
How to make blurry pictures clear is over and above an entrancing question in this age of digital revolution. Despite advances in camera technology, there are examples where images emerge with a regrettable lack of clarity. Whether due to poor focus, motion blur, or low-light conditions, blurry photos are a common challenge faced by photographers and enthusiasts alike.
It is true that preventing the negative consequences of an image is naturally more facile than dealing with it. But sad to relate, this is not always feasible in modern photography. However, in the vast landscape of ultra-modern photography, capturing images in fine detail is the absolute goal of modern photographers.
So, whether you’re a seasoned photographer who seeks to salvage a valuable shot or a beginner who demands to boost the skill, this guide is tailored to cater to all levels of expertise.
In this article, we will show you step-by-step how to enhance a blurry photo with both Adobe Photoshop and App.
But before entering on fixing blurry photos, let’s give a glimpse at what is hiding behind your blurry photos.
Reasons Behind Blurry Photos

It’s a fact that capturing the perfect shot is not always easy sometimes, even the most seasoned photographer compromises with blurry pictures.
What’s more, there are some diverse issues or approaches that can make your perfect shot into a blurry image. For example, it might happen:
- For Camera Trembling
- Subject Moving While Making the Shot
- Employ the Wrong Lens or Focus
- High Heat or PPoor Air Quality
- Shameful Low-Quality Lighting
- Outdated or Faulty Equipment
- Digital Noise
- Motion Blur
- Radial Blur
- Bilateral Blur
- Box Blurring on Images
- Gaussian Blurring Image
- Zooming Too Much
- Picture is Old
By solving these common problems, you can significantly enhance a blurry photo. Bear in mind that an alignment of these reasons can contribute to blurry photos. So it’s unavoidable to consider diverse aspects when solving image quality problems.
How to Make Blurry Pictures Clear with Adobe Photoshop:
The power of Adobe Photoshop enables you to turn any blurry photo into a sharp, crystal-clear masterpiece. It is a widely used and strong photo editing software, offering photographers and graphic designers a way to solve problems like blur in their images.
Software like Adobe Photoshop involves a combination of different techniques to achieve the result of not just cleaning up a blurry image but also resizing an image or similar work.
Let’s walk through to learn the step-by-step process of how to clear up a blurry picture, ensuring your images look professional and polished.
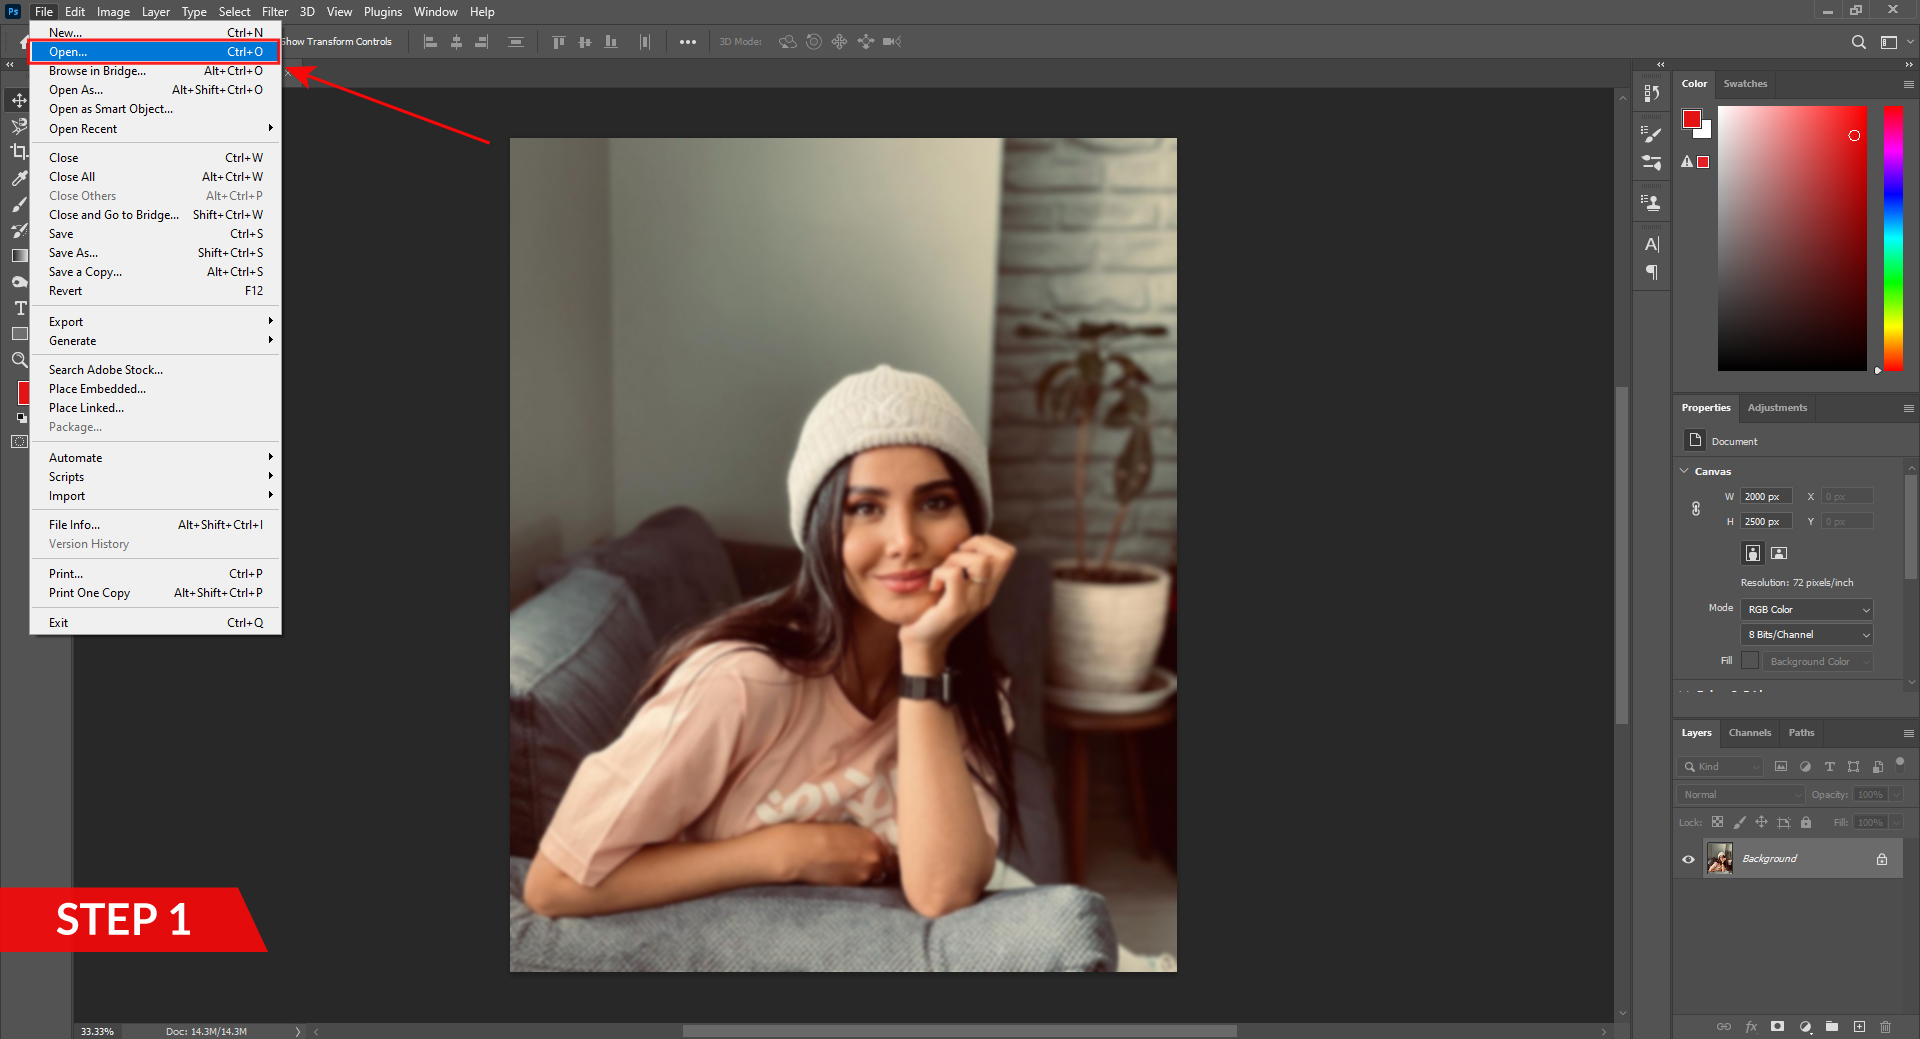
Step 1: Open Your Blurry Picture in Photoshop:
First, open Adobe Photoshop and open the blurred image you want to enhance. Run for ‘File’ and select ‘Open’ to import your image to the software.
Step 2: Duplicate Background Layer:
On the right bottom of your software, there is a Layers panel, press right-click on the background layer and choose ‘Duplicate Layer.’
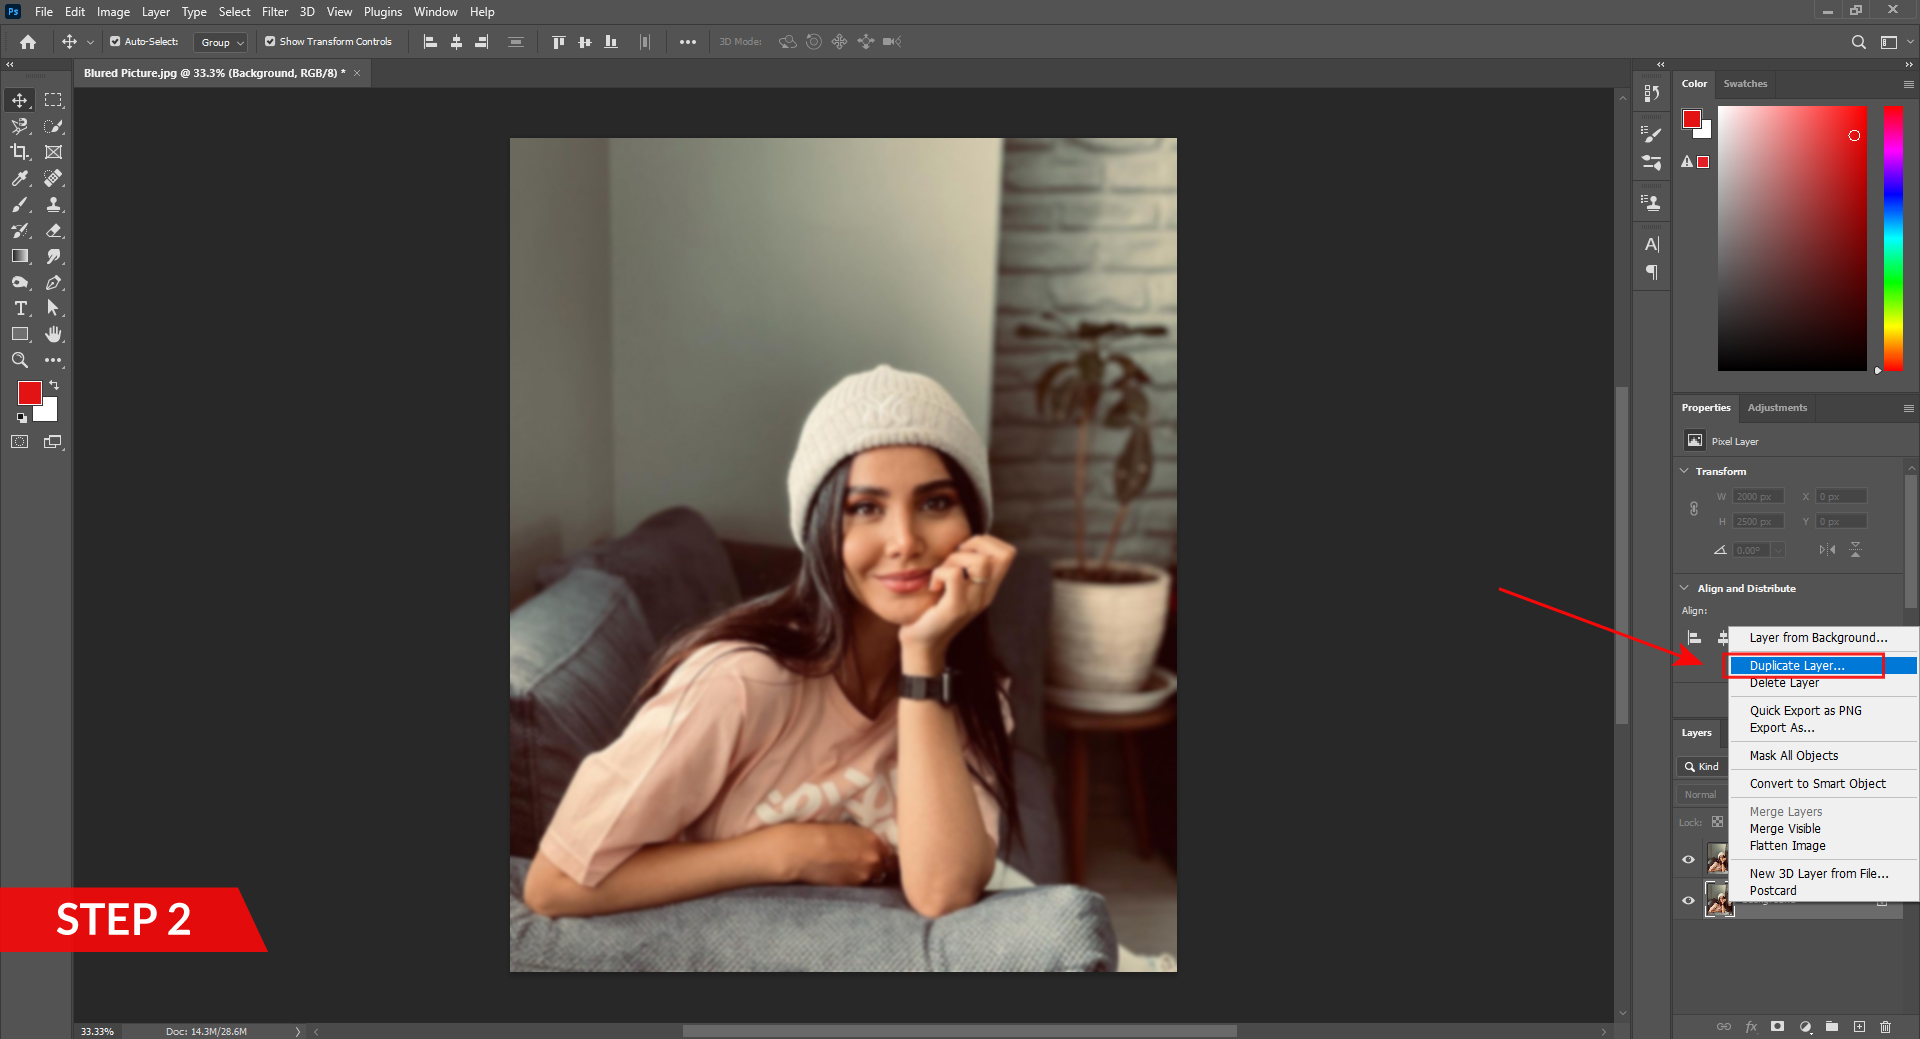
NOTE: Duplicating the background layer is emergent before making any edits. This acts as a safety net, enabling you to easily compare the primary and modified versions later.
Step 3: Apply the Sharpening Filter:
Time to navigate the ‘Filter’ menu and select the ‘Sharpen’ filter. To access the settings of this ‘sharpen’ filter you need to select the ‘Unsharp Mask’ option (or, Filter > Sharpen > Unsharp Mask). Then scale the ‘Amount,’ ‘Radius,’ and ‘Threshold’ sliders until you are satisfied with the alluded level of sharpness.
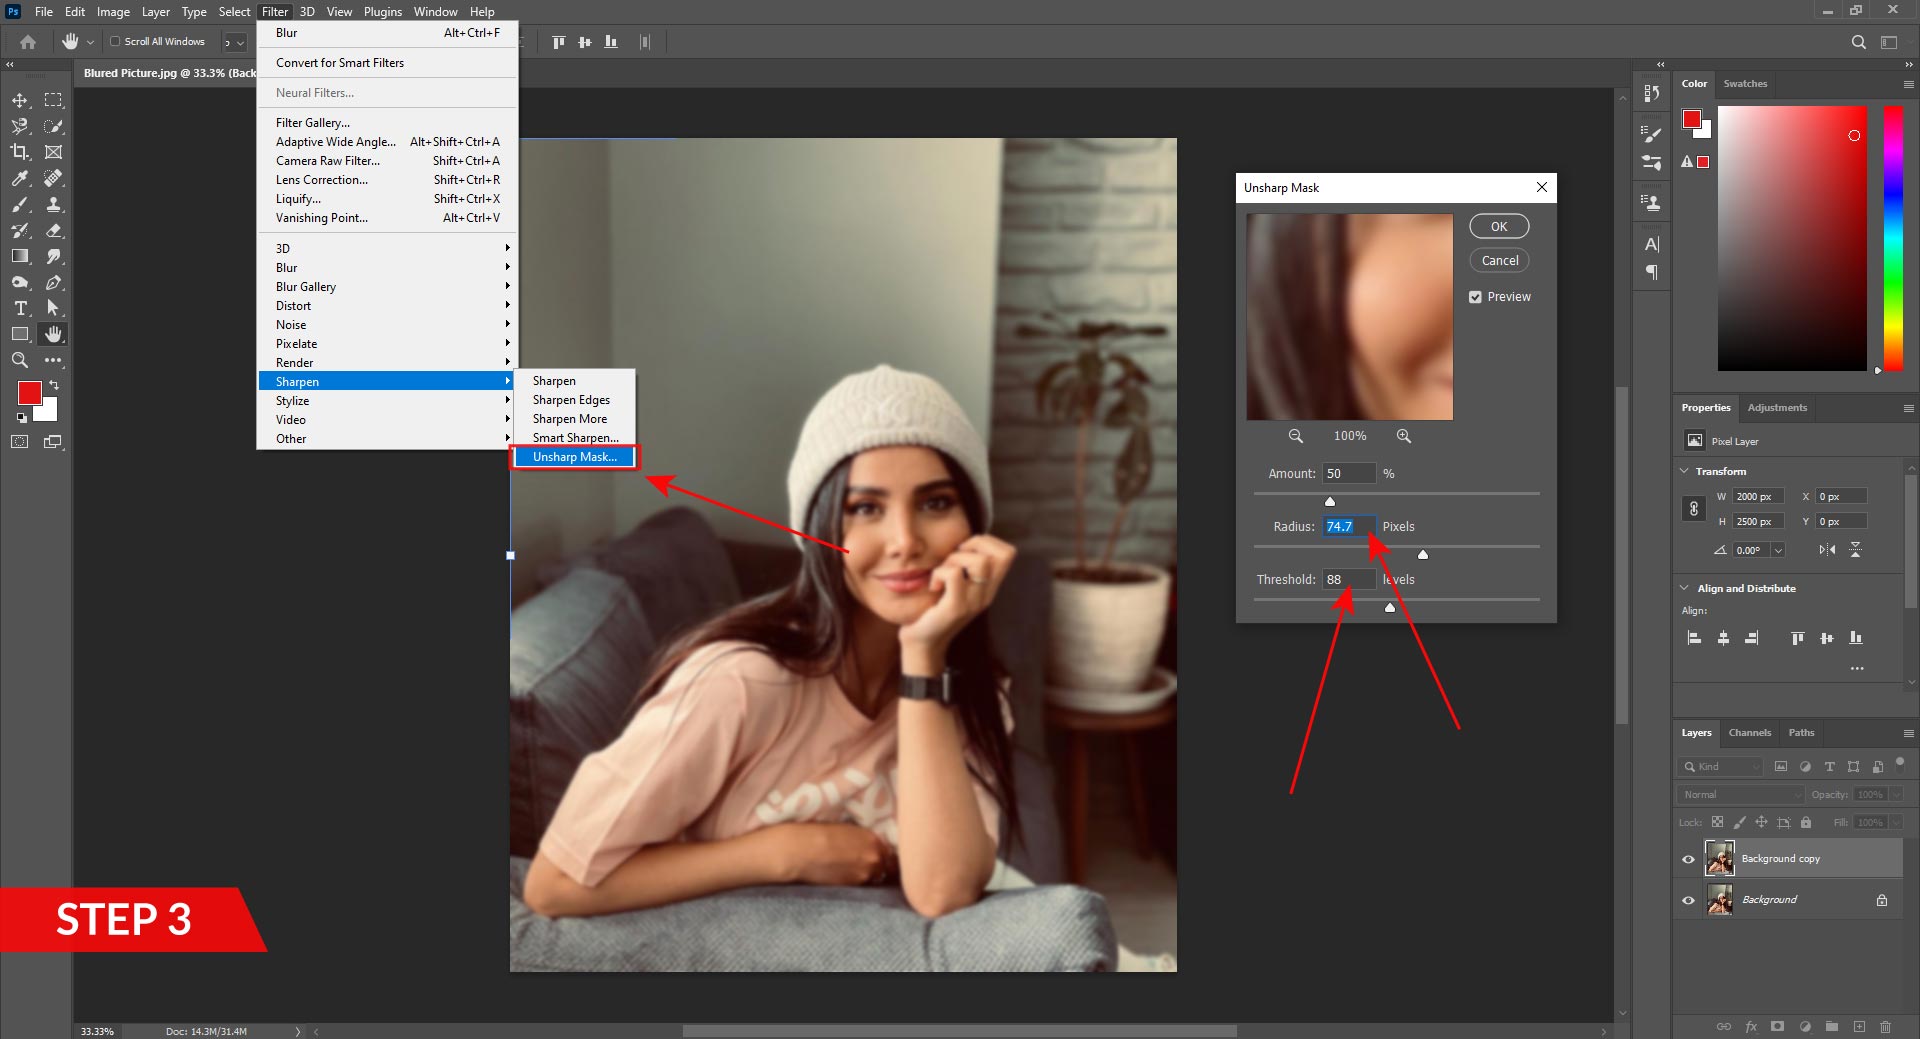
Don’t Forget: Subtle coordinations are often more fruitful than incursive ones to abstain from introducing artifacts.
Step 4: Apply the Shake Reduction Filter:
Discover the Filter option from the top bar, locate ‘Sharpen’, and select the ‘Shake Reduction’ filter (or, ‘Filter’ > ‘Sharpen’ > ‘Shake Reduction’). The software will automatically reveal the blur and apply corrections.
If you feel the need for additional fine-tuning, you can use the Photoshop Shake Reduction filter option. This feature employs automatic analysis and correction of blur originating by camera shake.
Also, you can check out our photo color correction service
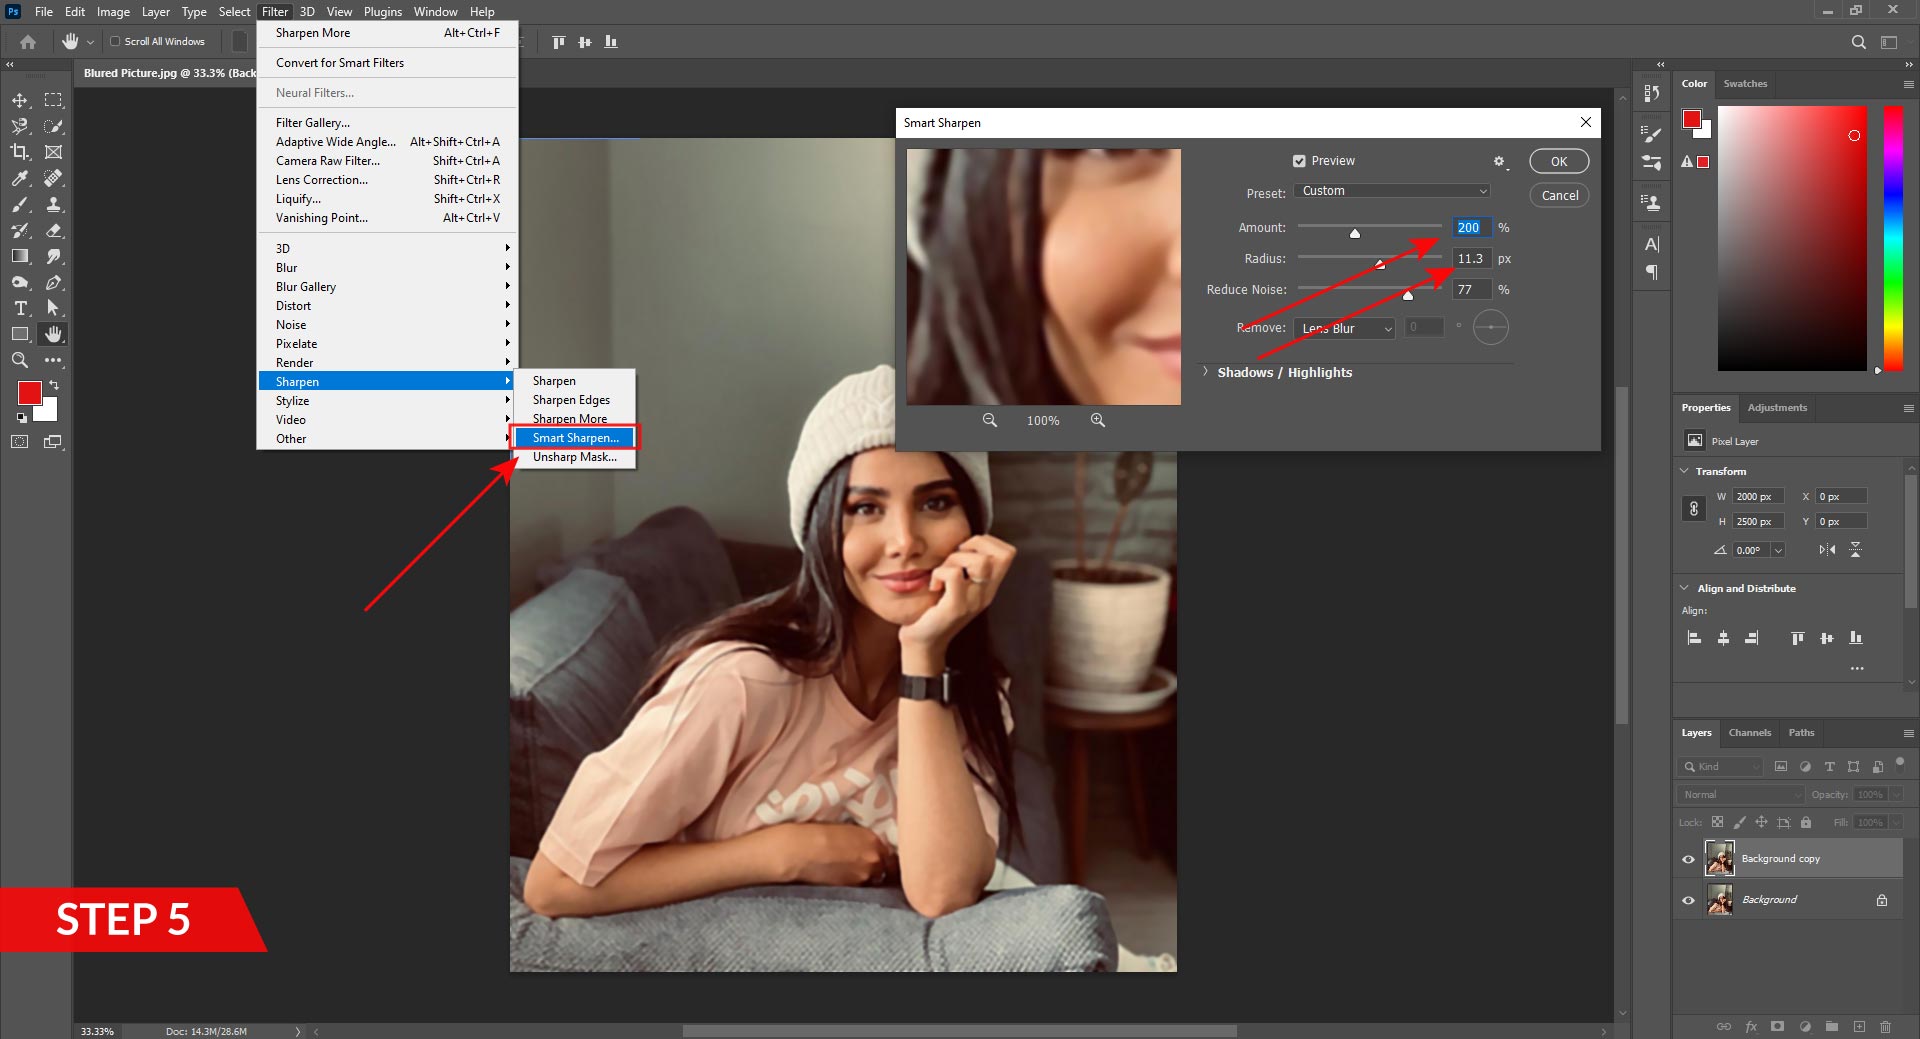
Step 5: Utilize the Smart Sharpen Tool:
Another strong weapon for boosting clarity is the Smart Sharpen filter. Run again for the Filter option, locate ‘Sharpen’, and select the ‘Smart Sharpen’ filter (or, ‘Filter’ > ‘Sharpen’ > ‘Smart Sharpen’). Now scale the ‘Amount’ and ‘Radius’ sliders to estimate the sharpness of your photograph.

What makes this tool special is that it empowers you to target specific grounds, giving you more control over the sharpening process.
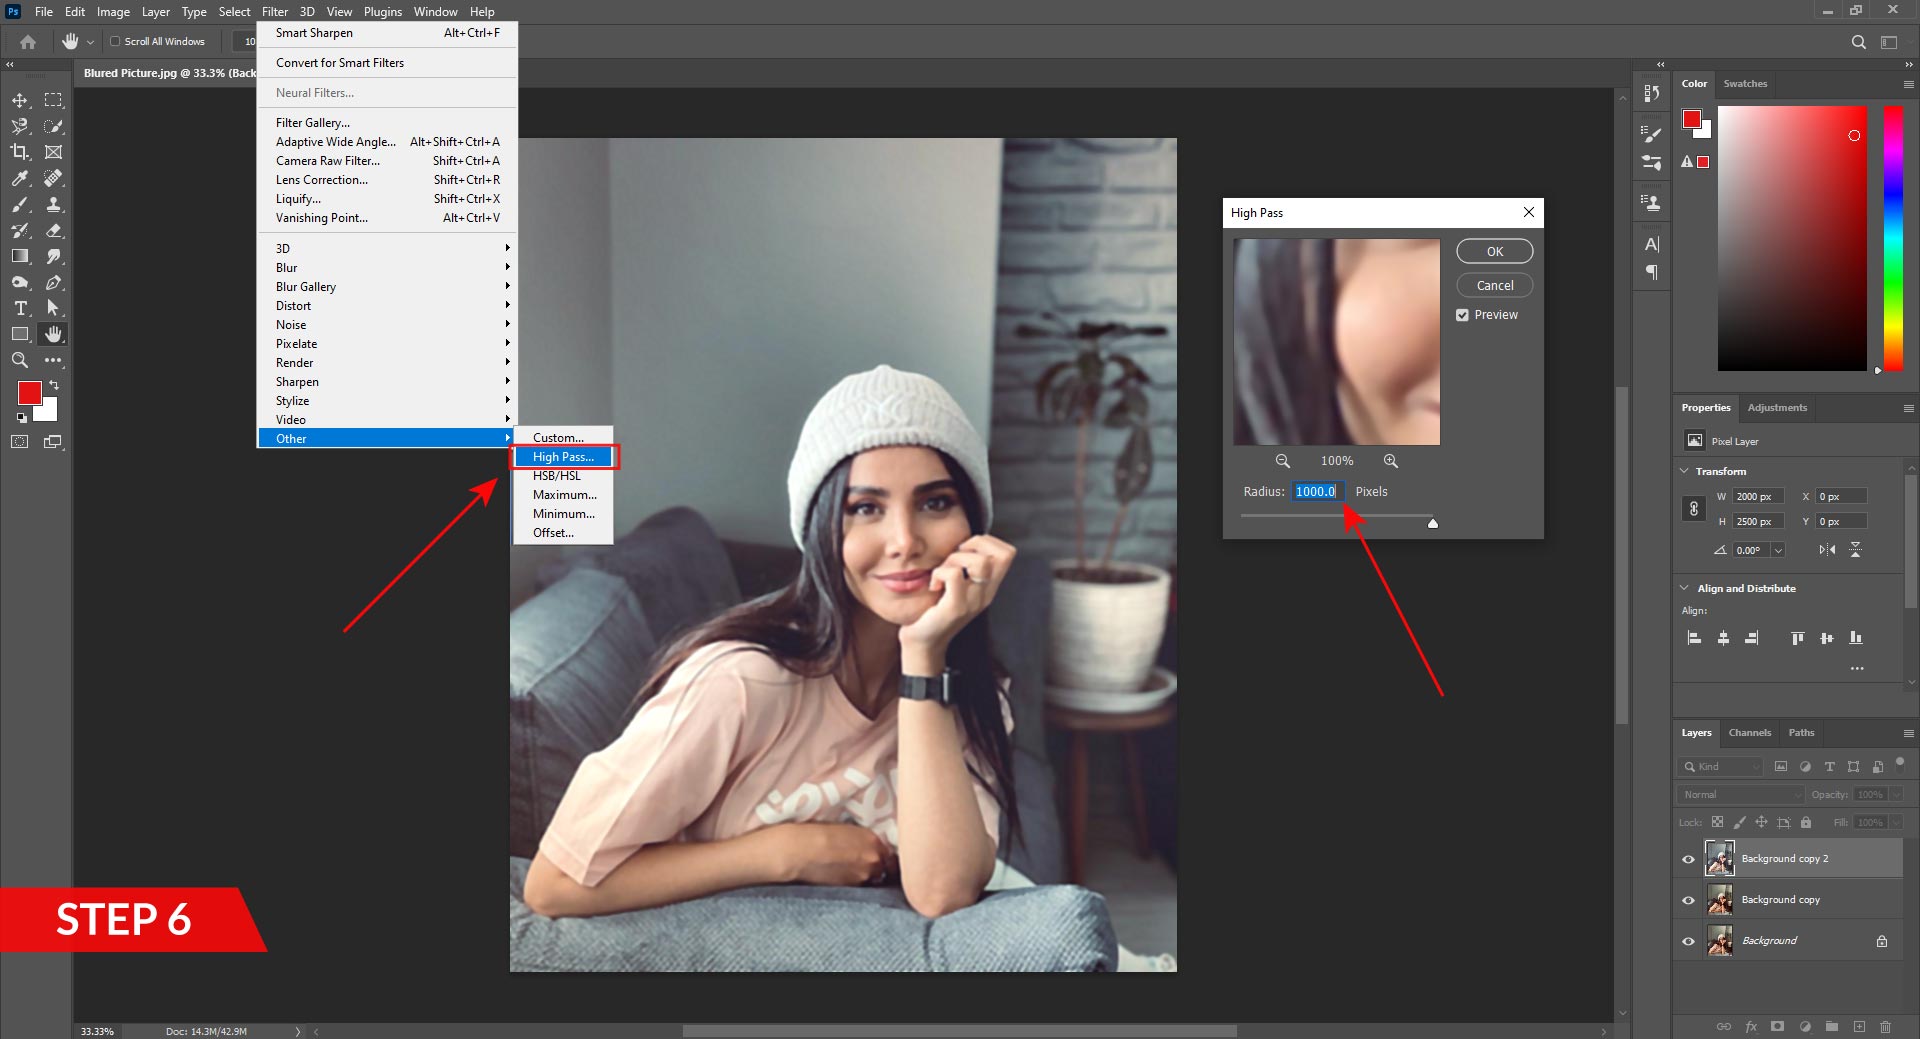
Step 6: Fine-Tune with the High Pass Filter:
You can use the ‘High Pass’ filter for localized sharpening. So again, make a duplicate background layer, then go for the Filter option, locate ‘Other’, and select the ‘High Pass’ filter (or, ‘Filter’ > ‘Other’ > ‘High Pass’). Now scale the radius until the details make the image clearer. Convert the layer blend mode to ‘Overlay’ for the best results.
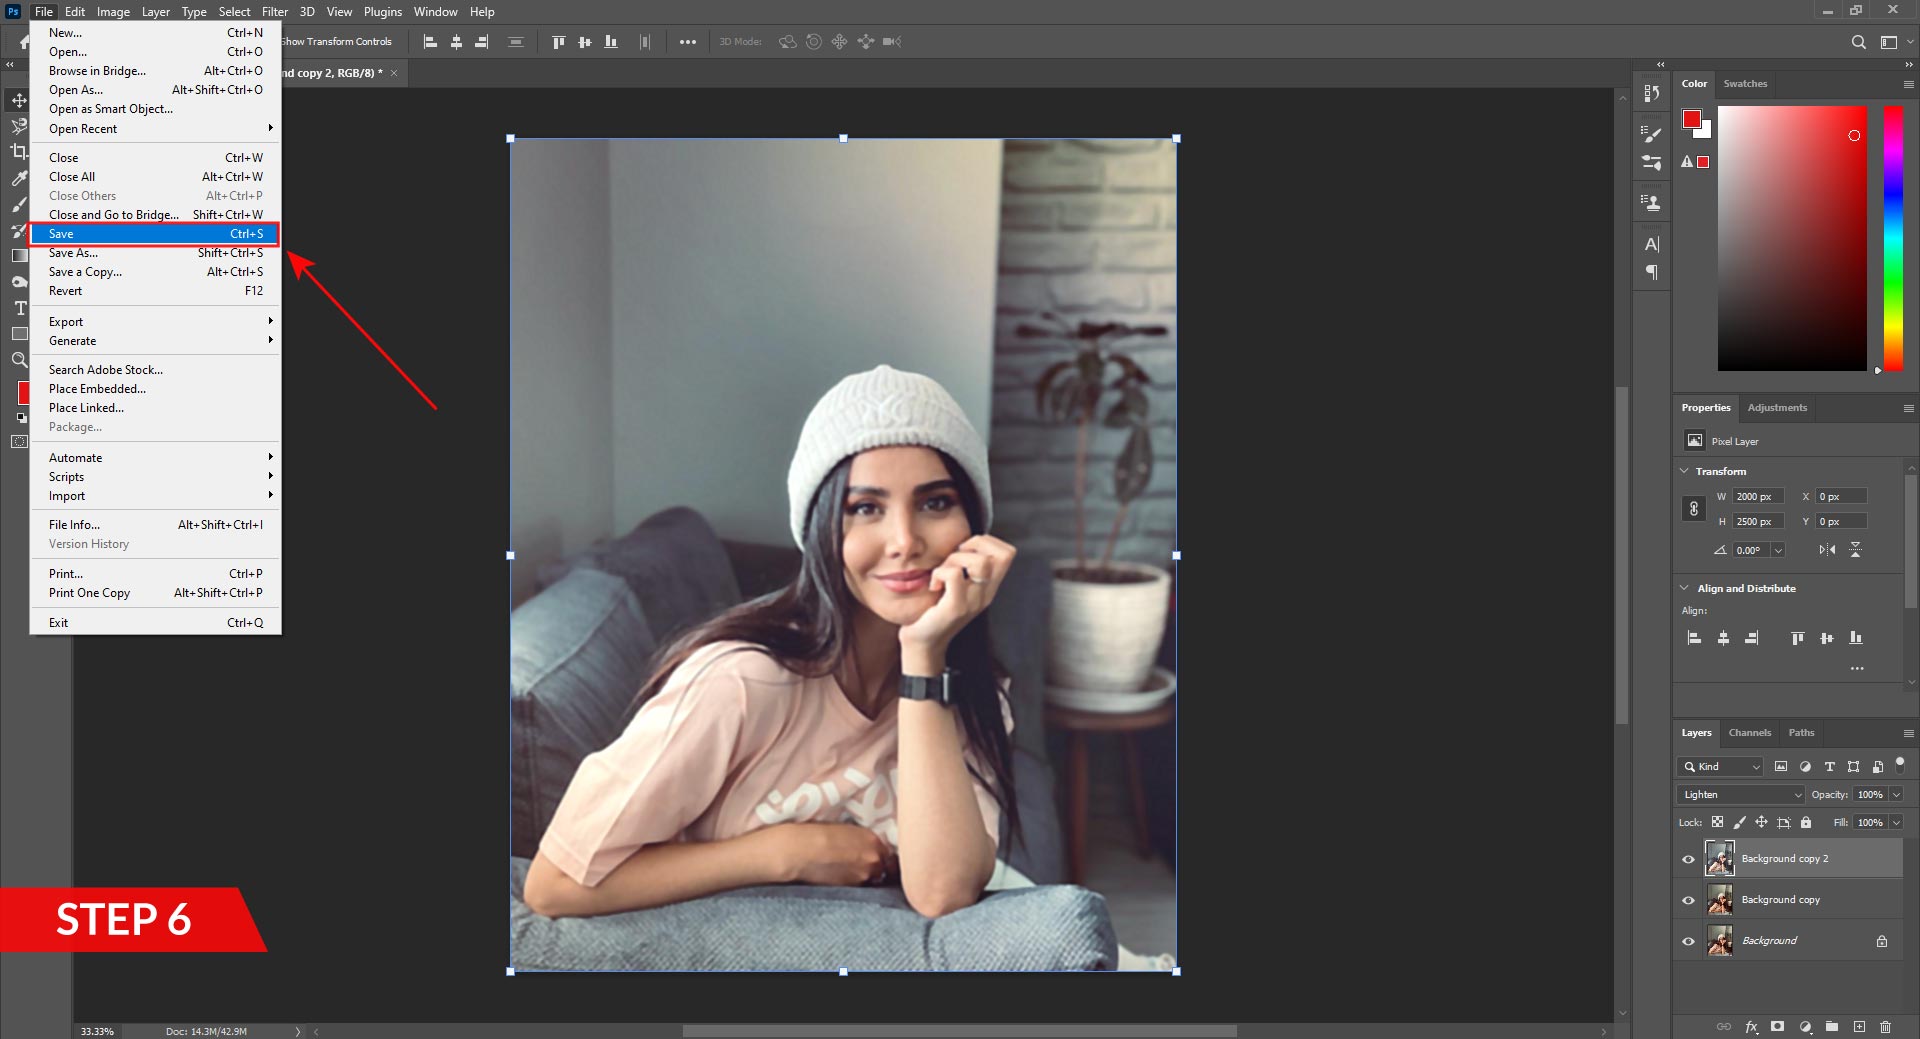
Step 7: Save Your Improved Picture
Finally, if you are well contented with the results, save your edited picture. And be sure to use a unique file name to conserve the core, unedited version.
These are the easiest step-by-step instructions that enable you to transform blurry images into crisp, high-quality photos employing the robust tools found in Adobe Photoshop.
Constantly, examine with variant filters and settings to explore the excellent balance for your specific picture. So that soon, you can demonstrate professional-looking, clear images that leave a lasting impression.
Check out How to Photoshop Someone out of a Picture
Best App to Fix Blurry Pictures:
Snapseed is a free-to-use best app to fix blurry pictures developed by Google and is available for both iOS and Android platforms. Here are the step-by-step instructions to fix blurry photos for free:
Download and Install Process:
- Go to the Google Play Store (Android), or App Store (iOS) on your device.
- Discover “Snapseed” and make the app.
- Install on your Android or iPhone device.
Open the Image:
- Launch Snapseed and tap on the edit (“+”) icon to open a photo from your gallery.
Appoint the “Details” Tool:
- In the tools menu, select the “Details” menu found in the upper right corner. It empowers you to improve the sharpness and structure of the picture.
Adjust Sharpness:
- Choose the “Sharpness” option by swiping your finger up or down on your iOS and Android screen.
- To increase or decrease the sharpness level, carefully move your finger right or left.
Remember: Always be careful not to over-sharpen as this can introduce artifacts.
Fine-Tune Structure:
- To choose the “Structure” option, easily stir your finger up or down.
- Carefully move your finger right or left to fine-tune the structure which improves fine details in the picture.
Apply Changes:
- Once you are well contented with the adjustment results, press the checkmark or “Apply” button to embed the changes to the photograph.
Compare Before and After:
- Employ the compare button to toggle between the elementary or modified versions. It assists you in evaluating the impact of your adjustments.
Save or Export the Photo:
- After enhancing, hit the export icon to protect the modified picture on your gallery or share it straight from the app.
Receive professional photo restoration service for about $5 per photo.
Bonus: Free AI-based Tool To Make Picture Clearer:
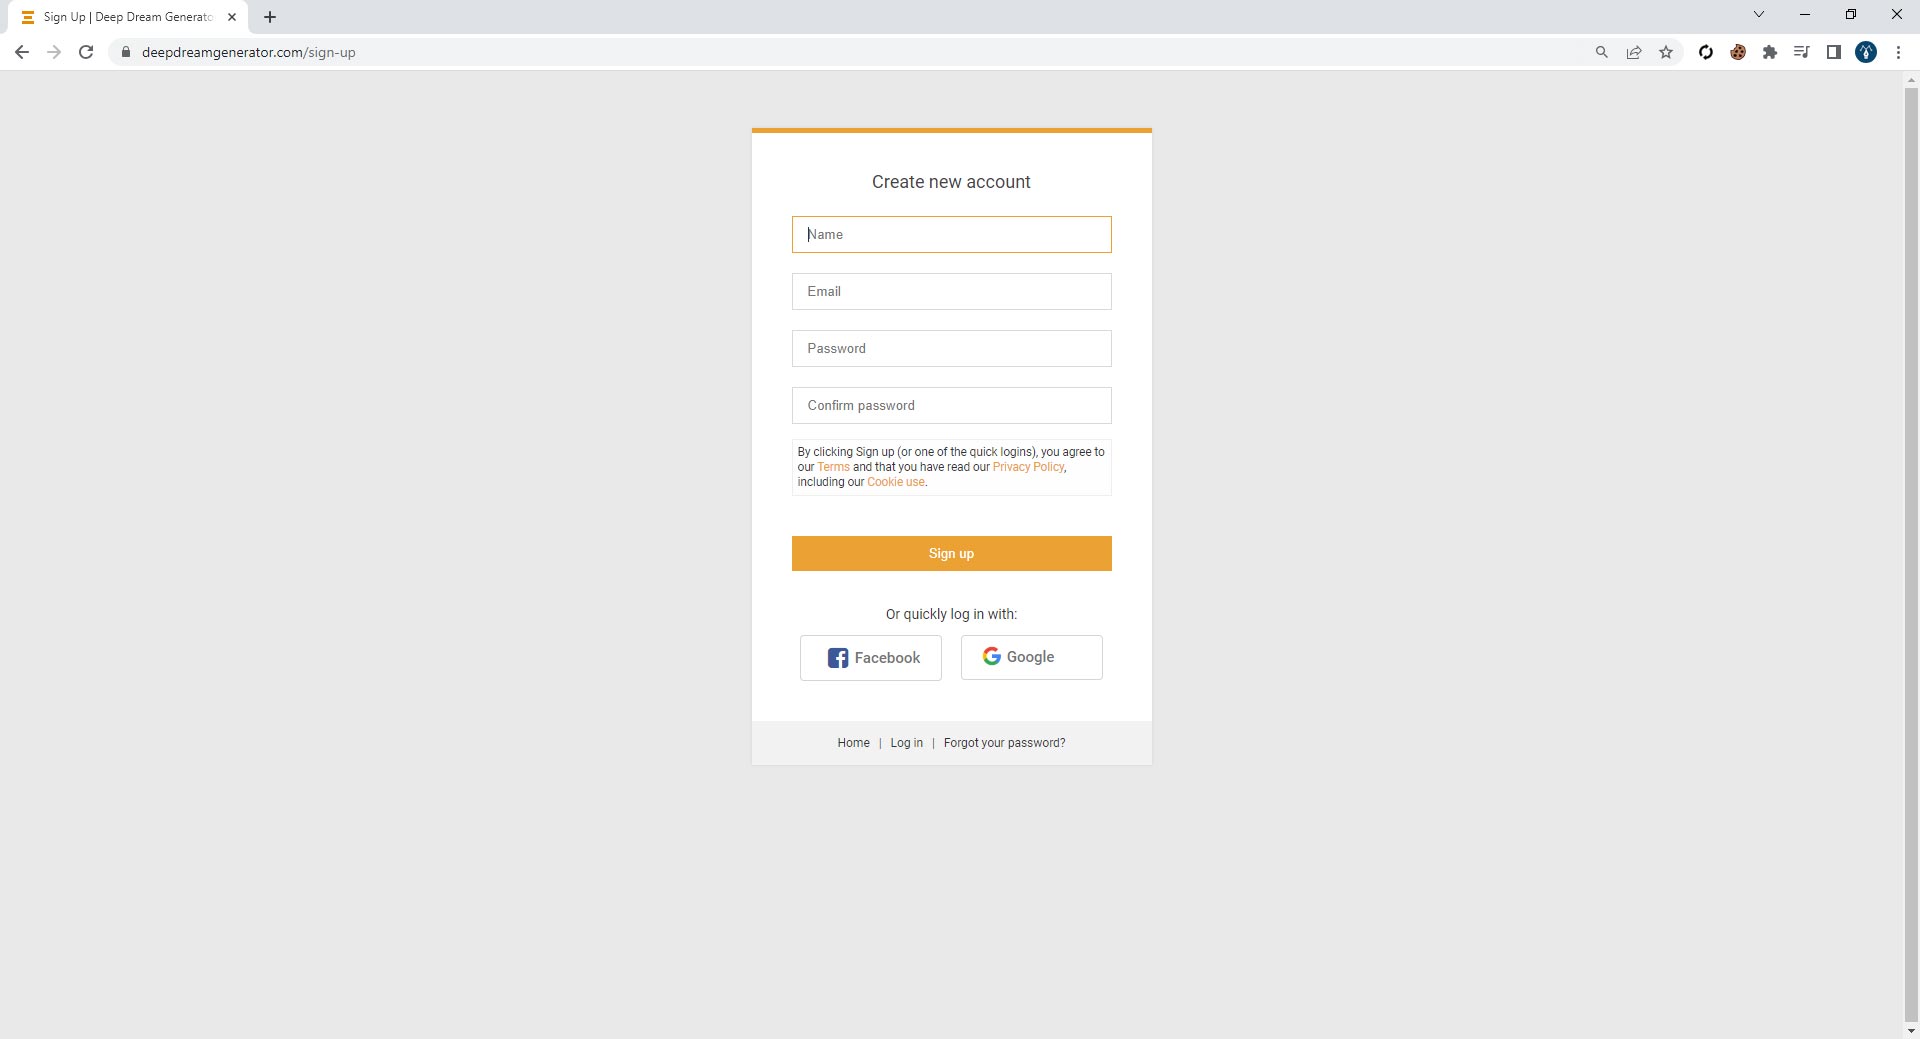
If you are looking for a free AI-based tool to make pictures clearer, consider trying the Deep Dream generator. It’s a tool that offers picture amplification features and is specifically built to unblur images to perfection.
- Visit the Authentic Deep Dream Generator Website

- If Required Make an Account
- Employ Text Prompt
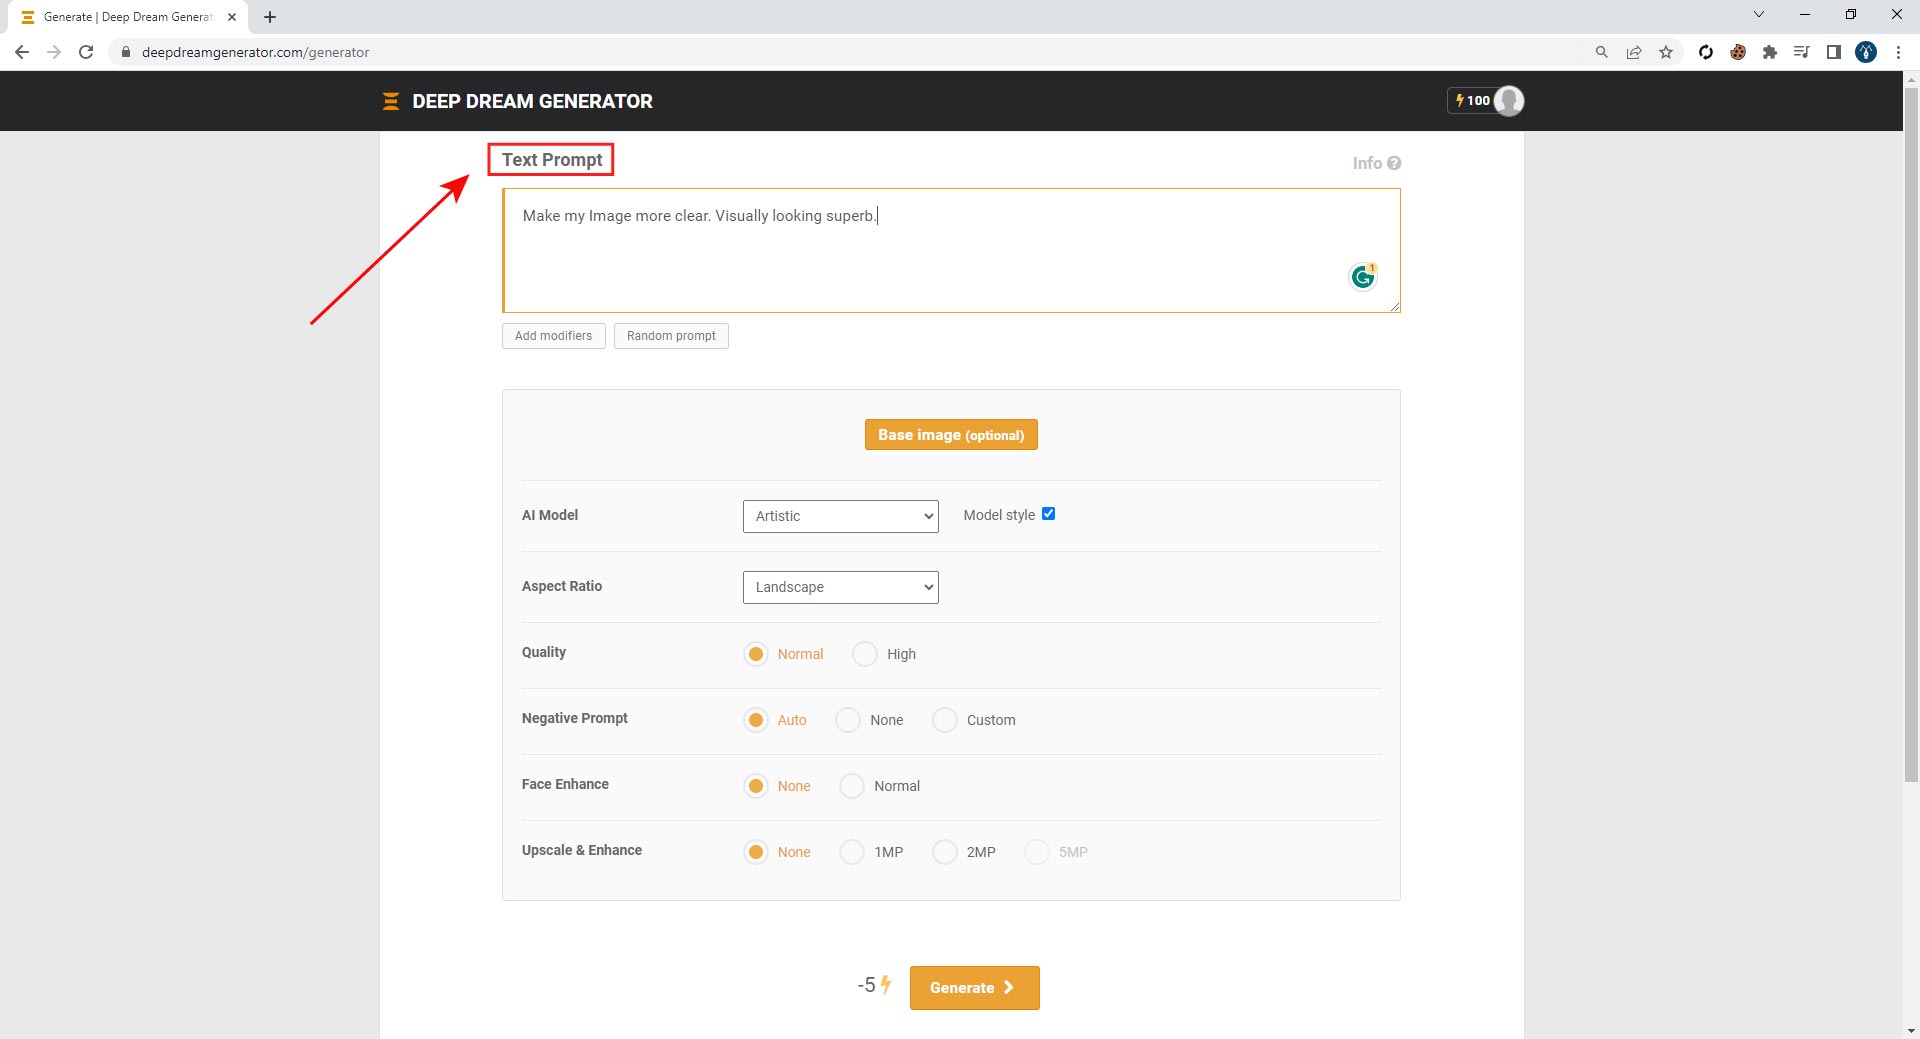
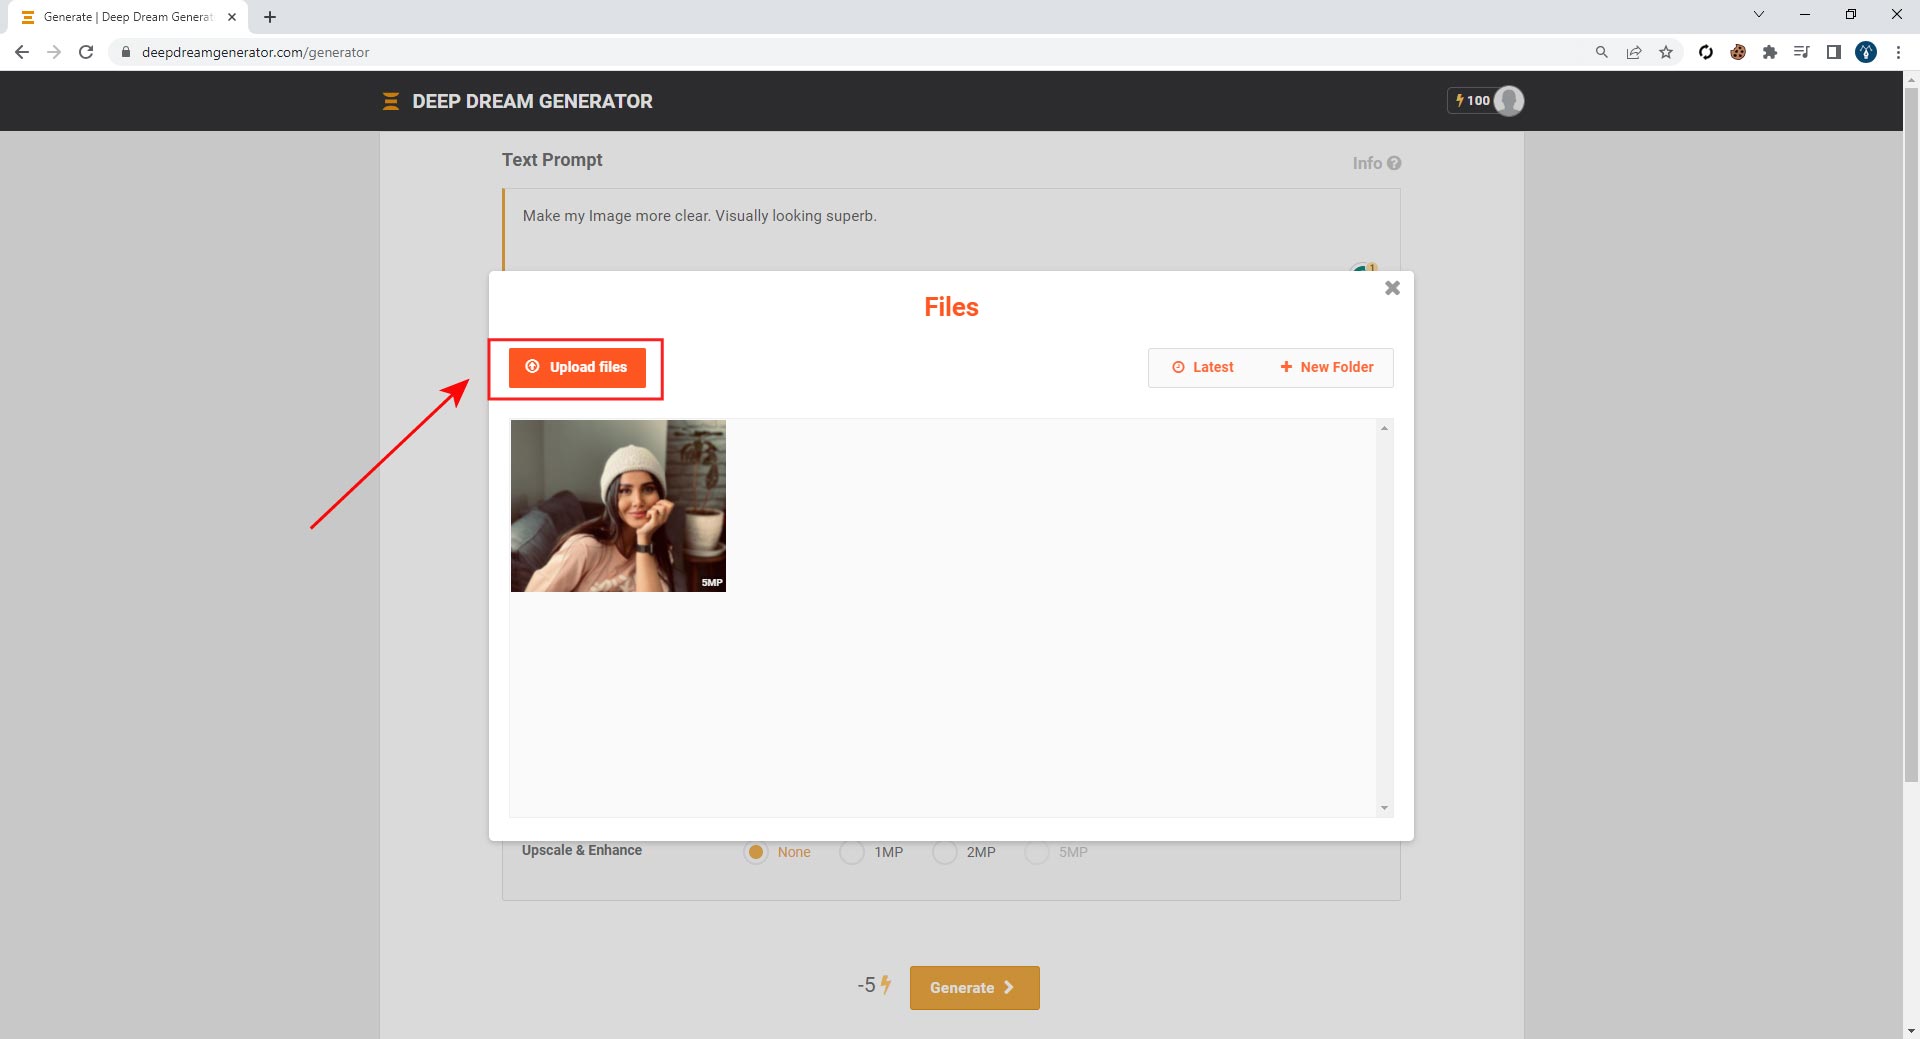
- Upload Your Image
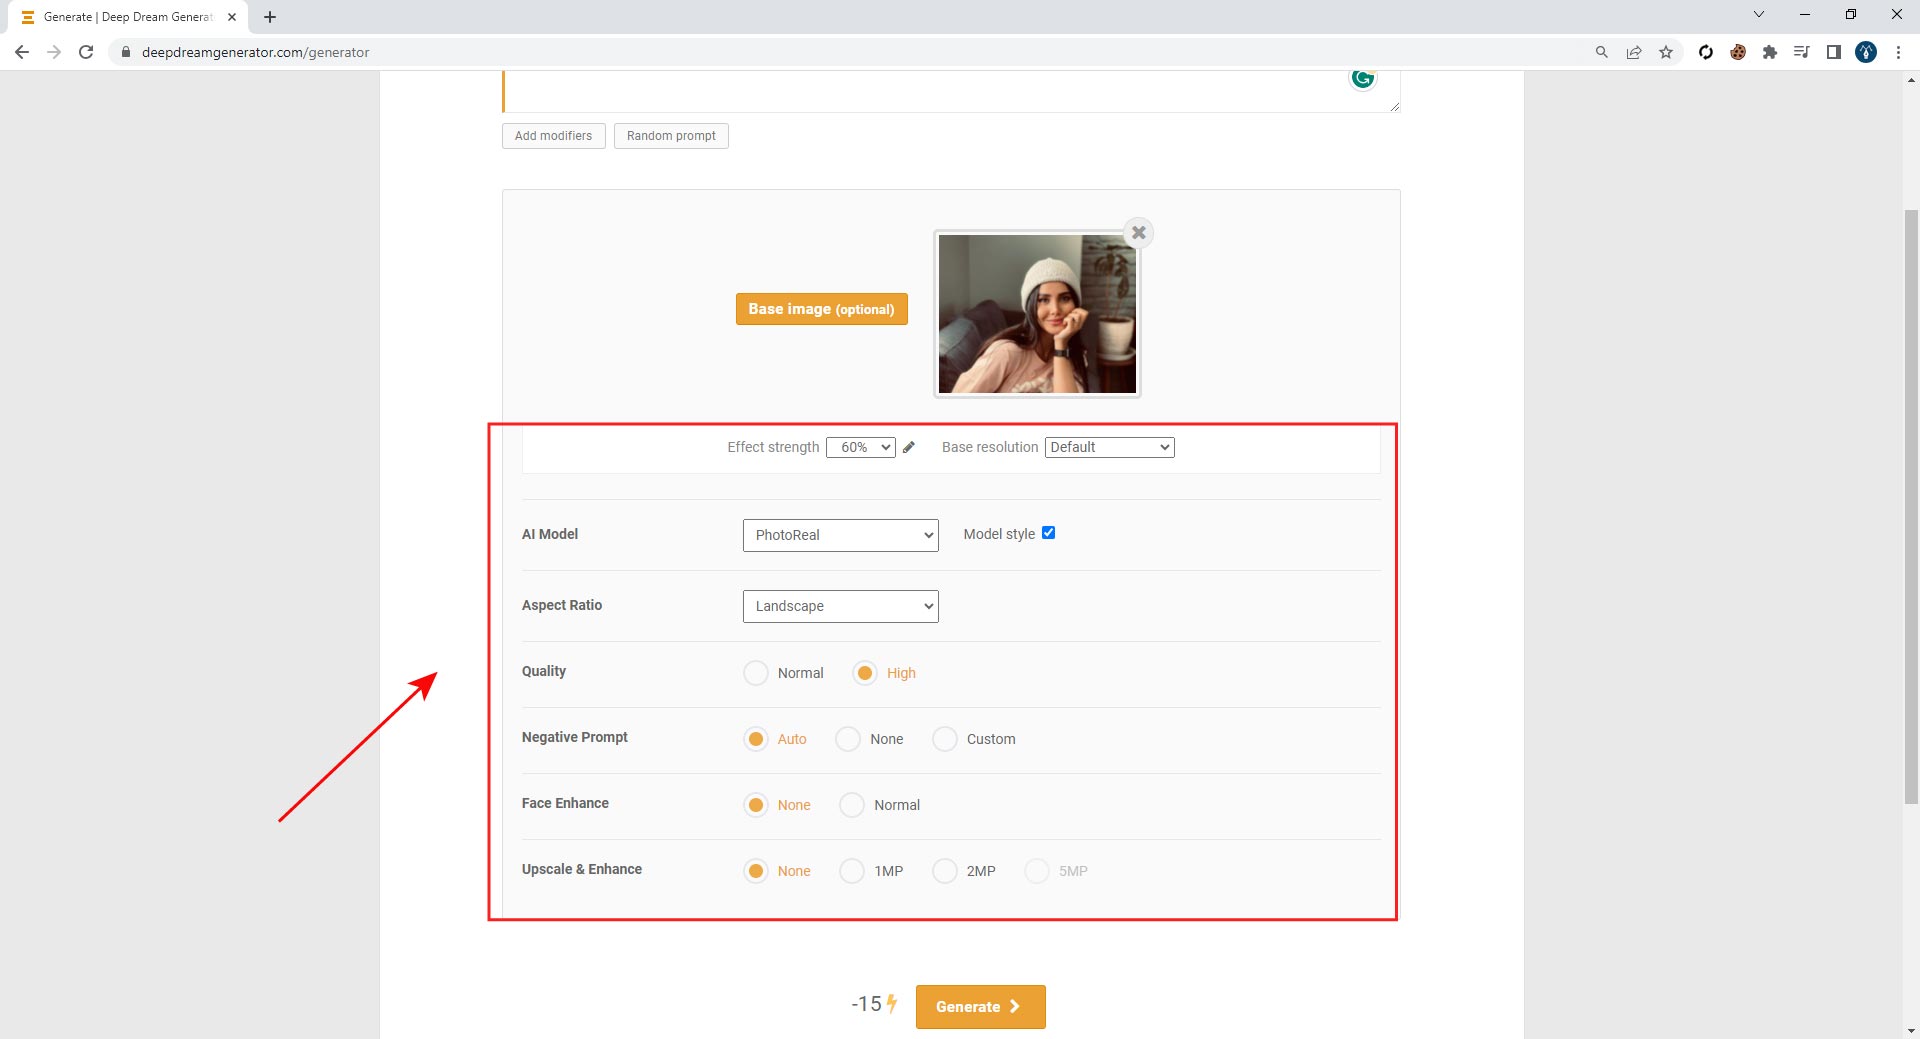
- Choose Different Styles and Settings for Your Photo
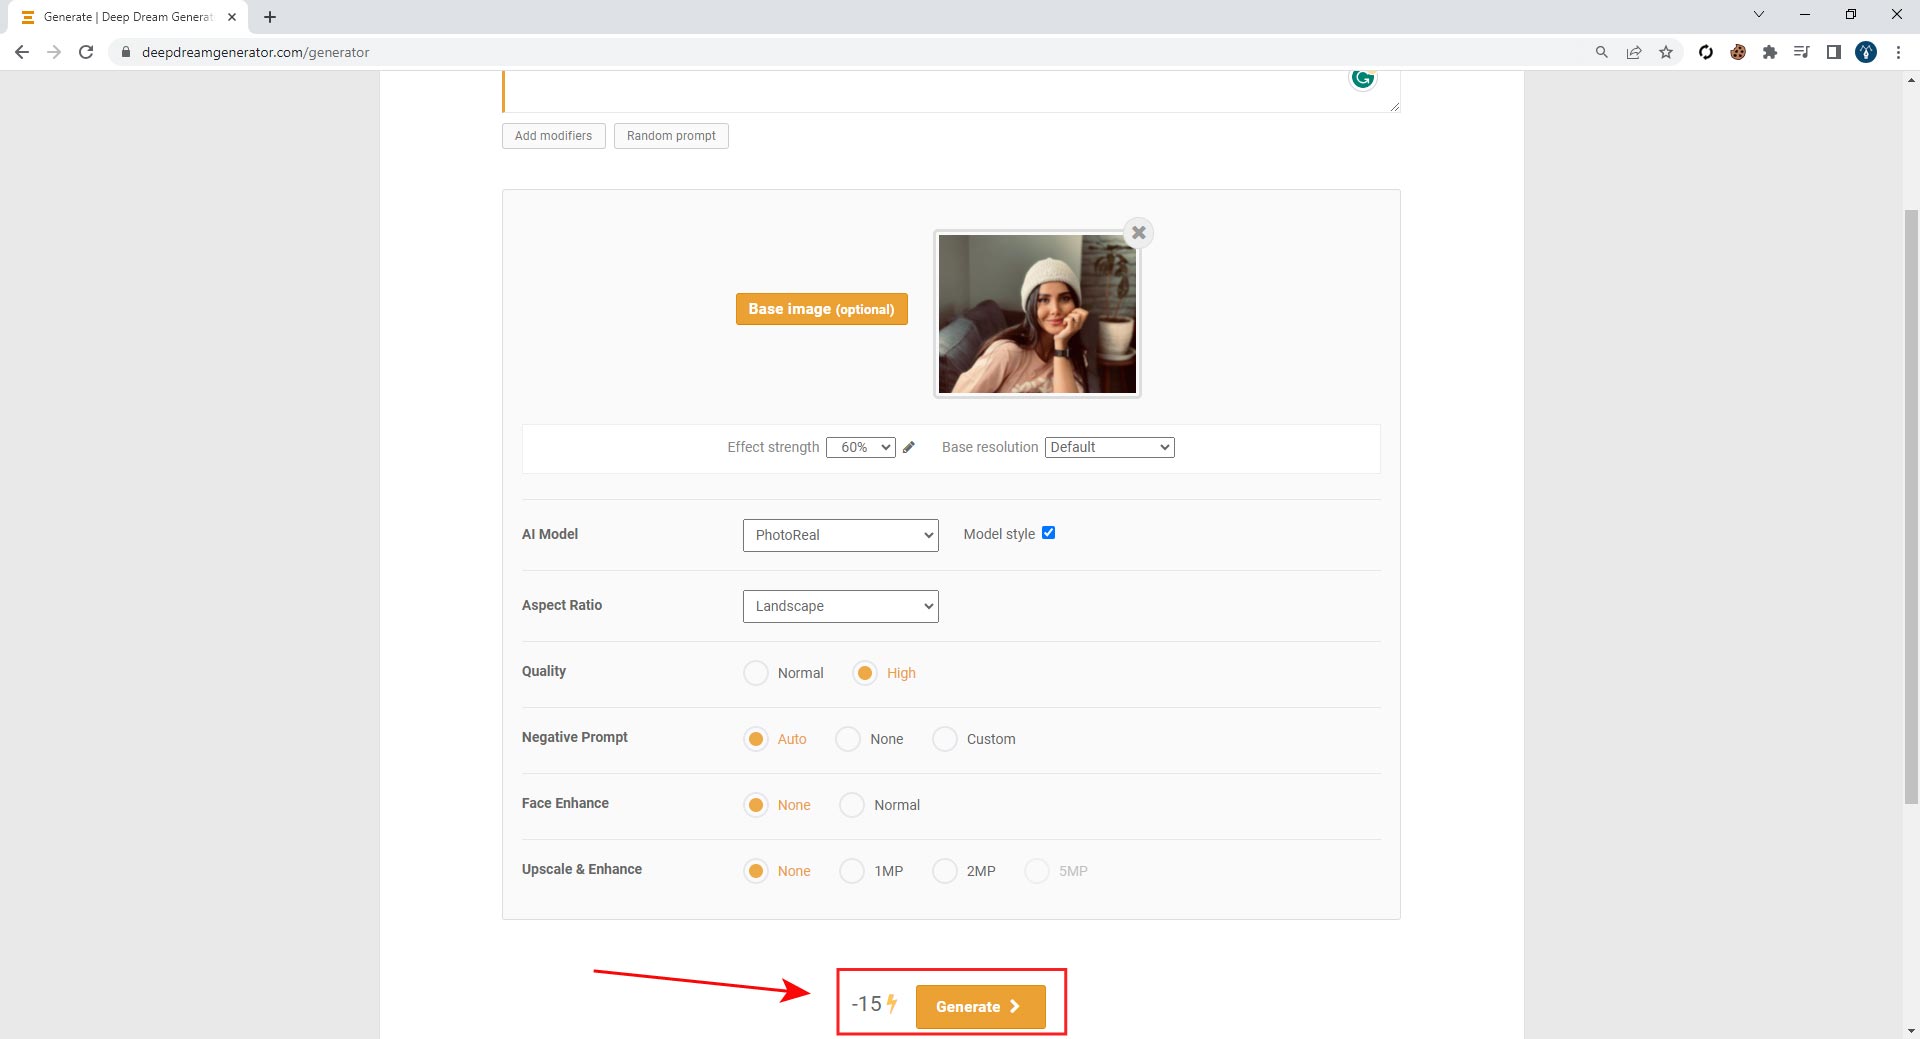
- Press the ‘Generate’ button at the bottom of the page, that’s it.
Final Verdict About How to Make Blurry Pictures Clear:
Whether you choose the nuanced control of Photoshop, the user-friendly features of mobile apps like Snapseed, or the artistic touch of AI-based tools, the quest for clarity in imagery aligns with the meticulous craftsmanship provided by clipping path services.
With the right tools and techniques, enhance your imagery with precision. Also with a combination of professional and efficient editing, you can captivate your target audience.
In conclusion, we’ve explored three comprehensive step-by-step guides on how to make blurry pictures clear using different tools and techniques. However, the journey of image enhancement doesn’t end there. Embrace the power of creativity, precision, and innovation as you embark on your journey to make every image a work of art.


