
We have all taken pictures where someone willingly or unwillingly ruined a perfectly captured shot. We always wonder if there is a way to remove them from the background so we can save that fantastic picture. Here is where this blog comes in. We will discuss the steps you can follow on How to Photoshop Someone out of a Picture and become an expert in saving all your ruined shots!
To remove someone from a picture may seem daunting at first, but with the help of Photoshop and all the amazing tools it offers, you can create some magic! So, go ahead and read this blog to find out how!
Receive professional image cutout service for about $0.50 per photo.
Step-by-Step Guide for How to Photoshop Someone out of a Picture
When it comes to removing someone from a picture in Photoshop, following these specific steps mentioned here will give you exceptional results. So, read along to find out how!
- Find out more about How To Edit Newborn Photos in Adobe Lightroom.
Step #1 Open the Image in Photoshop
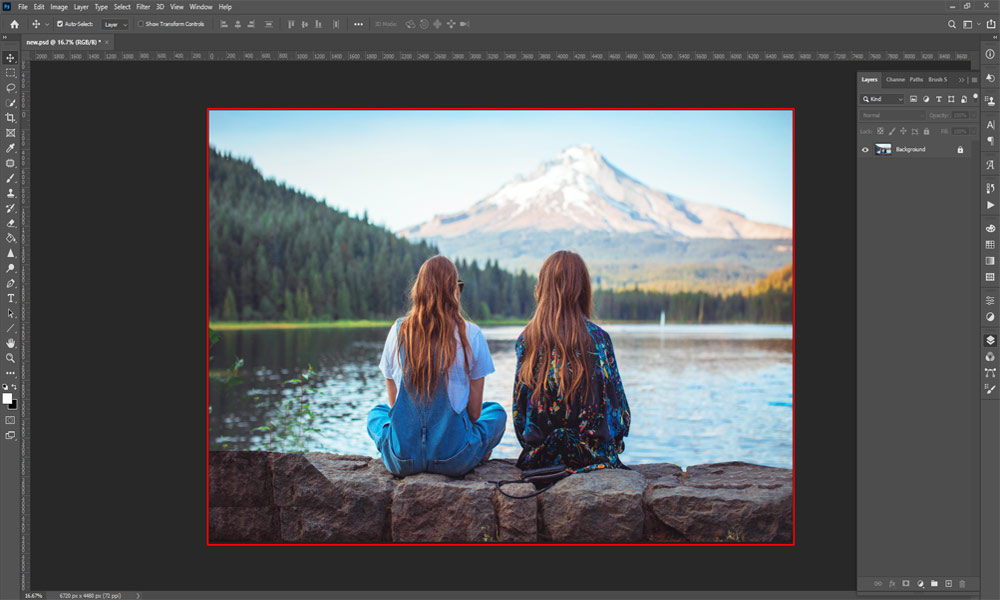
The first thing you must do is open the Image in Photoshop. To do this, select the image you want to open, drag and drop it into the Photoshop Workspace, and the image will appear for you to start your editing process.
Another option for opening the image in the Photoshop Workspace is selecting “Open” from the “File” menu. Once you have found your image from the folder it was stored in, click the “Open” button in the toolbox, and the image appears in the Photoshop Workspace.
- Check out The How to for Double Exposure in Photoshop Made Easy
Step #2 Take a Copy of the Image Layer
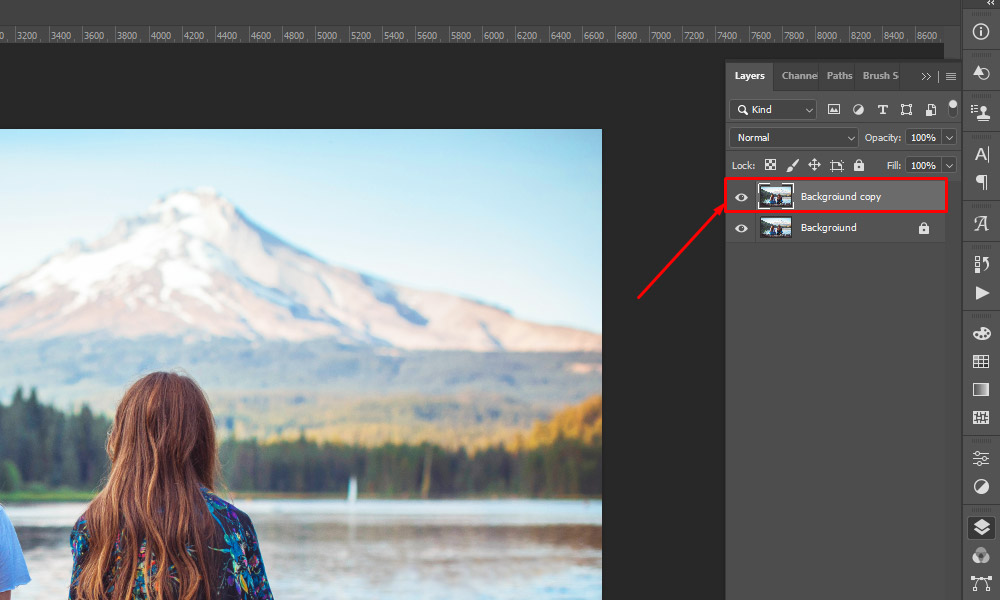
The next step in removing a person from an image in Photoshop is to take a copy of the layer in the Layers Panel. It is done to keep a backup of the original layer. It is always a good practice to work on a copy of the original layer so that you can recover the original image if something goes wrong.
Plus, you can judge your editing work properly when you have the original image to compare to.
- Guide to Master Photoshop Color Replacement with these 3 Easy-to-Follow Techniques
Step #3 Decide on the Selection Tool to Use
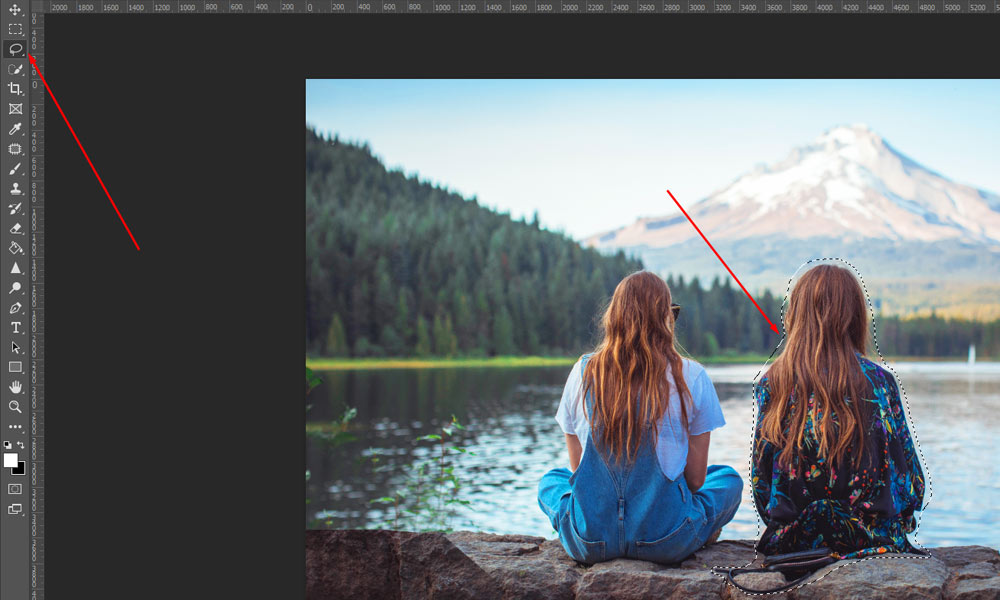
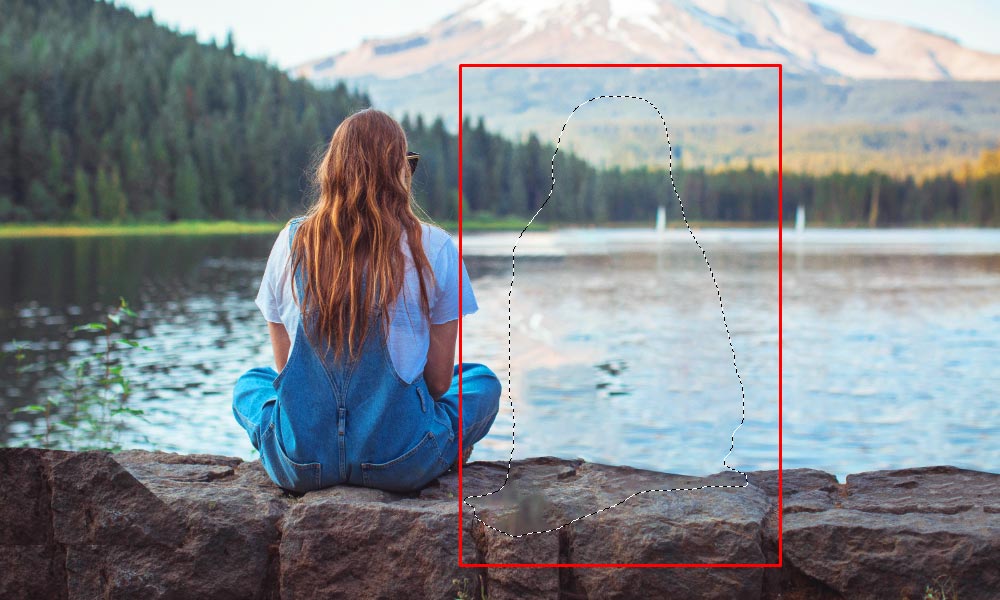
The third step is deciding on the Selection Tool. Photoshop has various Selection Tools for selecting an object or a subject. You can use one of these Selection Tools to isolate the person you want to remove from your image. For the image we have used for our blog, we have used the Lasso Tool.
With the Lasso Tool, we drew around the person we wanted to remove from our image and created a selection. It is a Selection Tool where you can use freehand drawing to make a selection around an object or subject.
- View more How to Add Fonts to Photoshop – The Detailed Guide
However, this is not the Selection Tool for you if you need a more precise edge. Read our blog, “How to Cut Out an Image in Photoshop,” to learn more about the different Selection Tools for cutting out an image in Photoshop.
With the knowledge regarding the various Selection Tools, you can do many other editing tasks like Background Removal or Image Manipulation and more.
Step #4 Use Content-Aware Fill
Once the selection is made, a dashed line called “Marching Ants” appears around the person you want to remove. You know that your selection is active when you see this dashed line.
Next, go to “Edit” from the top menu. A toolbox appears when you select the “Fill” option from the “Edit” menu. You can select “Content-Aware” in this toolbox.
- Find out more about How to Resize an Image in Photoshop
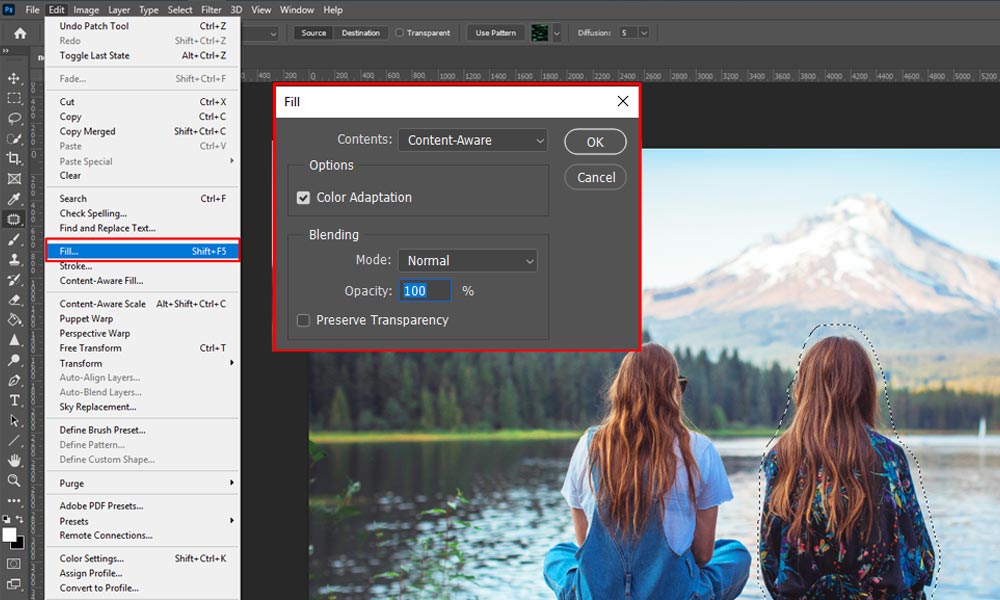
Content-Aware Fill is a Photoshop feature that uses AI to look at the surrounding area and take suitable samples to fill the selected area. It usually does an excellent job of removing the object and making it seem like it was never there.
- Learn more about How Easily You Can Make A Background Transparent in Photoshop
Step #5 Make Adjustments with Clone Stamp Tool/ Patch Tool
Even with the help of AI and filling up the space using samples of the pixels in the surrounding areas, a few areas still require some touch-ups to make the picture look flawless.
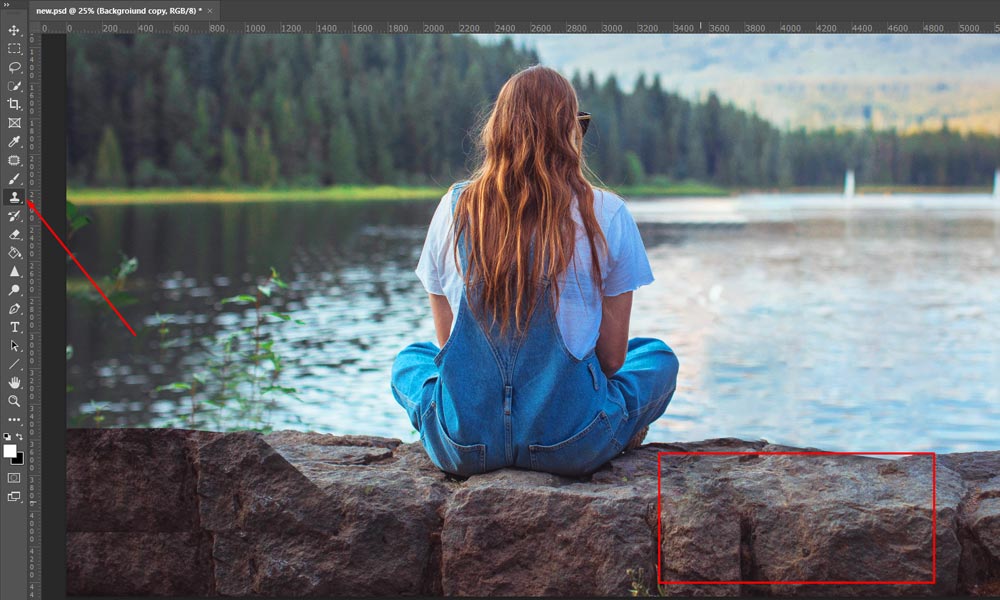
You can use tools like Clone Stamp Tool and Patch Tool to make these adjustments to the area needing some touch-ups.
For the image we used for this blog, a few areas on the rock need some adjustments as that area became blurred after the Content-Aware Fill. Using the Clone Stamp Tool, you can press the “Alt” key for Windows or the “Option” key for macOS to take a sample of the area you want to use for making the adjustments.
Learn more about How To Photoshop A Picture
Similarly, you can use the Patch Tool to take samples from nearby areas. This tool works by drawing around the area you want to adjust and dragging it to the area you want to take the sample.
Step #6 Save your the Final Image
Once you are satisfied with the results of your adjustments, you can check the before and after results by clicking on the “eye” symbol beside the layer to turn the layer on and off. You can check how your work has turned out with this method and if you need further adjustments.
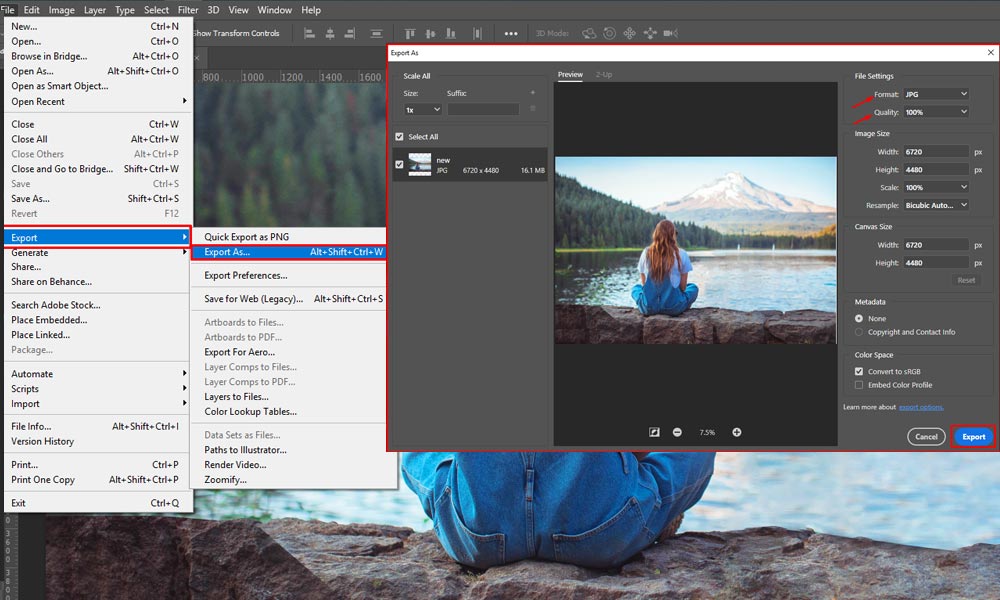
Once you are ready to export your work, you can go to the “File” menu on the top click on “Export” from the drop-down menu, and select “Export As.” A toolbox will appear with the options for selecting the file format for your image. You can use PNG, JPG, or GIF with this method of exporting.
- Find out more about How To Remove a Background in Photoshop Quickly and easily
Additional Pro-tips for How to Photoshop Someone out of a Picture
Here are some additional things you can use to enhance your Photoshop skills further for removing a person from a photo.
- Like you must understand the uses of different Selection Tools, there is another Photoshop knowledge you must possess. It is how to deselect if you have made an inaccurate selection. To learn more about deselecting, read our blog, “How to Deselect in Photoshop – The Ultimate Guide.”
- You can also use some other Photoshop tools to make your adjustments flawless, such as the Blur Tool. At times there are certain portions that get pixelated during the removal process. You can smooth out these pixelated regions using the Blur Tool.
- Another thing you must consider to speed up your editing process is to learn the keyboard shortcuts for using Photoshop’s various tools and features instead of having to look through the toolbars and menus every time. For example, press the “S” key for both Windows and macOS to get the Clone Stamp Tool.
Conclusion
There you have it! You have successfully learned How to Photoshop Someone out of a Picture with these six simple steps. With practice and an understanding of how to use the different Selection Tools in Photoshop, you can be an expert in no time. So, go ahead and remove someone from your photos and get the perfect picture you are looking for!
Watch our Video Tutorial given below!
Frequently Asked Questions [How to Photoshop Someone out of a Picture]
Q.1 Are the steps to remove a person from a photo the same in every version of Photoshop?
Ans. Yes, you can follow the same steps for every Photoshop version to remove someone from a picture. However, specific selection methods, like the Object Selection Tool, are unavailable in versions older than 2020.
Q.2 Where can I find the keyboard shortcuts for all the different tools and Photoshop features?
Ans. The keyboard shortcuts are mentioned beside the name of each tool you select. You can even do a Google Search for Keyboard Shortcuts for Photoshop and visit the Adobe site for all the shortcuts.
Q.3 Before saving the final image, are there other adjustments I can make to my picture?
Ans. If you have any faces in your image, you can retouch the faces to remove blemishes and pores. Spot Healing Tool is one of the tools you can use for skin retouching.
Read Our Latest Articles-
- How to Remove Watermark from Photo: A beginner’s friendly Guideline
- Maternity Photoshoot | Pregnancy Photoshoot Poses Ideas to Capture Love
- The Ultimate Guide to Captivating Couple Poses: Unleash the Magic of Love
- Ugly Wedding Rings: Embracing Unconventional Beauty


