
In the modern era, photographing newborns is one of the most worthwhile experiences you’ll ever have. They are lovely, priceless, and everything fantastic. Nevertheless, there is a slew of possible snags. Newborn snapshots frequently reveal infants with red, splotchy, or sickly complexion, red or purple feet and hands, and other problems. To fix these issues, you should have some fundamental knowledge about how to edit newborn photos in adobe lightroom.
However, images of babies nearly always require some post-processing assistance. This article will teach you how to edit newborn photos in Lightroom. Additionally, it’ll share some pro tricks with you regarding how to utilize defaults and paintbrushes properly to fix the newborn photo backdrop, which is the most frequent issue in newborn photography.
To get the optimum outputs without any delay, you can hire an experienced image background removal service provider for your newborn photography.
Happy Reading & Happy Learning!!
How To Edit Newborn Photos in Adobe Lightroom? [Basic Guidelines]
With little effort and hard work, anyone can effectively edit the newborn stock photo by using presets and paintbrushes tools in Adobe Lightroom.
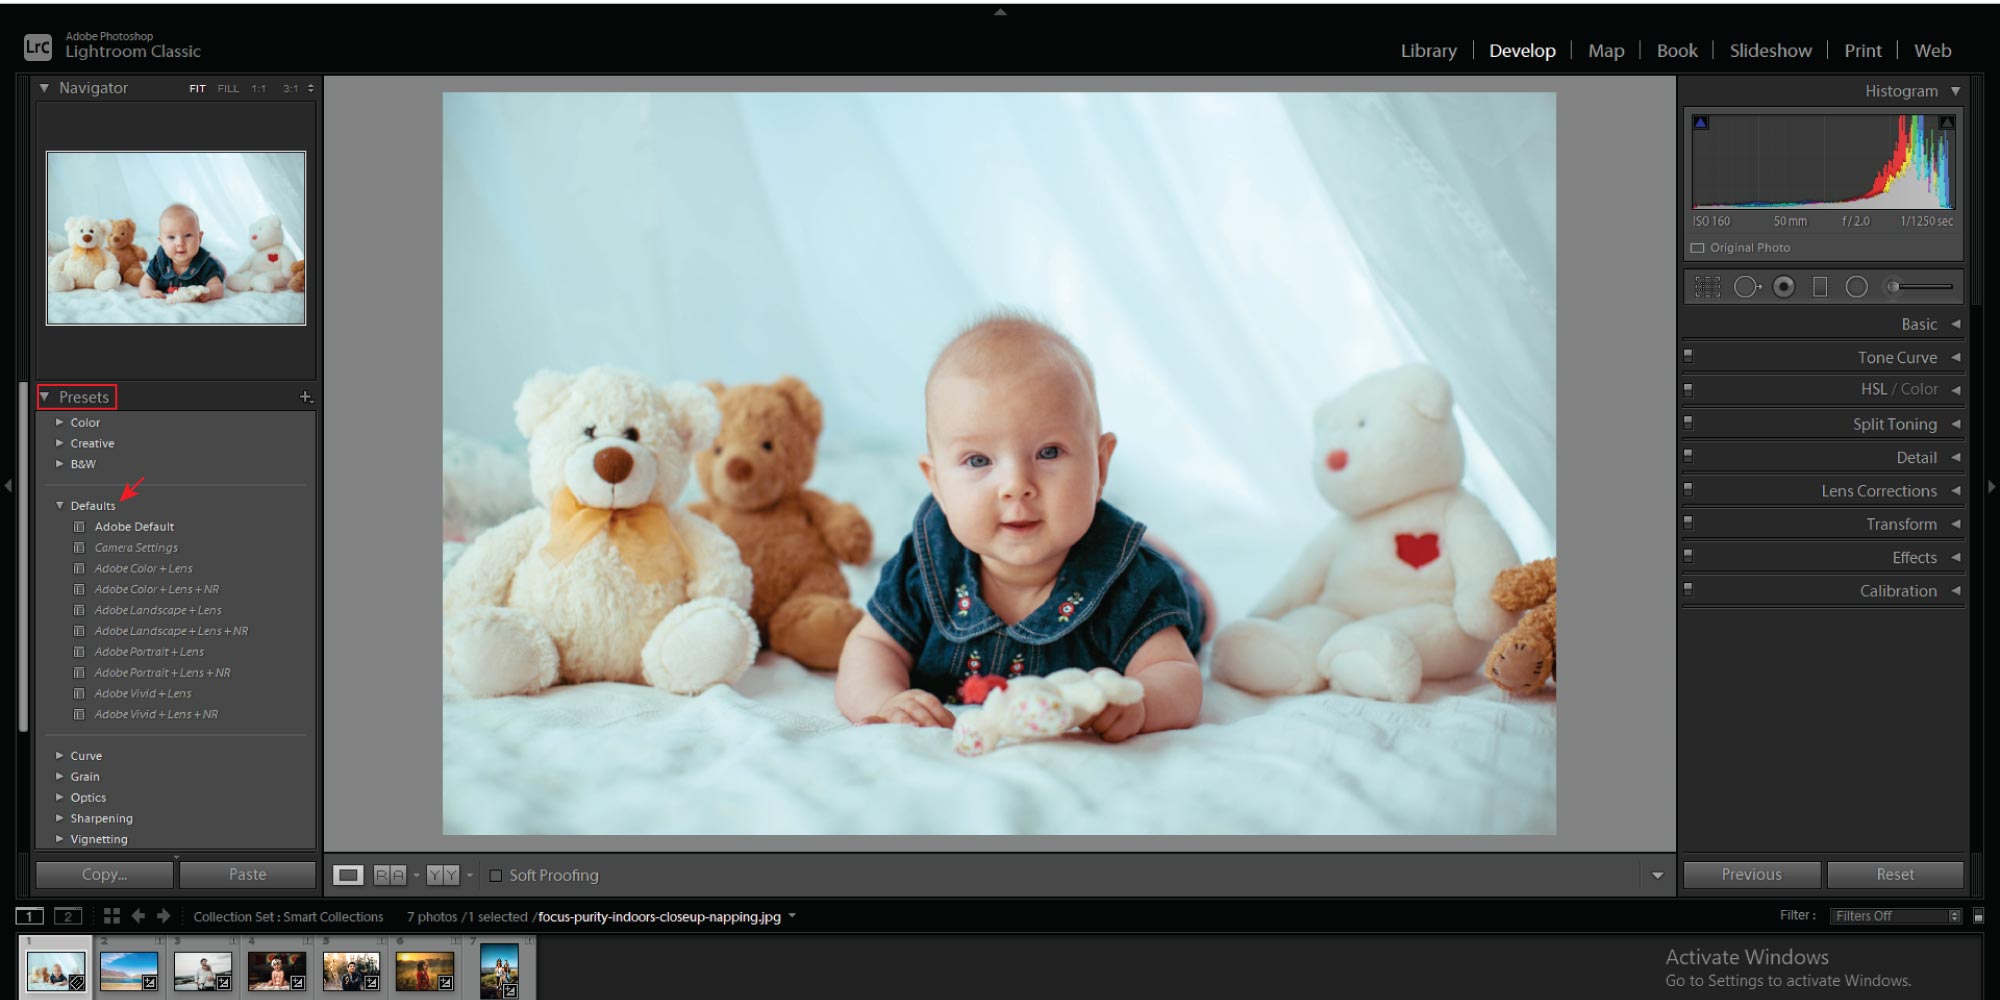
Therefore, you can jump with the “Defaults” if you’re looking for a “Fresh Edit” {presets on the left sideways of the “Develop Module” under the “Presets Panel”}. So, let’s begin with newborn family photo ideas!!
Key 5 Phases: How To Edit Newborn Photos in Adobe Lightroom?
Phase#1: Picking Out A Global Preset:
In this stage, I’d used the “pat-a-cake” preset from the “bella baby newborn preset” collection, which is an All-In-One preset. Most importantly, the all-in-one configurations will eventually affect the overall piece of newborn Christmas photo props.

Phase#2: Doing White Balance Adjustments {If Required}
It’s the time to make necessary white balance adjustments to the newborn photo ideas girl. To rectify any white balancing concerns, you can utilize the eyedropper in the “Basic Panel.” The photograph straight out of the camera has a decent white balance. Here, I added a touch of relaxation.
The below newborn photo after using the “Pat-A-Cake” preset and making a minor white balance modification. It’s already looking fantastic!!
- Also, you can check out our photo retouching service

Phase#3: Facilitating Lens Corrections
This often-overlooked technique has the power to radically transform your newborn photo, especially if you’re going for a vibrant and clean style. I observed that the lens I used {Nikon 50mm f.1.4 Lens} left a vignette on the brink of this newborn snapshot. Because of the light gray walls of the landscape, it usually stands out.
You have to move down to the “Lens Adjustments” panel to activate lens corrections. Then, select “Enable Profile Corrections” from the drop-down menu. If your lens isn’t visible, select “Manual” at the top of the “Lens Adjustments” window and make manual changes to repair any vignettes you notice.
- Learn more about A Step-by-Step Guide on How to Insert Image in Photoshop

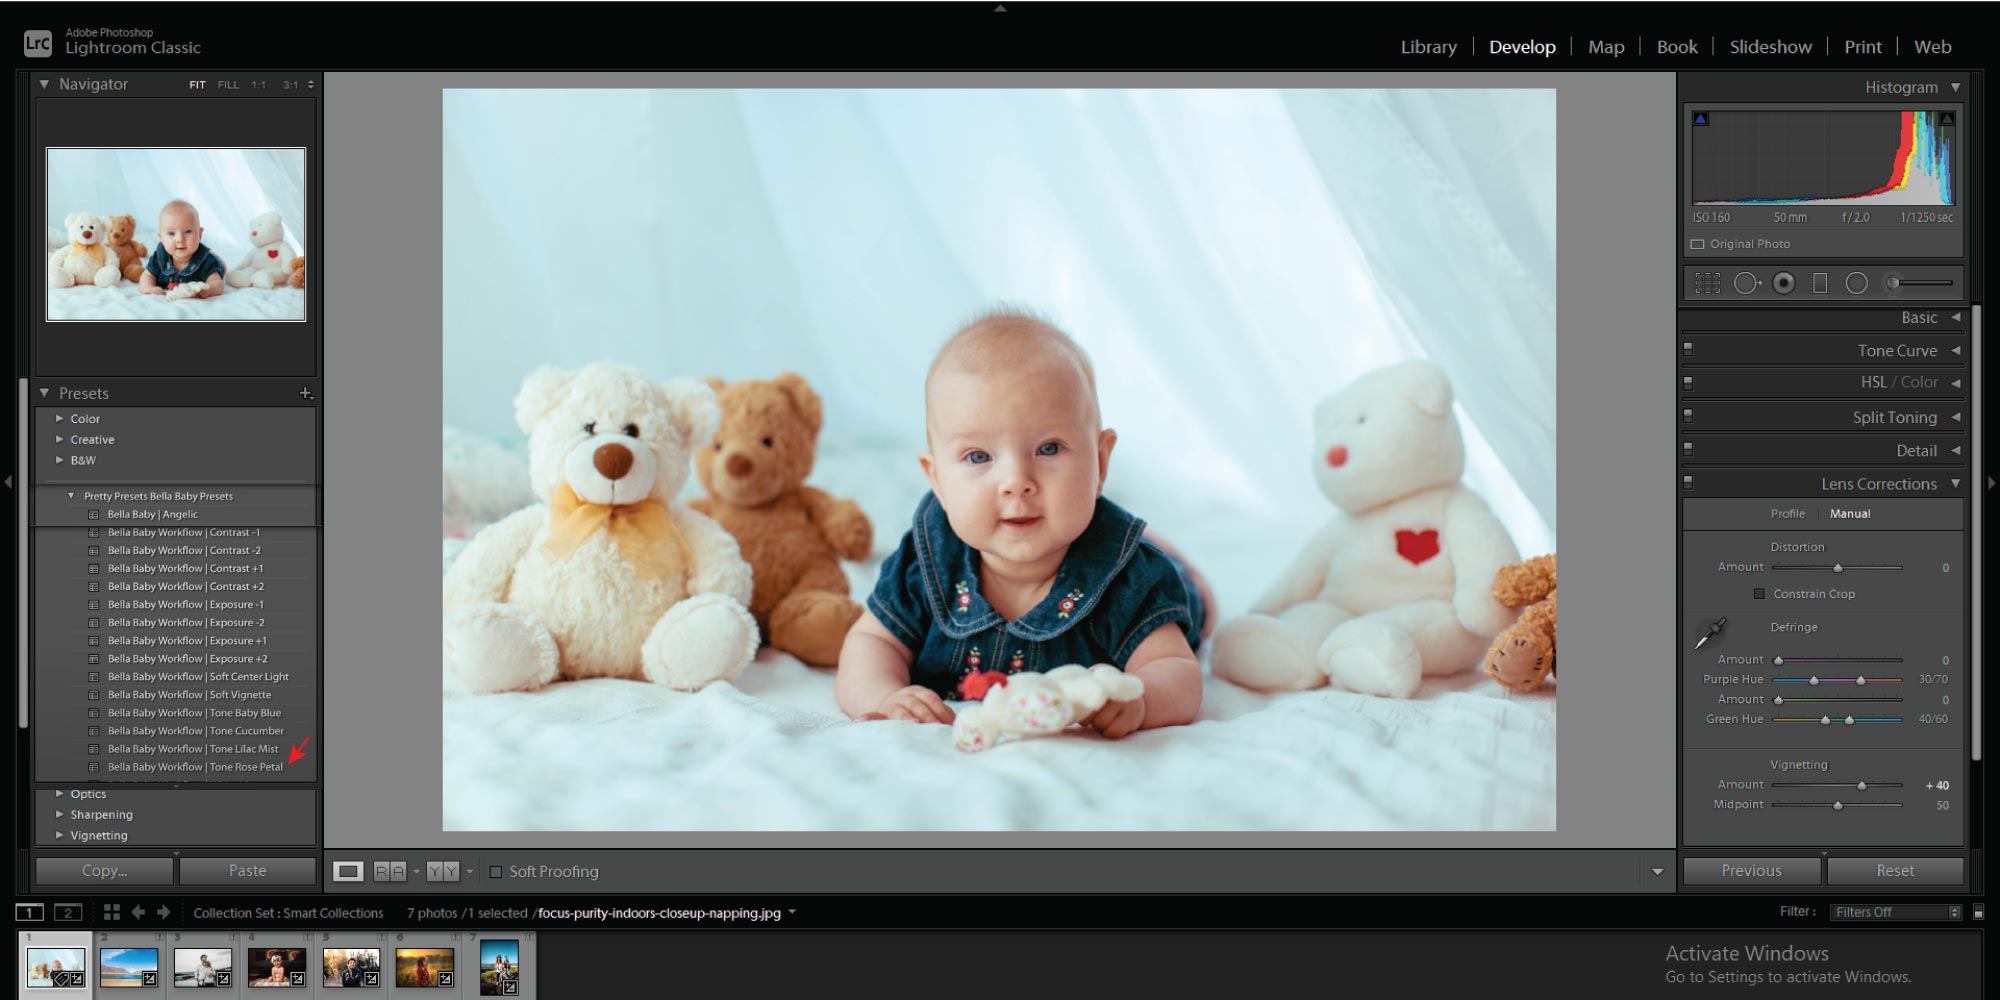
Phase#4.1: Adding Bella-Baby Workflow Presets
The Bella baby newborn presets assortment typically includes a good range of processing presets that can be covered on top of the All-In-One presets to modify the preset to your specific newborn image. This photograph needs a little more exposure and a reduction in colors and designs. It’s a very common way in terms of polishing newborn baby photos.
- Find out more How To Make Blurry Pictures Clear

Therefore, I used the below processing preset for the newborn and sibling photo ideas:Tone Rose Petal | Bella Baby Workflow.
Phase#4.2: Use Bella Baby Adjustment Brushes
This package typically contains a good range of Lightroom brushes made expressly for correcting newborn photo basket difficulties, which is one of the main causes. It’s an excellent tool for editing newborn baby photos.
On top of that, I used these Lightroom brushes regularly to assist in correct infant skin coloration such as Jaundice, Redness and softening their skin. Hence, I used the following three brushes to create the below newborn photo:
Kiss The Red Away, Baby Bella {Over The Skin}
Add Details to Baby Bella {Over The Hair & Eyes}
Smooth as Baby’s Bottom, Baby Bella {Over Skin Regions}
- Read more about 25+ Fun and Creative Photoshoot Ideas to Inspire Your Next Shoot

Phase#5: Heal or Clone
Skin cloning is almost always required in newborn baby photos. The Spot Removal Tool is ideal for enhancing the appearance of infant skin. There’s absolutely no way to escape it when it comes to dry skin and other skin flaws. It’s a rare newborn photo that just required minor cloning. On the blanket, I just did a little cloning.
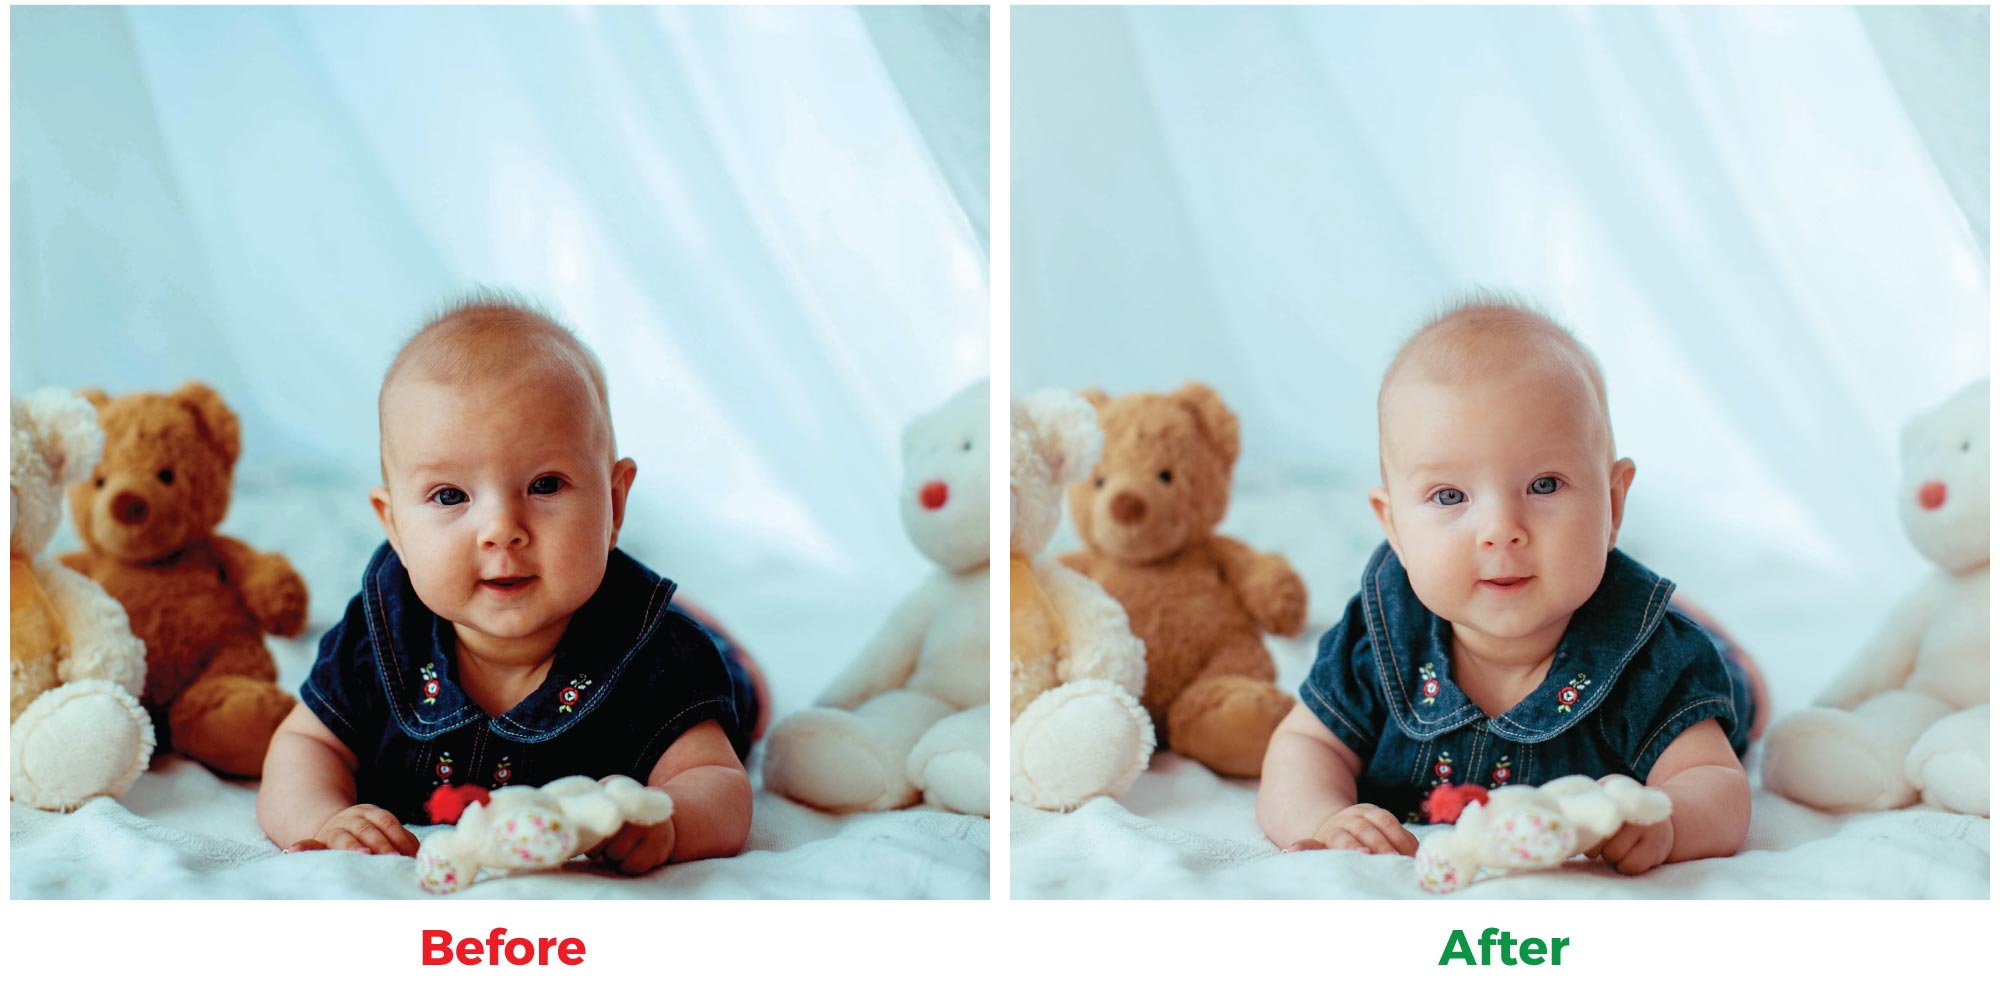
It just took less than 5 minutes to accomplish this editing task!! Plus, the Baby Bella newborn presets and brushes make editing infants a breeze. In the end, your newborn photographs will look wonderful!
Check out Mom And Son Photoshoot Ideas
Keep in mind that all presets will require some fine-tuning. These presets aren’t One-Size-Fits-All, and they can’t miraculously be what each newborn photo precisely requires. Hence, you may need to slightly increase or decrease the settings to suit your newborn photograph.
Pro 7-Process: How To Edit Newborn Photos?
The following is the procedure I’m used to editing newborn photographs. It’s a process that works for me and has become a habit of helping me work more effectively. If you’re having trouble finding your editing groove, start following me.
Stage#1. Background: Do I need to make any changes to my background?
Stage#2. Composition: Is it necessary to trim or measure the direction of acquisition?
Stage#3. Exposure: Considering global and local modifications like shadow fill, dodge & burn, and so on.
Stage#4. Skin Tones: Which regions of the skin need corrections?
Stage#5. Contrast: Is there a need for more contrast, either locally or globally?
Stage#6. Details: Are there any distracting features, such as flaws or styling issues?
Stage#7. Refine: Pay attention to facial details and the object’s main emphasis, as well as any global polishing that may require.
Final Decisions On How To Edit Newborn Photos [In Conclusion]
In a nutshell, experience and a good approach are equally essential for editing newborn baby photos and other images. If you want to make stunning newborn photos, you should first learn how to edit newborn photos in Adobe Lightroom.
While Actions can be used by people who have little or no Photoshop knowledge, I believe that the more skill and comfort you have with the editing tools of Adobe Lightroom, the better you will edit newborn photos professionally. Optimizing your light and other aspects to produce the greatest possible exposure also contributes significantly to image high-quality.
Last but not least, your creative process will become much more fluid and productive once you learn what you can achieve and get better at utilizing those tools.
Be cool with your amazing newborn snapshots!!
FAQs: About How To Edit Newborn Photos in Adobe Lightroom?
1#. In Adobe Lightroom, how can I create warm brown tones?
Answer: In Lightroom, utilize the “HSL and Colour Correction” modifications to get brownish tones. Reduce the “Hue and Saturation” of your greens, yellow and blue, and orange using the HSL tweaks. After that, use “Results in Changes” to add a yellow-orange hue to your photograph for completing the earthy brown colors.
2#. In Adobe Lightroom, how can I minimize yellow?
Answer: Well. To use the color temperature adjustments controls in Lightroom, you can easily repair yellow photos. You may successfully cancel out the yellow color casting and make things appear white again by adjusting your brightness level to prefer a bluer tone.
3#. In Adobe Lightroom, how do I get rid of the orange skin?
Answer: The approach increases the red and orange “hue” parameters while lowering the red and orange “saturation” sliders. Raising the “Luminance” sliders after that will fix the color intensity.
Read Our Latest Articles-
- Graphic Design is My Passion | Origin and Best 15 Memes
- Adobe Photoshop 7.0 Free Download – Strange Facts and Secret Reasons To Love
- Top 10 AI Nude Generators: Unleash Your Inner Artist
- Famous Nude Photographers: Secret Strategies To Be A Master Of Nude Photography


