
The powerful tools of Photoshop have made photo editors love it. The new updates make it more helpful for beginners. Now, you can get professional photos with just a few clicks. But the question is how to insert image in photoshop?
Well, adding images in Photoshop is super easy. You can apply the drag-and-drop or place-embedded method. Moreover, smart objects, layer masks, and blending modes feature to enhance the image placement.
Learn everything about Photoshop’s image insertion processes in this post. Moreover, you will get bonus tips on the Photoshop tools. Let’s jump into the main topic.
How to Insert Image in Photoshop:
Inserting photos in photoshop is the first step of photo editing. You have to follow two simple methods to add images in Photoshop. However, make sure you have installed the program on your device.
You can get it from the Adobe Photoshop’s website. Moreover, a lot of websites offer cracked versions. But, avoid these for security reasons. Additionally, the crack versions may not have access to all the tools.
Adding A Background Image
Now, you have to open a background photo. This is the starting process of how to insert image in photoshop. Here are the steps to insert the background image.
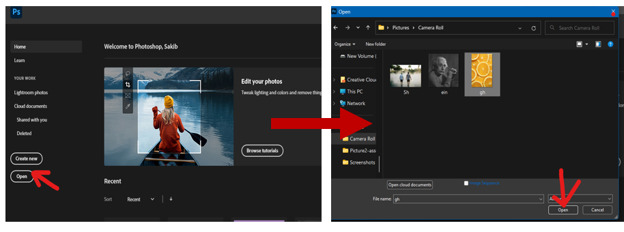
Step 1: Select an image for the background layer.
Step 2: Go to Photoshop. Now click the “Open” button. Then, go to the image location and click the image. Hit the “Open” button again. Thus, you will get the image on the background layer.
Another way to add the background image is the File option of Photoshop. So, click the File option, then click Open.
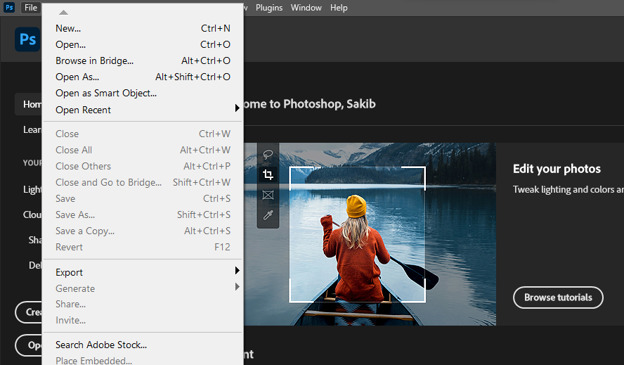
Moreover, ctrl+O allows you to directly go to the option of choosing the image.
So, we have added the background image in Photoshop. Now, you can place another image in Photoshop on the background layer. Here, we will use these two techniques.
Drag and Drop
The drag-and-drop is the easiest way to add images in Photoshop. You just need to click and hold the image on your computer. Then, drag the image file onto the open Photoshop document.
Then, position the image within the document and release the mouse.
Place Embedded Method
The place-embedded function of Photoshop also allows you to add an image to the existing background layer.
Click the “File” menu located in the top menu bar of the Photoshop interface. Then, Select the “Place Embedded” option from the dropdown menu within the “File” menu.
Now select the image you want to open onto the background layer. So, it’s almost done.
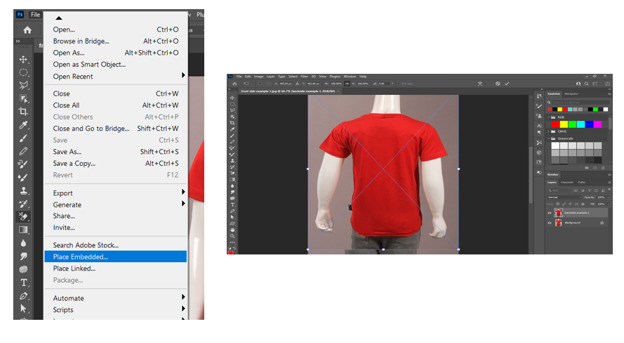
The second image has almost covered up the background layer. Don’t worry we will fix this issue.
Enhancing Image Insertion with the Photoshop Tools
We have placed the image. Now the position has to be corrected to get a proper composition. We have to fix this issue by using the other tools. Let’s learn about these tools to complete the image insertion process.
Transform Tool
You will get the “Free Transform Tool” from the toolbar of Photoshop. Also, you can access this tool by pressing ctrl+t.
Using the transform tool, you can resize the image non-destructive. Thus, you place the image in the proper size and position.
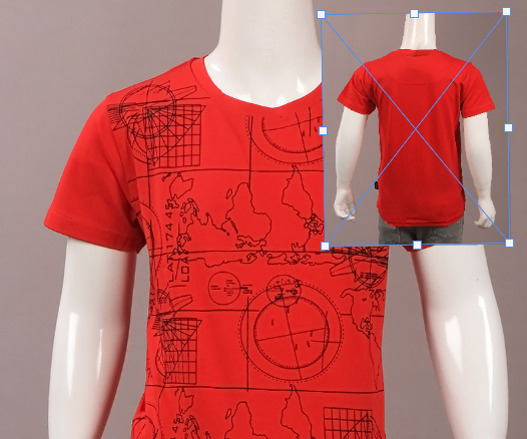
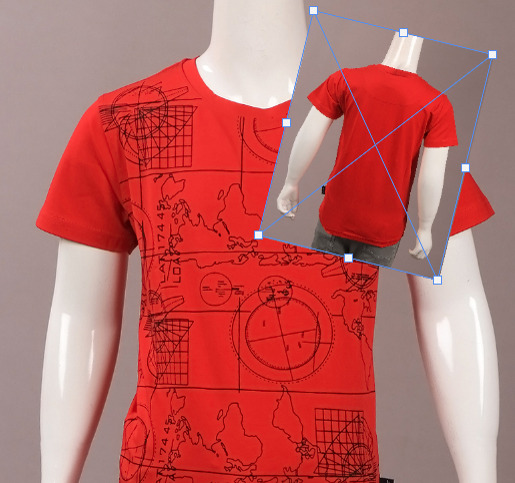
Using the transform tool, you can also rotate the photo. So you can adjust the position of the image.
Smart Objects
Smart Objects is a powerful feature of Photoshop. The editors use this tool to edit images more efficiently. It is a pixel-based image editing method. So, the image resolution remains unaffected.
Moreover, you can apply the filter on the smart object more effectively. Thus, you will obtain a perfect result.
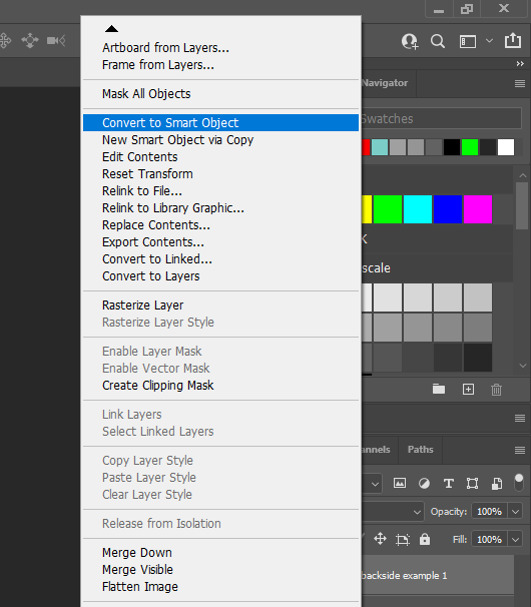
Go to the layer panel. Then select the layer to convert into a smart object. For this tutorial, I will convert the t-shirt’s backside layer.
So, right-click on the chosen image. Now, choose “Convert to Smart Object”. Name the smart object layer and hit ‘OK’.
Layer Masks
Layer Masks are an essential Photoshop tool for professional editing. Using layer masking, you can decide which layer you want to show and which you want to hide.
You can use layer masking for image putout, composition, and refining edges.
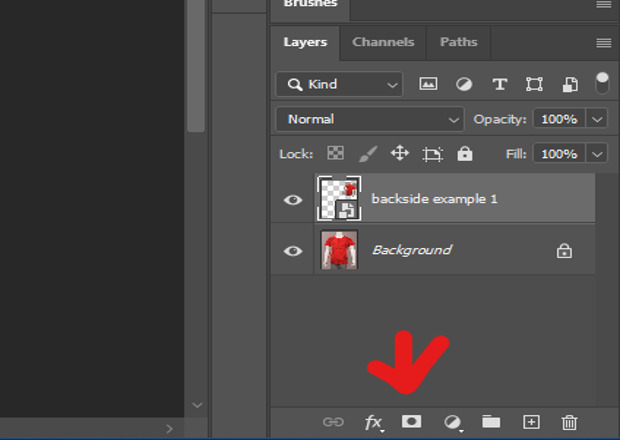
Select the inserted image layer to create a layer mask. Now Click the “Add Layer Mask” icon at the bottom of the Layers panel.
Final Thoughts [How to Insert Image in Photoshop]
Photoshop allows you to get professional photos. However, it requires years of experience in using this program to achieve the desired look. The Photoshop expert removes the mistakes of the photographers and creates flawless photos.
This article is about one of the basic processes of Photoshop. Now you know how to insert image in photoshop. Following the methods mentioned above, you can place the image correctly.
Then, you can manipulate these images to get a new look. For example, the images I have used in this tutorial can be edited to create a ghost mannequin effect.
However, hiring an expert photo editing agency is always better to get high-quality photos. You can hire an expert editor to get the images quickly and run a successful marketing campaign.
FAQ for How to Insert Image in Photoshop
How to add a layer in Photoshop?
You will get a “+” icon in the layers panel. Click on it to create a new layer. Now, double-click on the name of the layer to rename the layer. Now press Enter.
How do I put an image behind another image in Photoshop?
You can do it by dragging the layers up or down. So, click and hold the layer you want to send backward. Then, place it behind the other layer, sending it backward.
How to merge layers in Photoshop?
Press and hold the Shift button on your keyboard and click on the layers from the layer panel. Right-click on the chosen layers. Then, pick the “Merge Layers” option.
Read Our Latest Articles-
- Adobe Photoshop 7.0 Free Download – Strange Facts and Secret Reasons To Love
- How To Make Blurry Pictures Clear
- 19 Male Poses and Tips for Outstanding Your Next Photoshoot
- Maternity Photoshoot | Pregnancy Photoshoot Poses Ideas to Capture Love
- 25+ Fun and Creative Photoshoot Ideas to Inspire Your Next Shoot


