Do you know immense image files can ruin your storehouse space? Also, it can cause your website to slow down. So, if you want to overcome these obstacles and make your website run faster and lighter, you must learn how to resize an image in Photoshop. A beautiful Photoshop resized image can always attract your visitors and boost your product or service sales.
Resizing an image to a smaller size means discarding or reducing unneeded pixels with the photo editing software. And the same thing applies to enlarging an image by adding or making pixel details. So, to get the ideal photo size for your demands, you must take some steps to transform your file size and photo dimensions.
In short, resizing an image doesn’t indicate changing the photo but increasing or reducing the image pixels. It’s the typical image manipulation course of action that enables you to customize based on your demands without losing its quality.
Basic Concept of Image Resizing:
Knowing the basics of image resizing is mandatory before you run for resizing images. Resizing an image means not touching another part of an image other than changing the height and width of the picture. And it’s essential to resize a photo to ensure it serves within the limitations of placing images on your webpage.
Photos with higher pixels, especially those large pictures with high resolution, always take a vast amount of time to download or need massive storage to store. That is why it’s essential to edit image size in Photoshop.
Suppose you like to send a photo to anyone to glance at or desire to post a pic on social media. In this case, you’ll feel that a low-resolution small file-size image is crucial.
Receive professional image background removal service for about $0.50 per photo.
Importance Of Using Photoshop Resize Images:
The fundamental advantage of using Photoshop to resize images is to provide low-resolution (minimize the pixel) photos to attract visitors and save your website space storage.
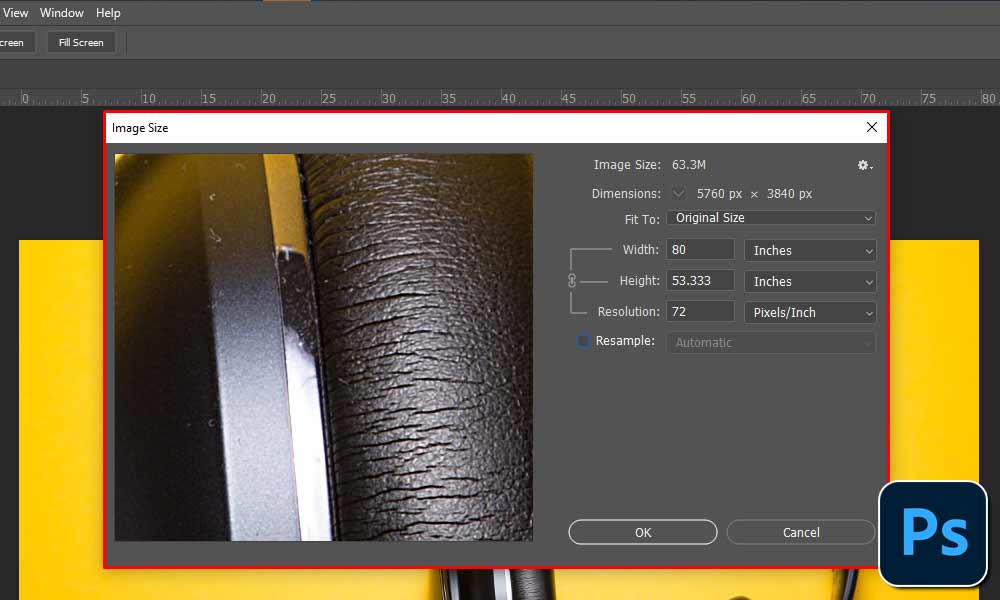
Dialog Box for Image Size:
It allows you to modify the height and width, or photo resolution measured through pixels per inch (PPI). And it lets you convert your photo file sizes permanently.
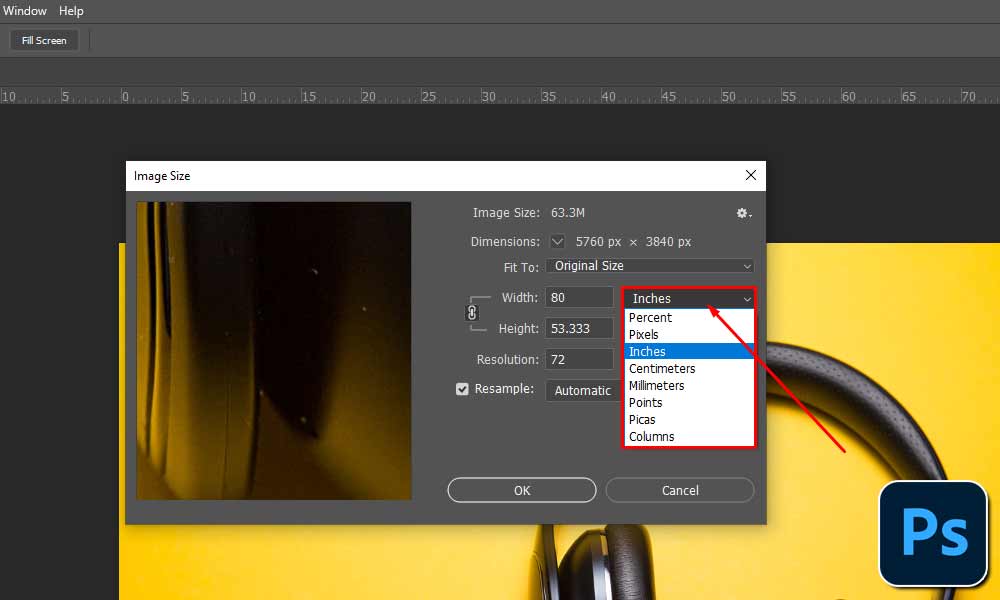
Select Your Measurement Unit:
It’ll give you the flexibility to make your desired pictures inches, pixels, centimeters, and more for measurement.
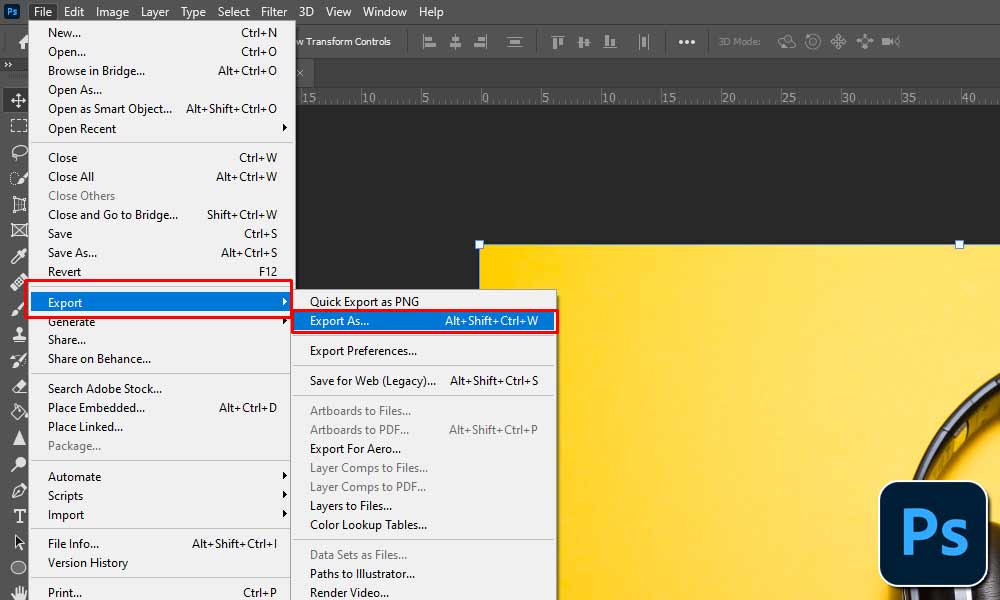
Export Function:
This option helps you to fine-tune your picture pixels, scale by percentage, or export as compressed JPEG format.
Full Quality Images:
The redrawn image provides the facility to zoom in or zoom out to confirm that the photo has entirely equitable or ethical details to use.
Save Time and Space:
An Adobe Photoshop resizes image can easily fit and run smoothly with your website. And it indicates that resized images have a low-resolution format to spare your storage and save your precise time simultaneously.
View more How to Photoshop Someone out of a Picture | The Easy Method
Step By Step Guide on How to Resize an Image in Photoshop:
Here is the two (02) easiest way that help you learn how to resize an image in Photoshop; See our video first.
Video on How to Resize an Image in Photoshop
First Step:
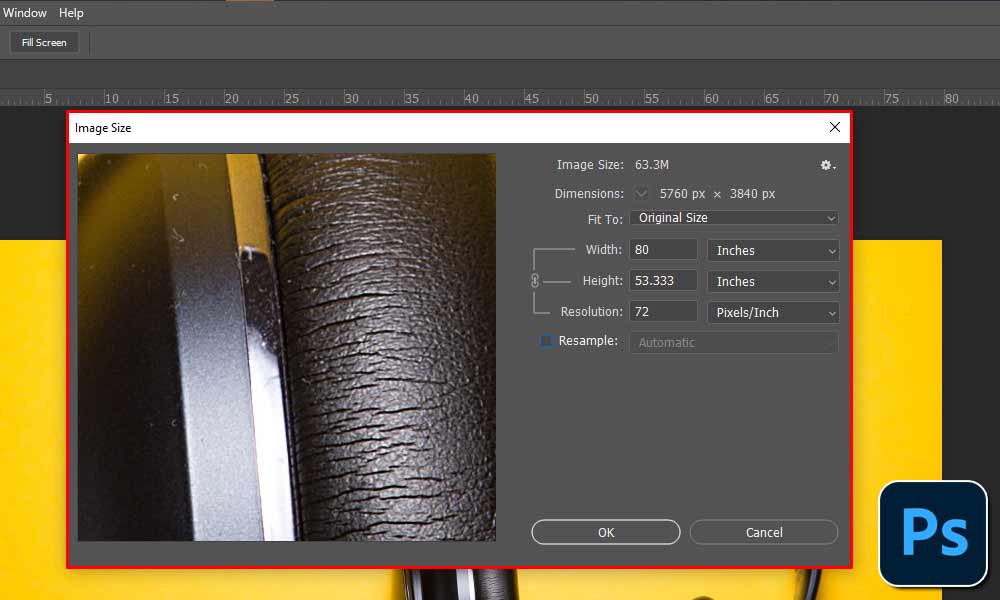
Go to your Photoshop Dashboard and open Image → Image Size.
Second Step:
Change Photo Preview:
You’ll see a pop-up window appear before you and display the preview photograph. Apply one of the following to change the photo preview:
Stretch a corner of the “Image Size Dialog Box” to resize the preview window.
To watch a diverse photo position, pull the hand icon that takes place in the preview.
Now, press Ctrl+ – for Windows and Command+ – for Mac OS to enhance magnification in the image preview. To minimize the magnification, press Alt+ – for Windows and Option+ – for Mac OS. After that, the magnification percentage dwells concisely underneath the preview image.
Read more about Double Exposure in Photoshop Made Easy
Third Step:
Recast Picture Resizing Parameters:
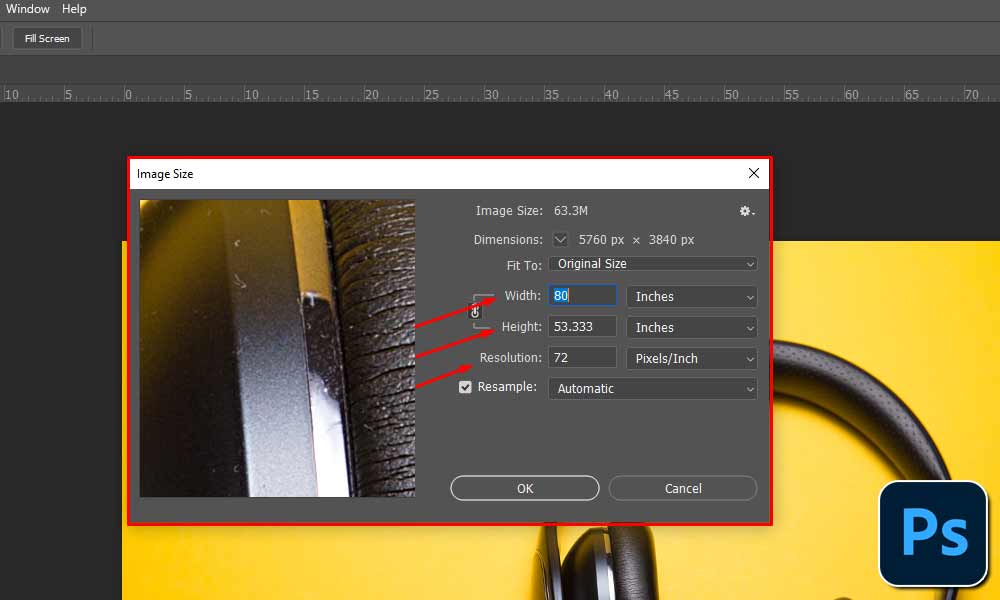
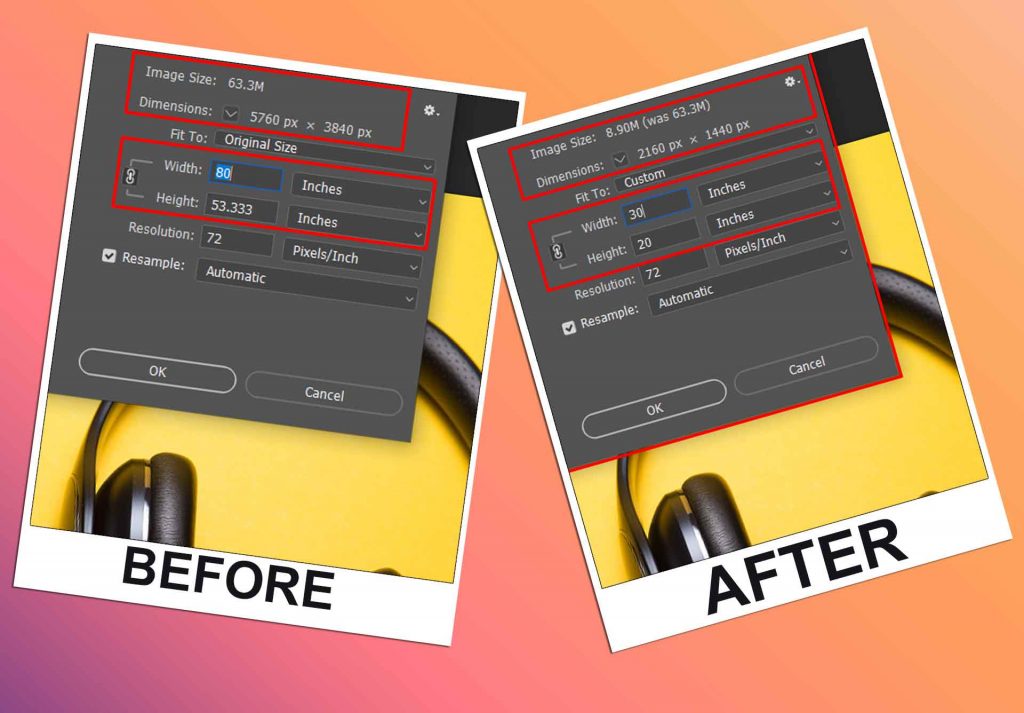
Dimension: To modify the measurement unit for pixel dimension, hit the triangle next to Dimensions and select from the menu.
Fit To: With this alternative, you can,
Select a Preset to resize the Picture.
For precise printing output, carefully select Auto Resolution to resize the photo. Differentiate the Screen standard and sort out a Quality from the Auto Resolution dialog box.
Constrain: Ensure the Constrain Proportion option is enabled, sustaining the central ratio of height to width measurements. Press the “Constraint Ratio” icon to detach if you want to scale the width and height all alone.
Height/Width: Adopt from the menu following the Height and Width text boxes to compose values in various measurement units. The file size of the most recent picture is now displayed above the “Image Size dialog box.”
Resolution: When transforming the Resolution, simply put a new standard. Or else, you can opt for a diverse measurement unit.
Resample: Ensure that resampling is selected to allow the photo size or resolution to modify and to adjust the total number of pixels proportionally.
Check out How To Edit Newborn Photos in Adobe Lightroom.
Fourth Step:
If your photo has styles applied to layers, choose Scale Style from the gear icon for your resized pictures to scale the effects.
Fifth Step:
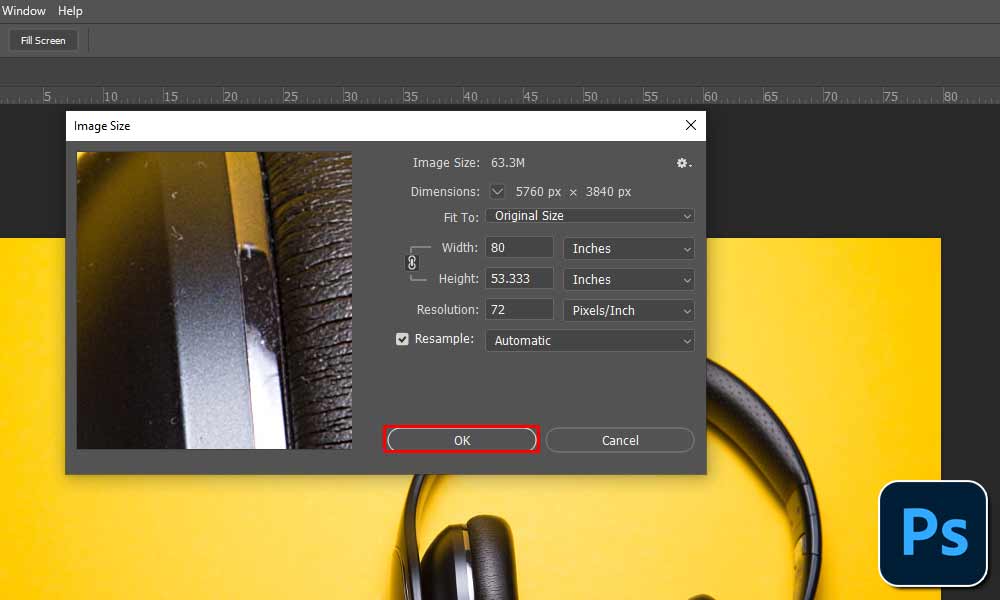
After completing the setting options, press OK.
How To Resize an Image in Photoshop By Drag & Drop From A Computer (Another Easy Method):
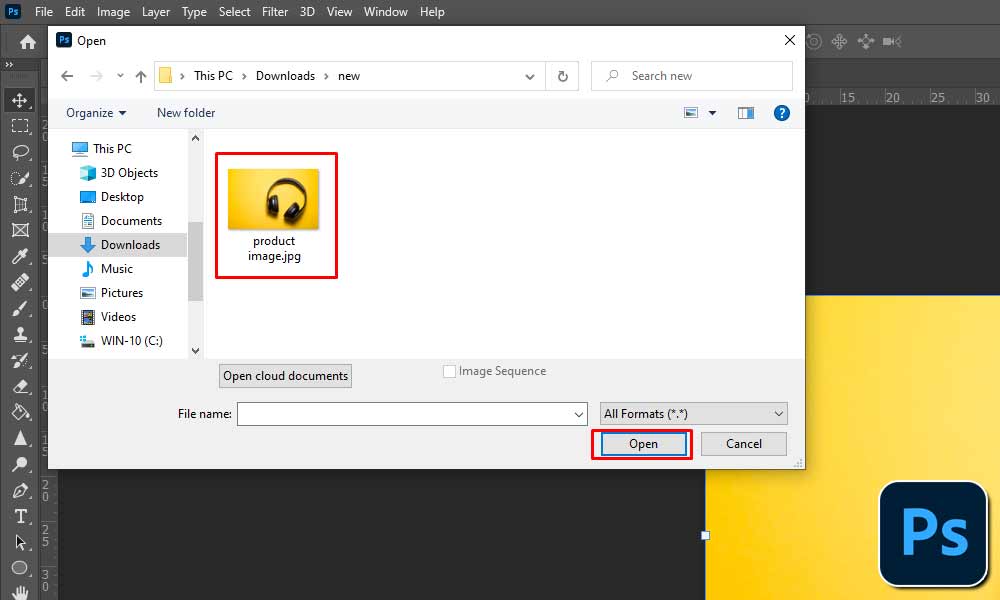
If you want to resize your images without losing the standard, you just need to drag them from your computer and drop them on Photoshop. After that, Photoshop immediately enables you to scale and reposition the layer automatically.
Step 1: Select A File
If you already opened your Photoshop, just allocate the file you like to work from your computer.
Step 2: Drag And Drop The File
After selecting your desired photo simply drag it to your Photoshop field. Now you can see this process automatically importing your images on the Photoshop field, allowing you to start working.
Step 3: Resize the images That Fit
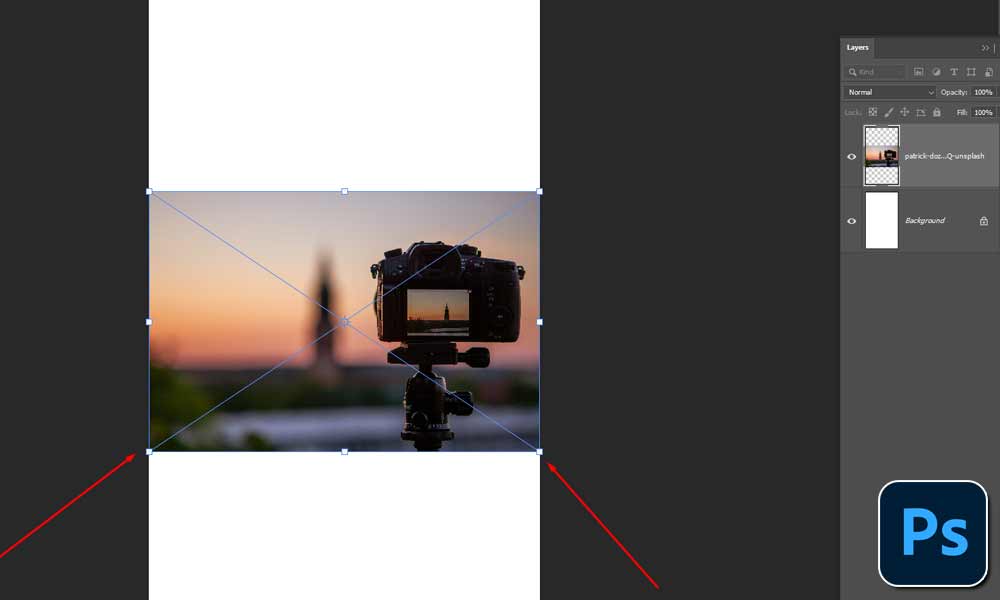
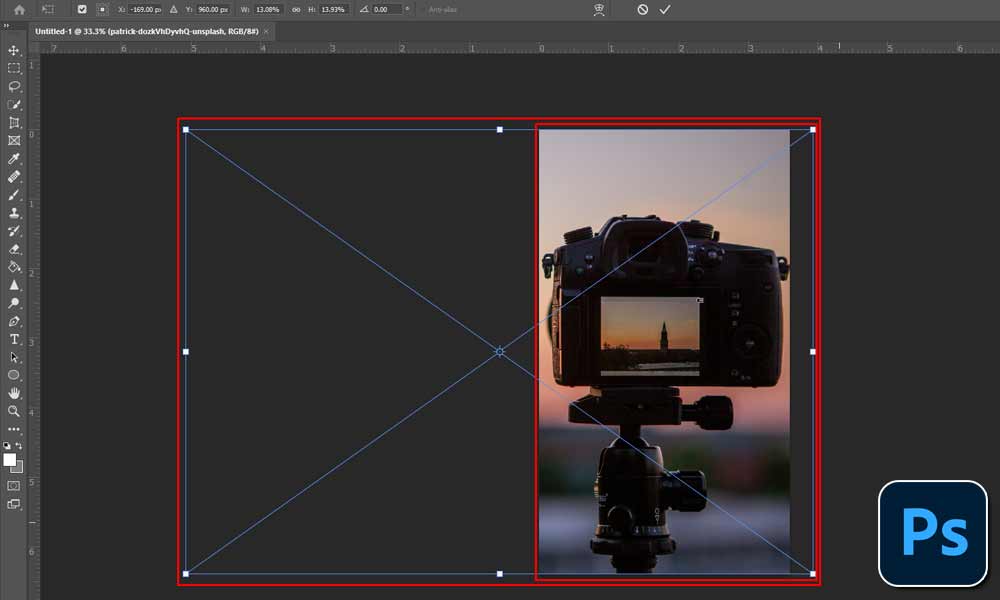
When importing images, first, you’ll see a transition box around the photo. And it indicates you’ll be able to modify your layer size as required.
Step 4: Make the Changes
Now, at the top of your screen click the check box if your photos are in the right position to change. Besides, you’re also allowed to hit the “Enter button” on your keyboard.
It’s time to apply your scale adjustment, and in your Layers panel, the most recent layers will appear as a smart object.
Step 5 : Finalizing:
Pick the layer and use the “Move Tool” to adjust more layer sizes by hitting the “V.” From there, you can modify your layer position and size.
Extent Tips About Scaling Photos in Photoshop:
So, I can assume you understand the world’s two best processes about how to resize an image in Photoshop. Besides minimizing your photo quality let’s talk about some tips:
- Pick the most appropriate interpolation method for the image you want to resize.
- Generate a copy of your work photo that you are ready to resize, and exercise on that copy image.
- Decide whether you like to expand or minimize the image size.
- Inspect the photo to decide whether it would be convenient for sharpening or polishing.
- Nondestructive image editing without quality loss is possible using Smart Objects.
- The topmost process to maintain photo quality is the use of Bi-cubic interpolation or smart objects.
- It’s better to reduce the number of resampling operations to produce high-quality photos.
- Bear in mind, that whenever you resample a photo, some quality of the picture will be spoiled.
Final Words:
Generally, most image resizing methods reduce image quality. But if you’re an expert in Photoshop or have a team of experts then you can resize images without compromising the quality. Or else, you can call an expert company like “Adept Clipping Path” who will do the work for you.
Understanding how to resize an image in Photoshop without reducing standards will confirm you have the greatest quality photos for your work always. Choosing the best method to accomplish your desired results is a very critical subject. Because enhancing the photo or reducing the photo file size requires diverse processes.
That’s why studying how to resize an image in Photoshop is mandatory. So, I humbly request you to read this post carefully and share it you your family, friends, and social media. And likewise, give us your potential point of view which is a very important issue for us.
Learn more about How to Remove Watermark from Photo: A beginner’s friendly Guideline
FAQ: [ How To Resize an Image in Photoshop ]
Why do I resize a photo?
ANS: In a word, an enlarged photo results in a blurry or pixelated picture, generally. Therefore, reducing a photo size is much safer and more sound than elaborating.
Does resizing a photo shorten the file size?
ANS: Resizing a photo indicates lessening its height and width which ends up decreasing its file size. Hence, reducing the size of an image means automatically removing unwanted pixel info and resizing the file.
Why do you think resizing an image is important?
ANS: It can affect your brand and decrease your sales for both products and services. If your photo is wrongly pixelated or sized, it also has an effect on page load speed both for mobile and desktop.
How can we resize a photo without reducing quality?
ANS: Run for your dashboard and go to Image (enter your dimensions). Then select Sinc (as an Interpolation) and after that, press Scale. That’s all, now you have your resized image with sustained quality.
Read Our Latest Articles-
- 19 Male Poses and Tips for Outstanding Your Next Photoshoot
- 25+ Fun and Creative Photoshoot Ideas to Inspire Your Next Shoot
- Maternity Photoshoot | Pregnancy Photoshoot Poses Ideas to Capture Love
- The Ultimate Guide to Captivating Couple Poses: Unleash the Magic of Love

