
Product photography has never been more vital than it’s now. So there is always a demand for photographic markets. As you know, color correction in photoshop can easily alter stock pictures into something more appealing. The improved photographs enhance the aesthetic beauty of product features. Here, anyone can easily download adobe photoshop latest for free. To learn more things about this software, simply read the blog. It takes less than 5 minutes!
However, it’s necessary to have the correct data to generate money from photo editing. Portrait photography can benefit from image editing since it usually allows for a more personal photo depiction. It’s essential to promote e-commerce products online. For e-business, you can professionally create your website by hiring some experts in photoshop color correction.
Therefore, color correction may appear to be a difficult task, but it isn’t. Knowing how to color balance photoshop will allow you to generate perfect images. To know & apply some alternative methods to correct your photography to the next level, keep reading. Learning is Fun! Good Luck!!
Color Correction In Photoshop [Basic Concept]
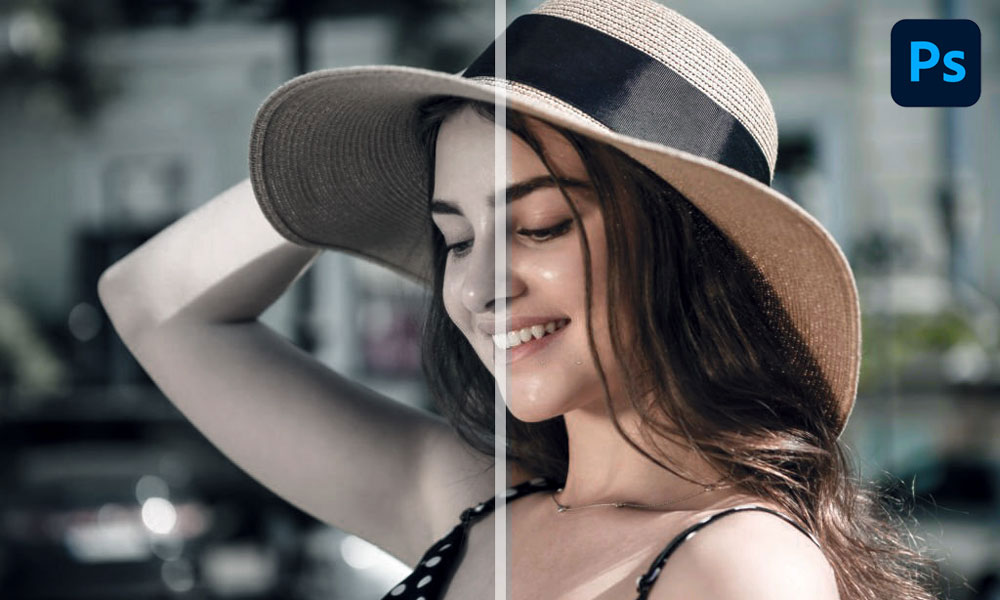
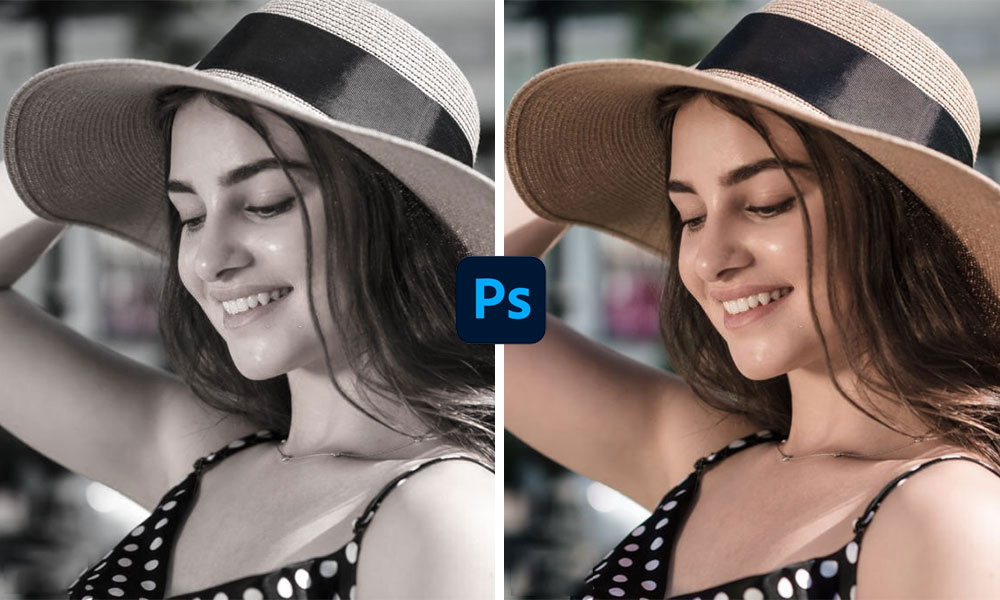
Removing undesirable color casts from photographs is the main goal of image color correction software. Because some color variations are appropriate, the word ‘Unwanted’ is crucial. For instance, you don’t want to neutralize the tanned complexion. Here, you may eliminate the blue color effect that sometimes appears in photos captured on cloudy days or in hazy places. You can reveal the real color of the subjects & objects in your photo and make the photograph ‘POP’ by eliminating an undesirable color effect.
On the contrary, it can be best if you don’t concentrate on skin color correction in photoshop for every photo because the content will decide how you edit it. Most times, you’ll want to leave the hue alone. Understanding the curves tool and the statistics that surround it will aid you in determining what each shot requires.
E-commerce or product? Photography is the most influential aspect that serves as a deciding factor when purchasing any product. For purchasing a product, most customers rely on photos.
What Is Photoshop Color Correction? [Broad Definition]
Restoring an image’s original color is known as color correction. When we use the camera to take pictures, it is not always possible to capture the precise sight that our eyes view. Color correction in Photoshop aids in restoring the image’s original color.
Most of the time, while taking shots outside, we don’t have control over the lighting. Throughout the day, the light conditions typically fluctuate. It’s almost inevitable that your photographs won’t have the same color tone throughout the day if you’re shooting for long periods. You’ll need to change the color in photoshop to maintain uniformity.
Color Grading VS Color Correction In Photoshop:
The basic color correction and color grading techniques both seek to correct an image’s color. But they differ in some ways.
Basically, color correction is the procedure of “correcting” the color of any photo to restore the photo’s initial color. We may not always catch the color of what we perceive while filming. In that situation, we may need to deal with the color to restore the subject’s original hue.
By contrast, color grading is all about appearances. We may alter the color tone of an image to achieve a new essence. It’s not the same as the originals, but it provides the image with a more artistic appearance. Color grading also adds to adjusting the image’s mode.

How To Do Color Correction In Photoshop?
Color correction can be done in a variety of methods. We’ll show you how to accomplish color correction most simply and quickly.
Method#1. Choosing A Gray Color For Color Correction:
This method works by determining the perfect gray color for an image. To fix an image’s color, we must first determine which parts of the image should have been gray in real life. Then we’ll have to save that color as a Photoshop reference.
If there isn’t any place in your photo that should have been gray in real life, we’ll have to designate the nearest area to gray. Following the discovery of that area, Photoshop will alter the other colors depending on a gray color guideline.
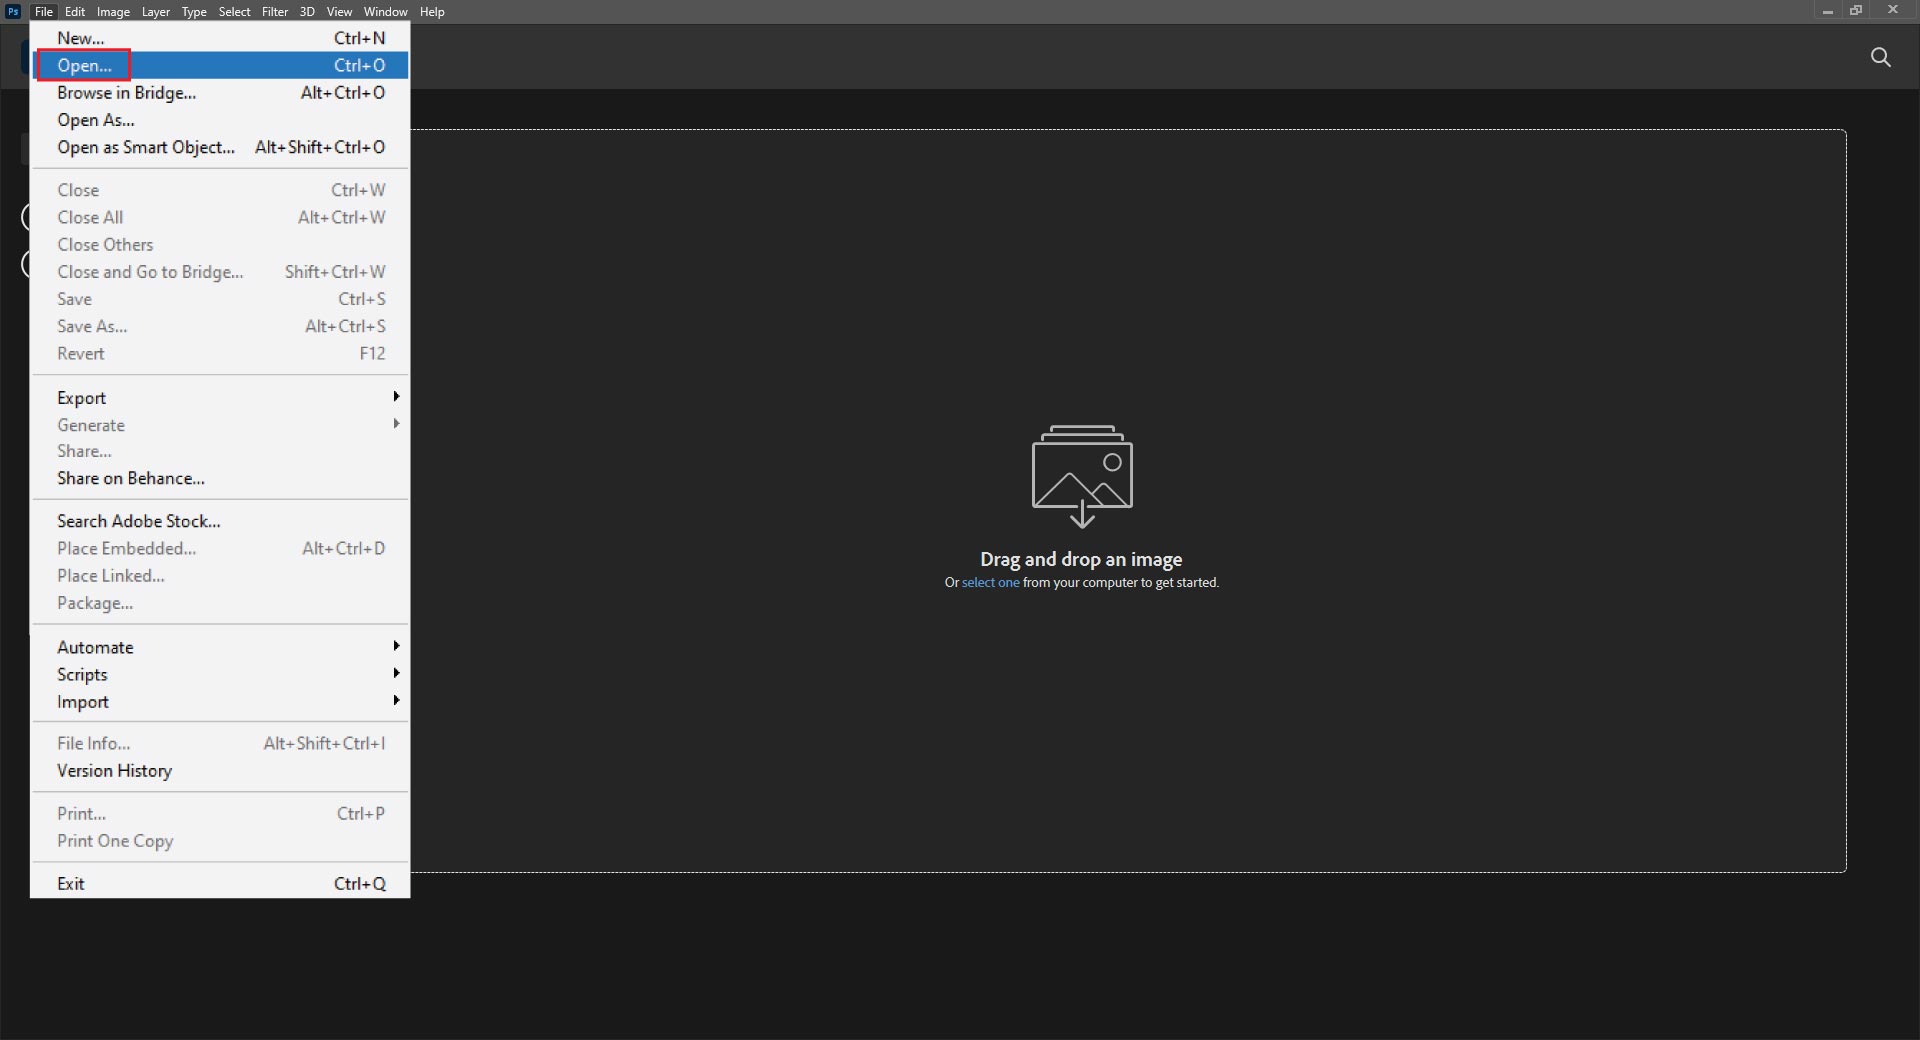
Step-1: Open The Image In Photoshop.
To open a file you wish to work on, go to File from the top menu and select Open.
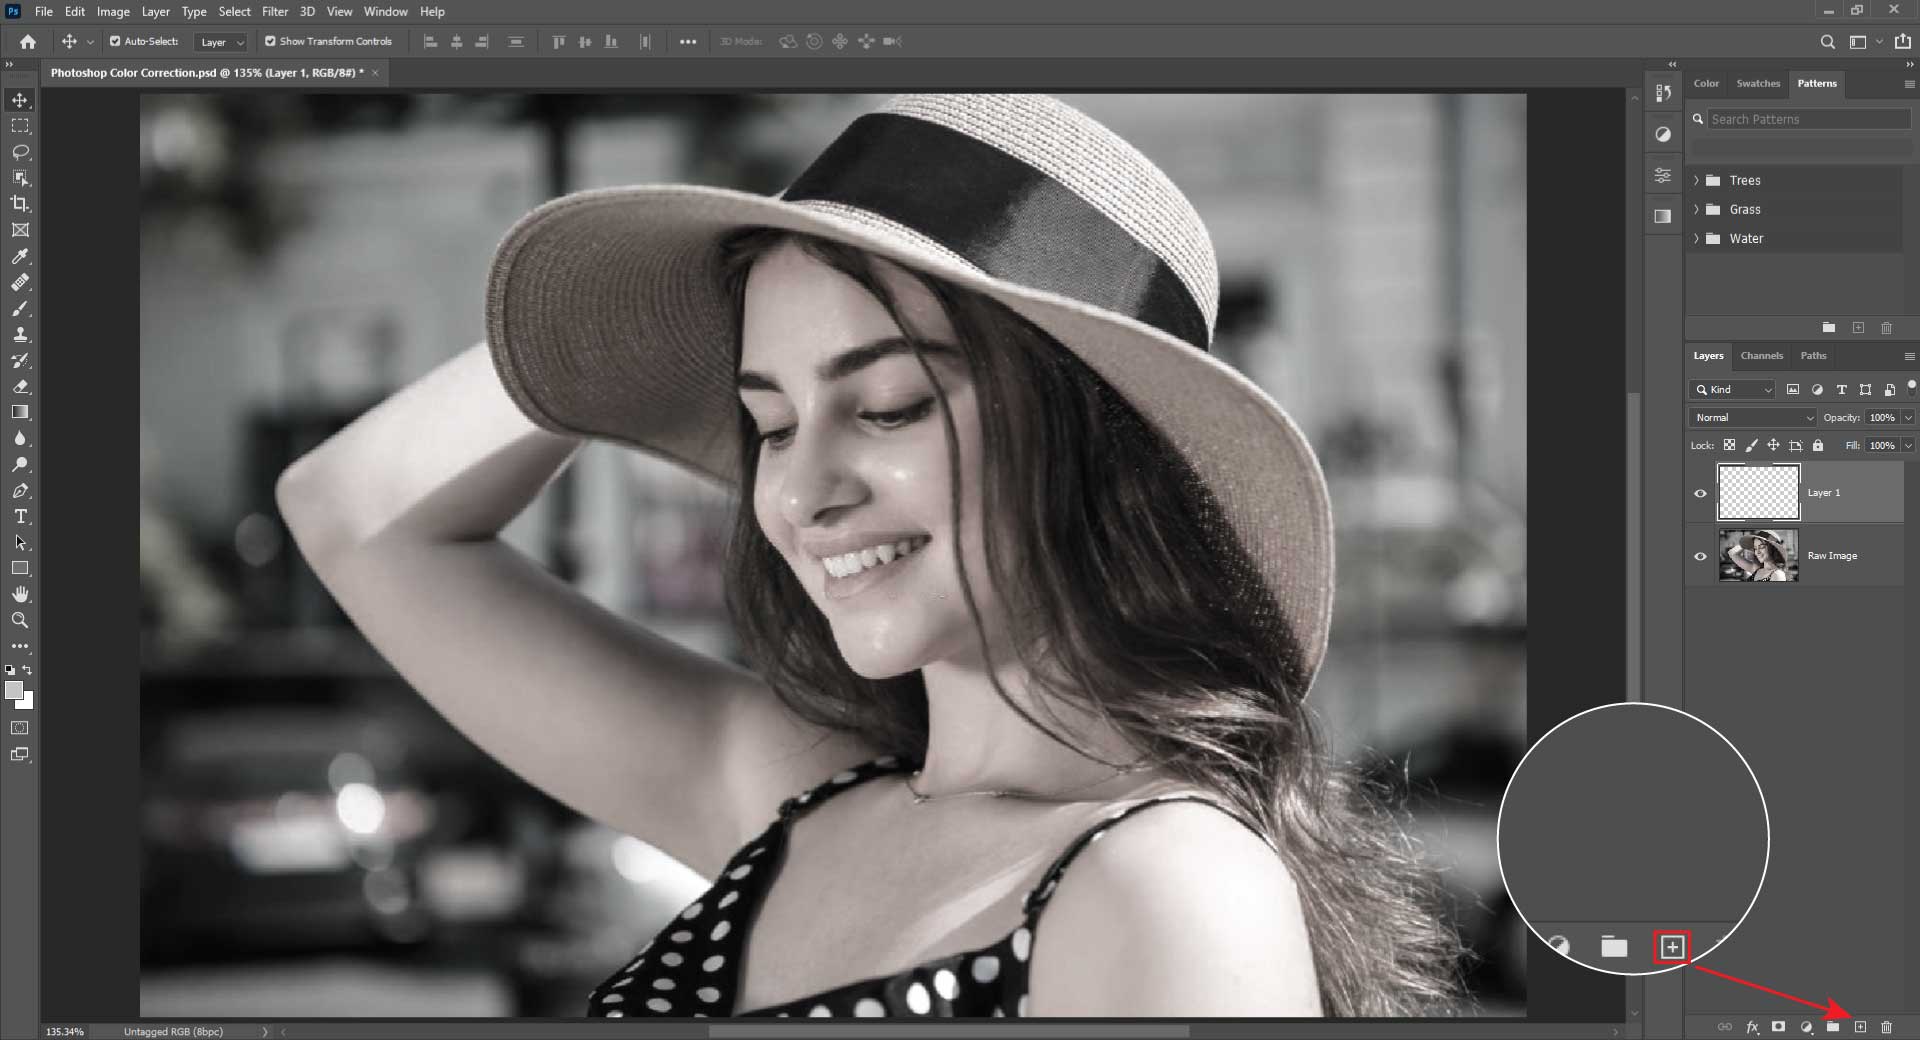
Step-2: Select A Gray Reference:
Next, we’ll select a gray pointer. Add a ‘New’ layer by pressing on the ‘Plus’ sign in the layer panel.
To make the layered gray, hit ‘Shift+Backspace’ on your keypad. A box will appear on the screen. On the ‘Contents Menu’, pick 50% Gray and press OK.
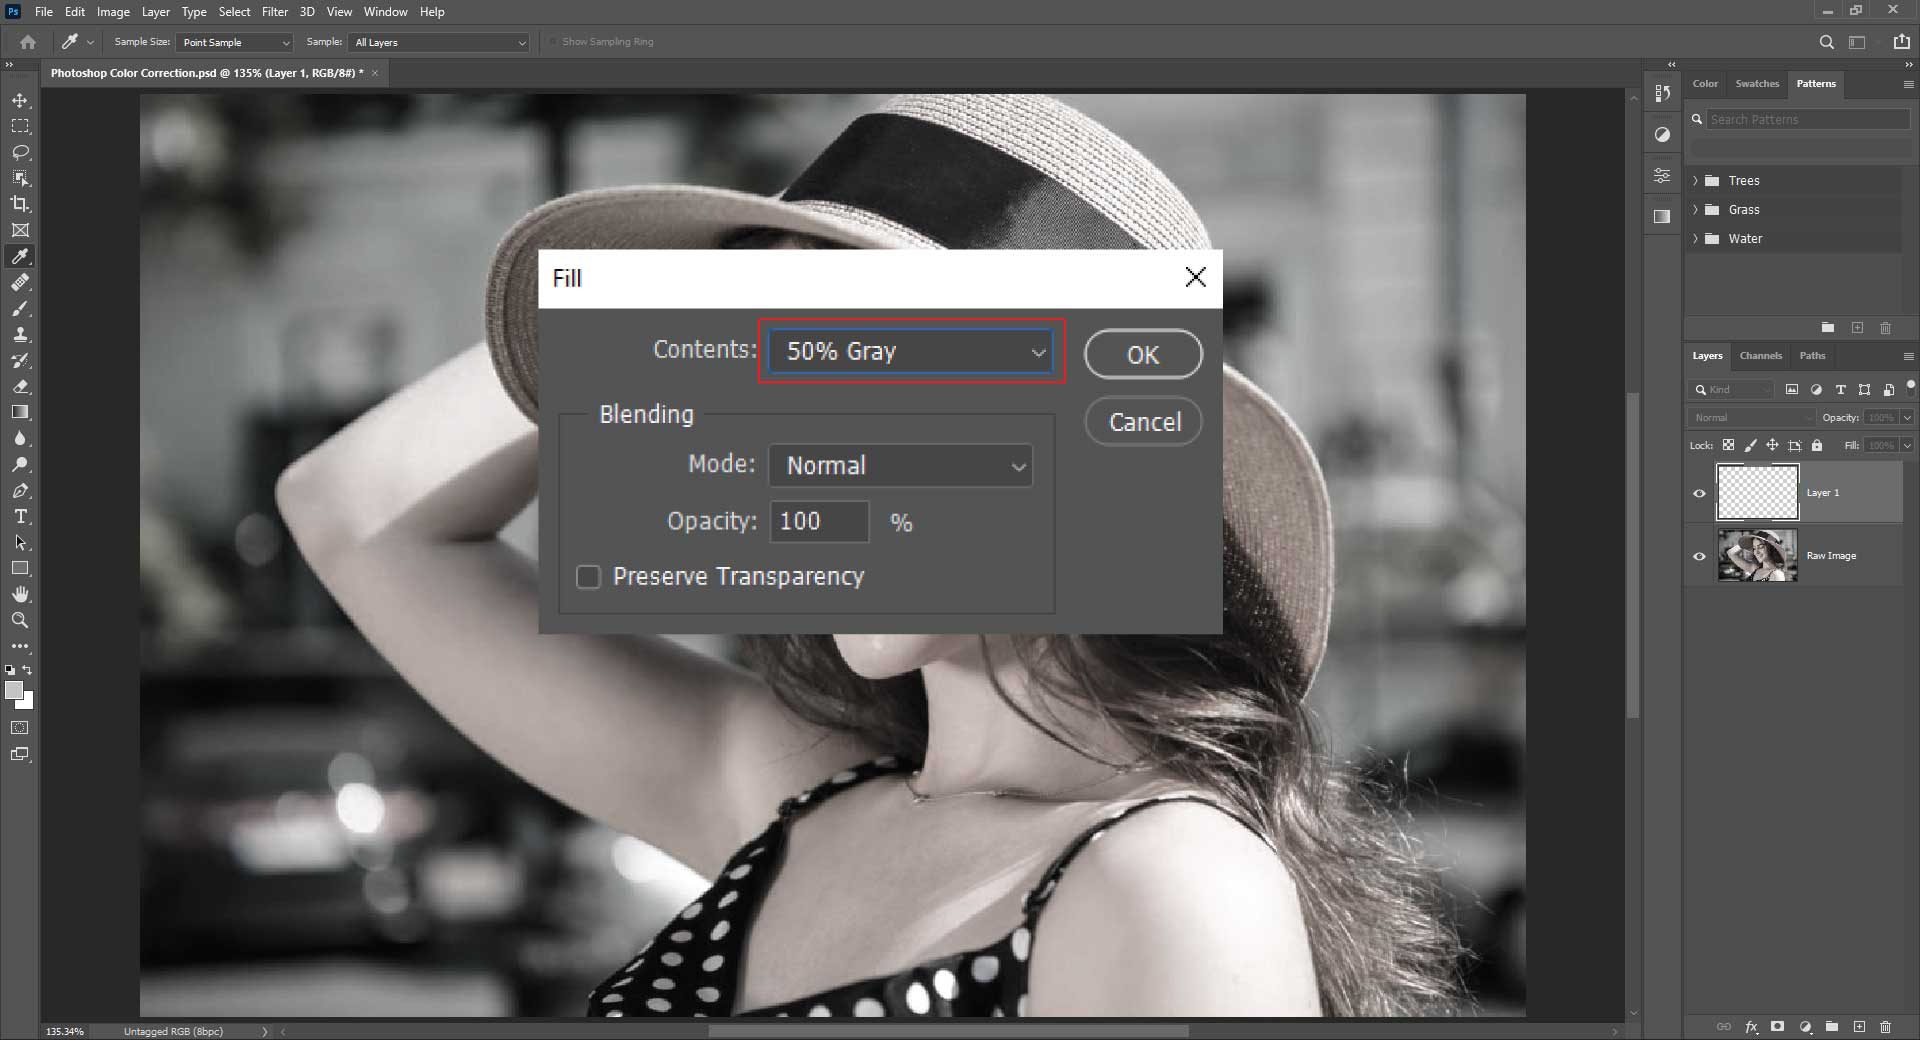
Now, choose ‘difference’ from the Blending Mode drop-down menu.
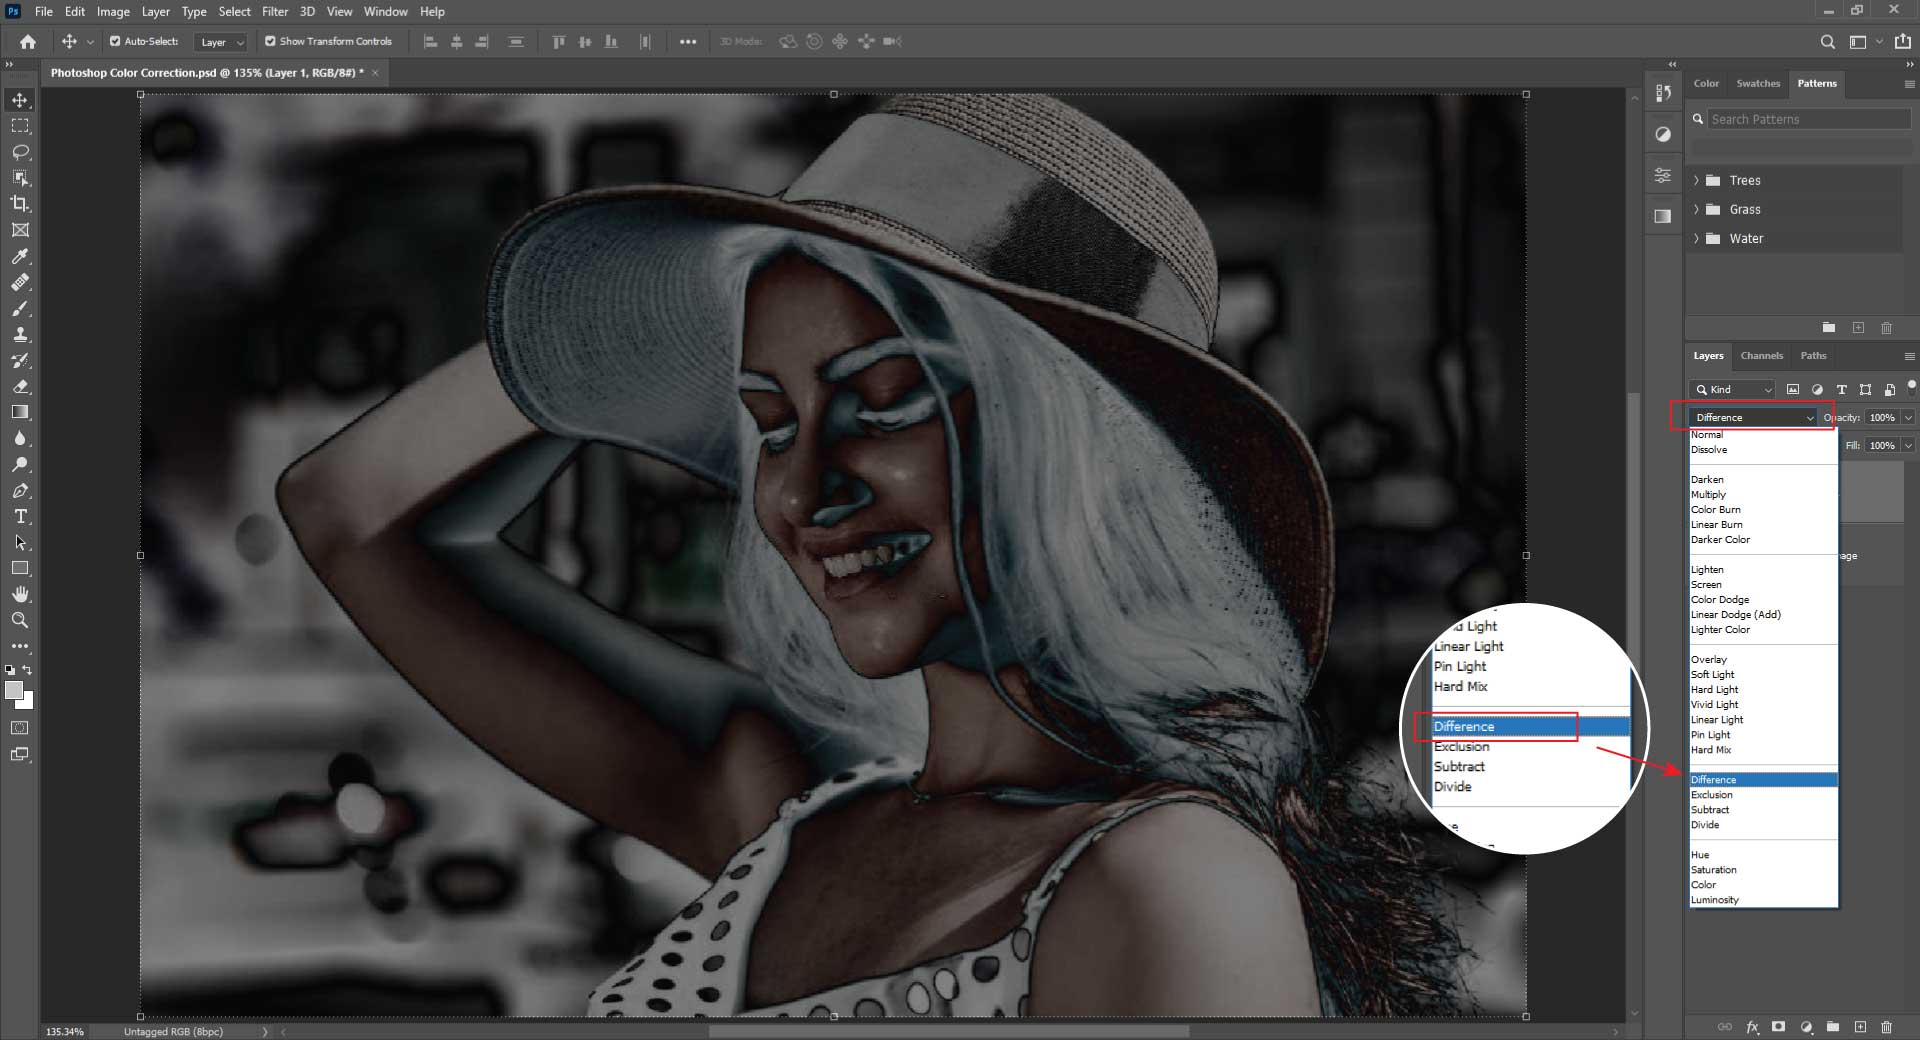
Step-3: Locate The Darkest Spot:
Select ‘Threshold’ from the ‘Adjustment’ Layer menu (right next to the Layer mask icon). There will be a diagram.
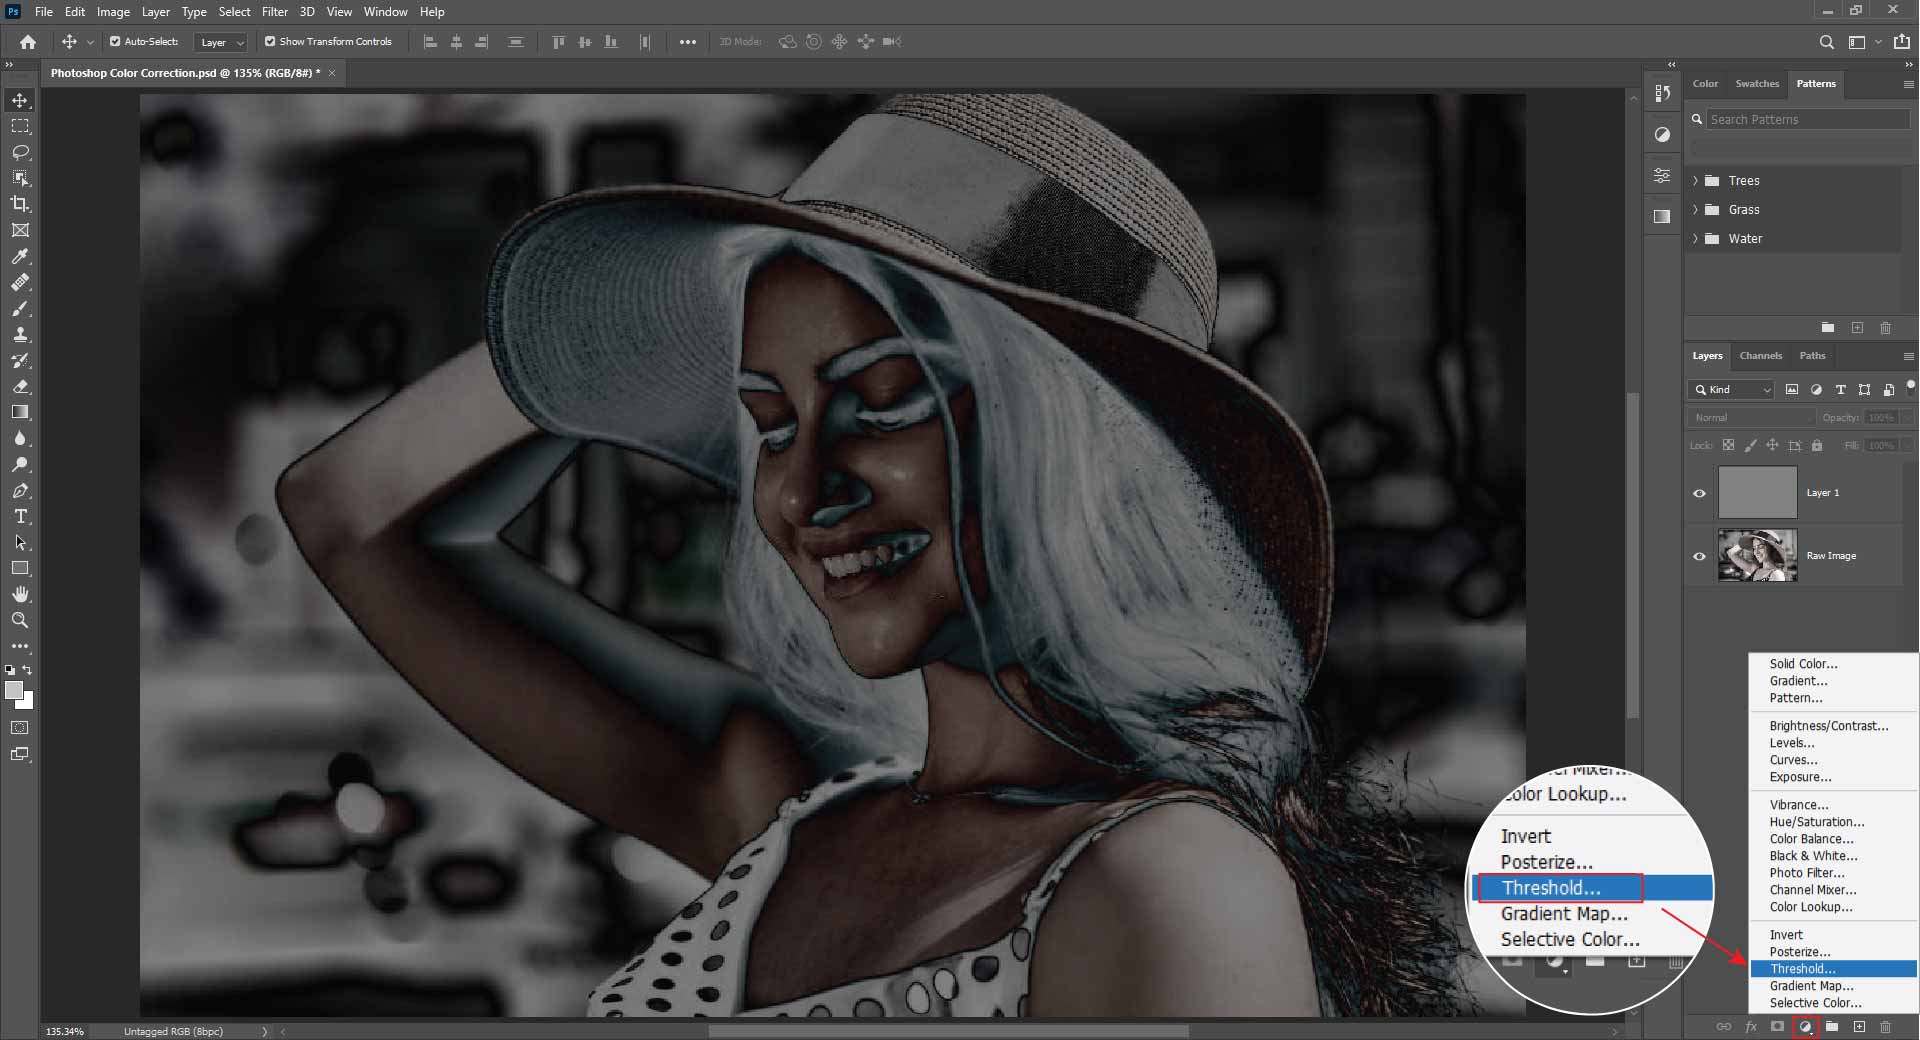
Right now, determine which section is the darkest by moving the slider.

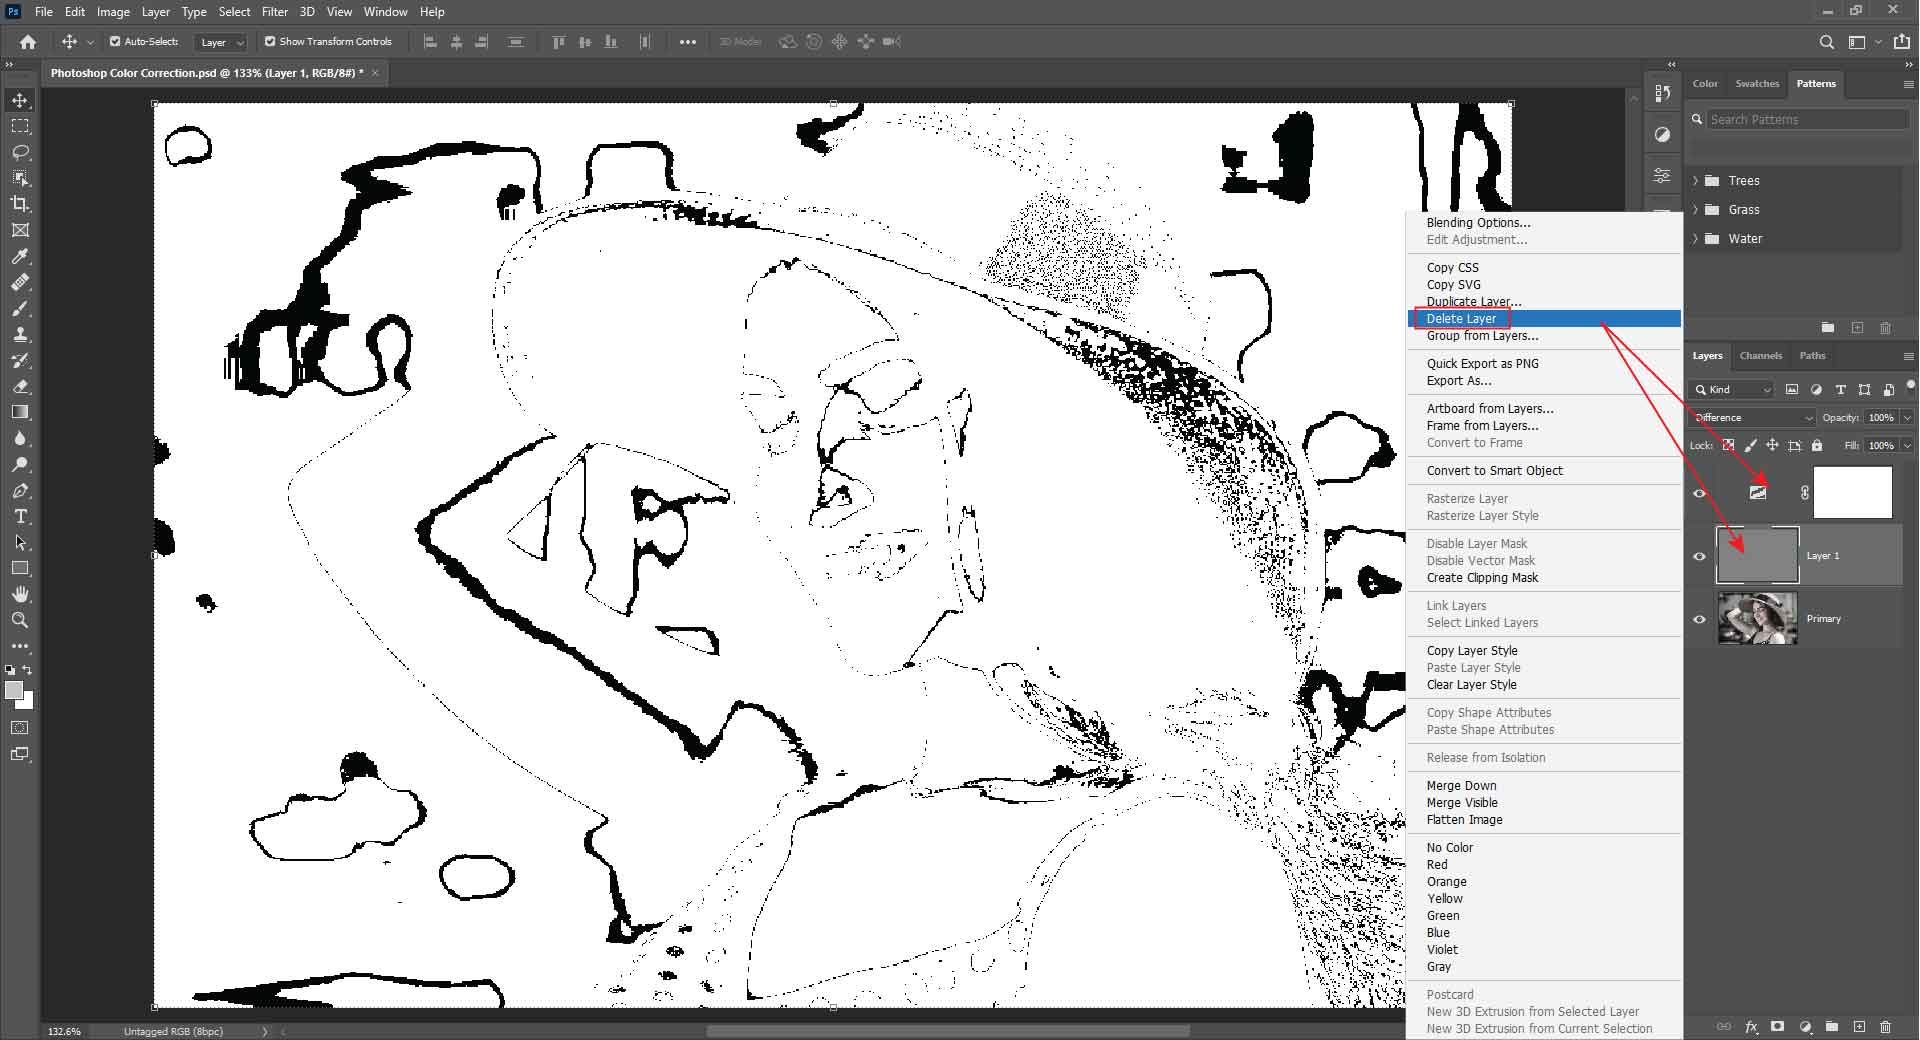
Step-4: Eliminate The Layers:
Delete all the remaining layers except for the primary layer. Select ‘Delete Layer’ from the context menu when you right-click on the Layer.
Step-5: Curves: Choose Curves from the ‘Adjustment’ Layer.
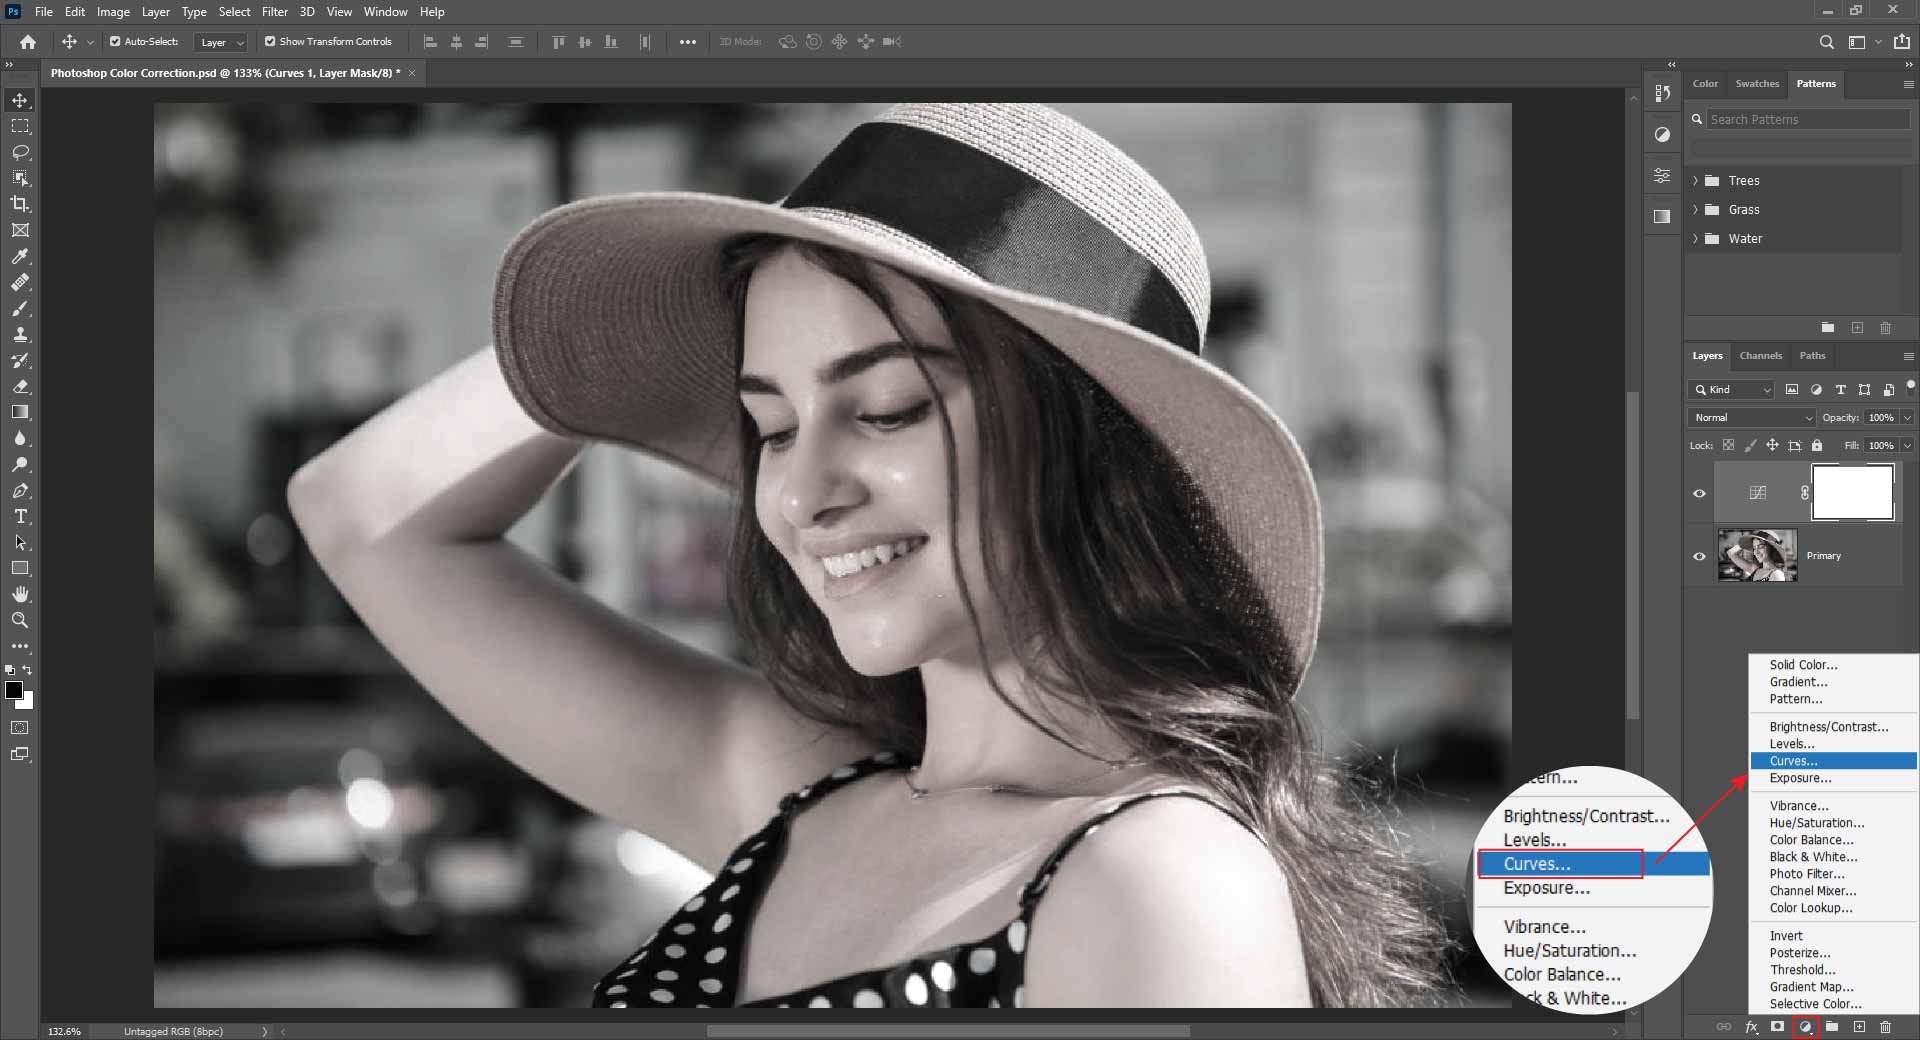
There are three Eye-droppers directly next to the curve, as you can see. Now choose the Gray point with the middle-eyedropper.
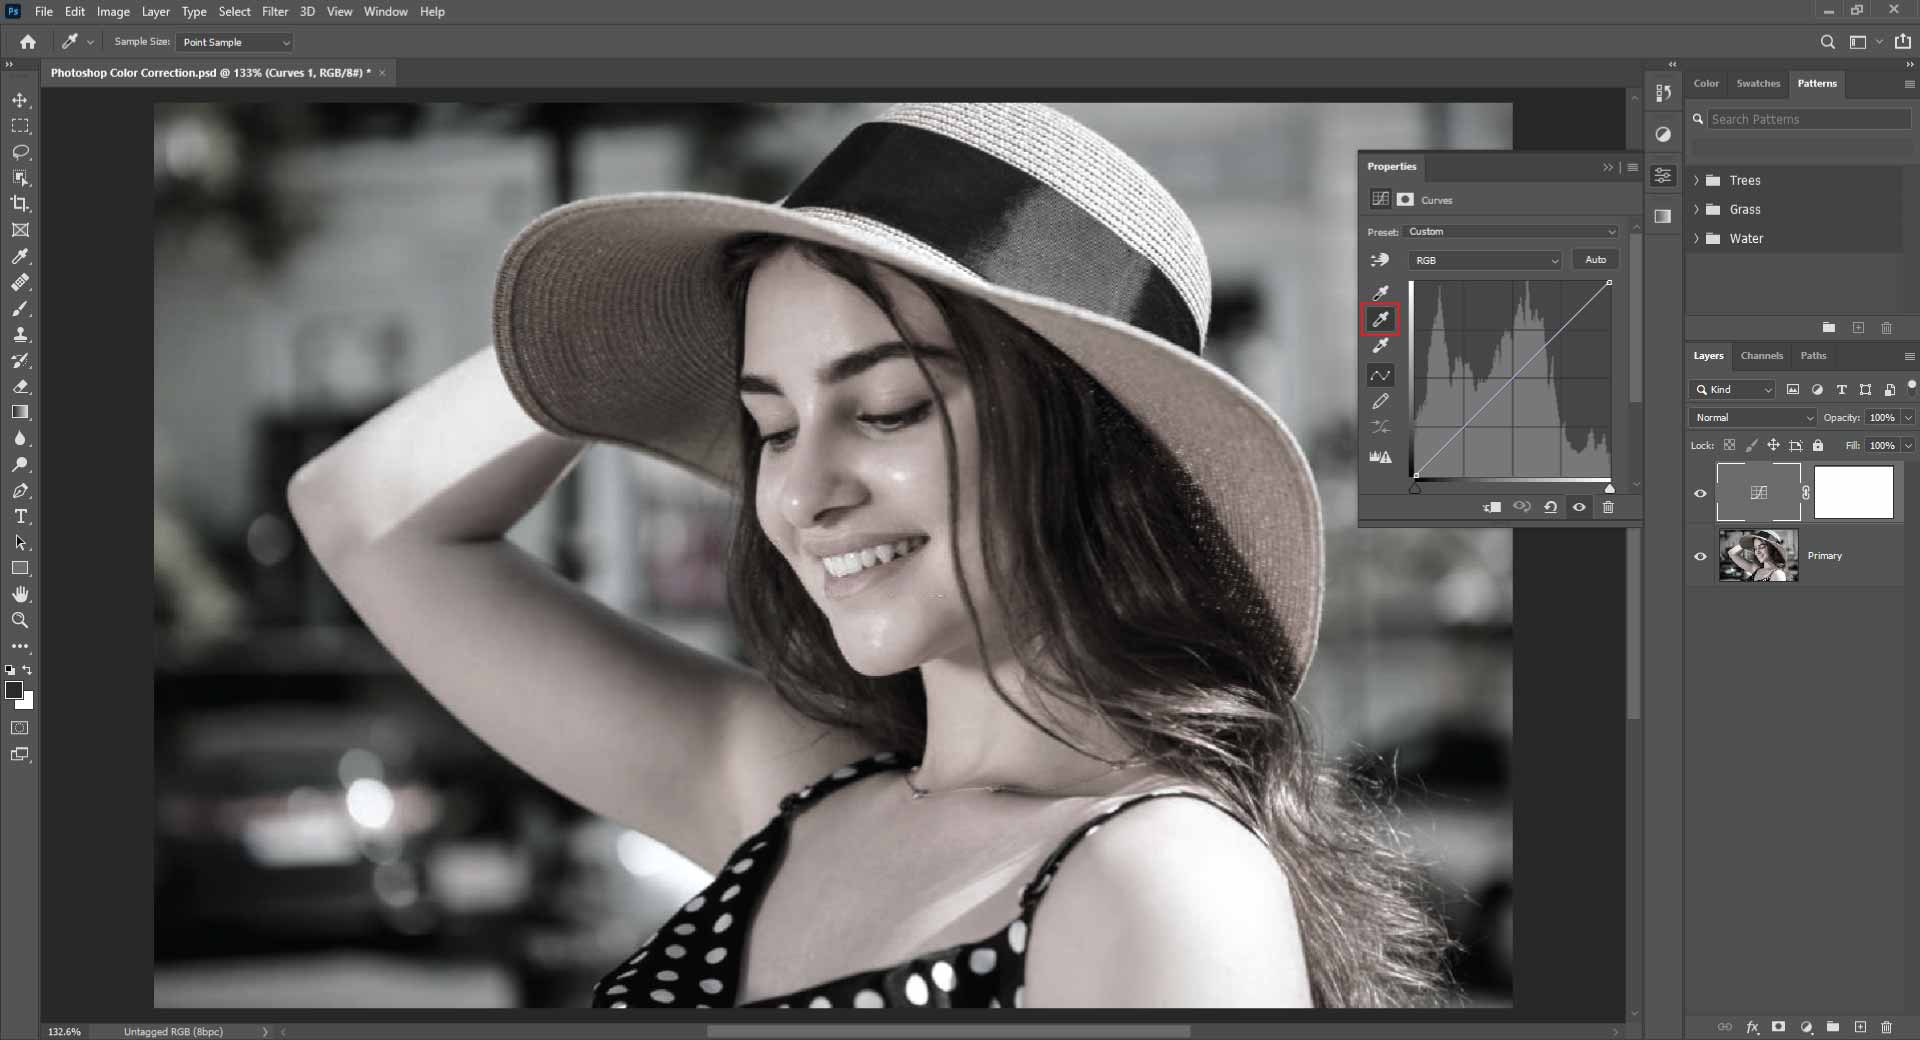
Step-6: Select The Darkest Spot You Discovered Previously.

It will fix the image’s color. Remember that, even though we’re focusing on the darkest part of the image, it could not work for all of them. In that case, experiment with some other aspects of the image. It’s determined by how you wish to view the image. So, try to achieve the desired color.
Step 7: Save Your Work:
To save the photograph, go to File and Save As.

Here is the final output with your desired color.

Method#2. Color Correction Using Color Balance:
There is another approach to correct color. That’s how the Color Balance feature works. To do so, you’ll need a rudimentary understanding of color. As a result, we’ll use complementary colors in this project.
If an image has a specific color cast (an excessive amount of one color), we’ll need to adjust the amount of the contrasting color. Look at the complementing colors first.
Cyan – Red
Magenta – Green
Yellow – Blue
Assume the image has a red cast. It has an enormous amount of red in it. As you know, the cyan color is the polar opposite of red. As a result, we’ll boost the cyan, which will reduce the red.
Let’s have a look at the procedure!
Step-1: Open The Photo File.
To open the file you wish to work on, go to ‘File’ from the top menu and select ‘Open.

Step-2: Make A Duplicate Layer.
Duplicate the Background Layer by right-clicking it and selecting Duplicate Layer—alternatively, press Ctrl+J on your keyboard.

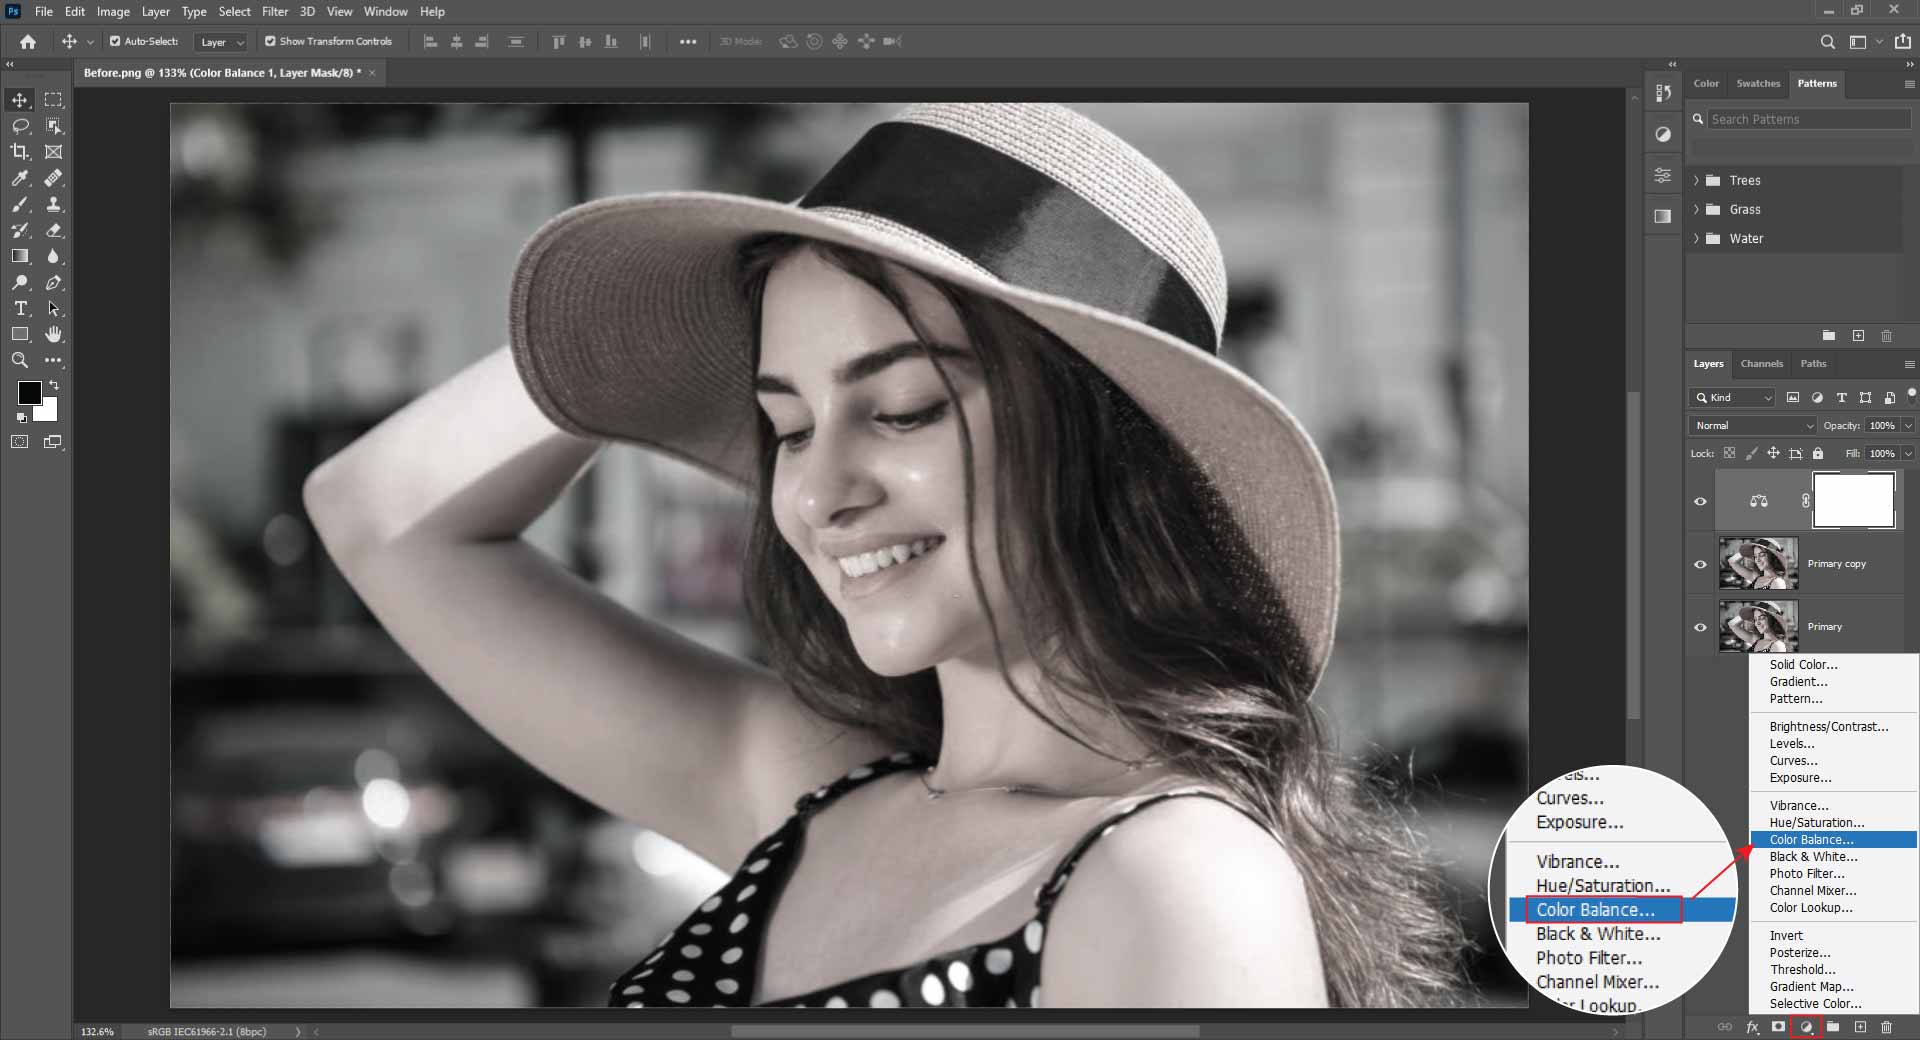
Step-3: Achieve Color Harmony.
Select Color Balance from the Adjustment Layer menu (right next to the Layer mask icon).
Step-4: Balancing The Slider.
Look at the photo below.
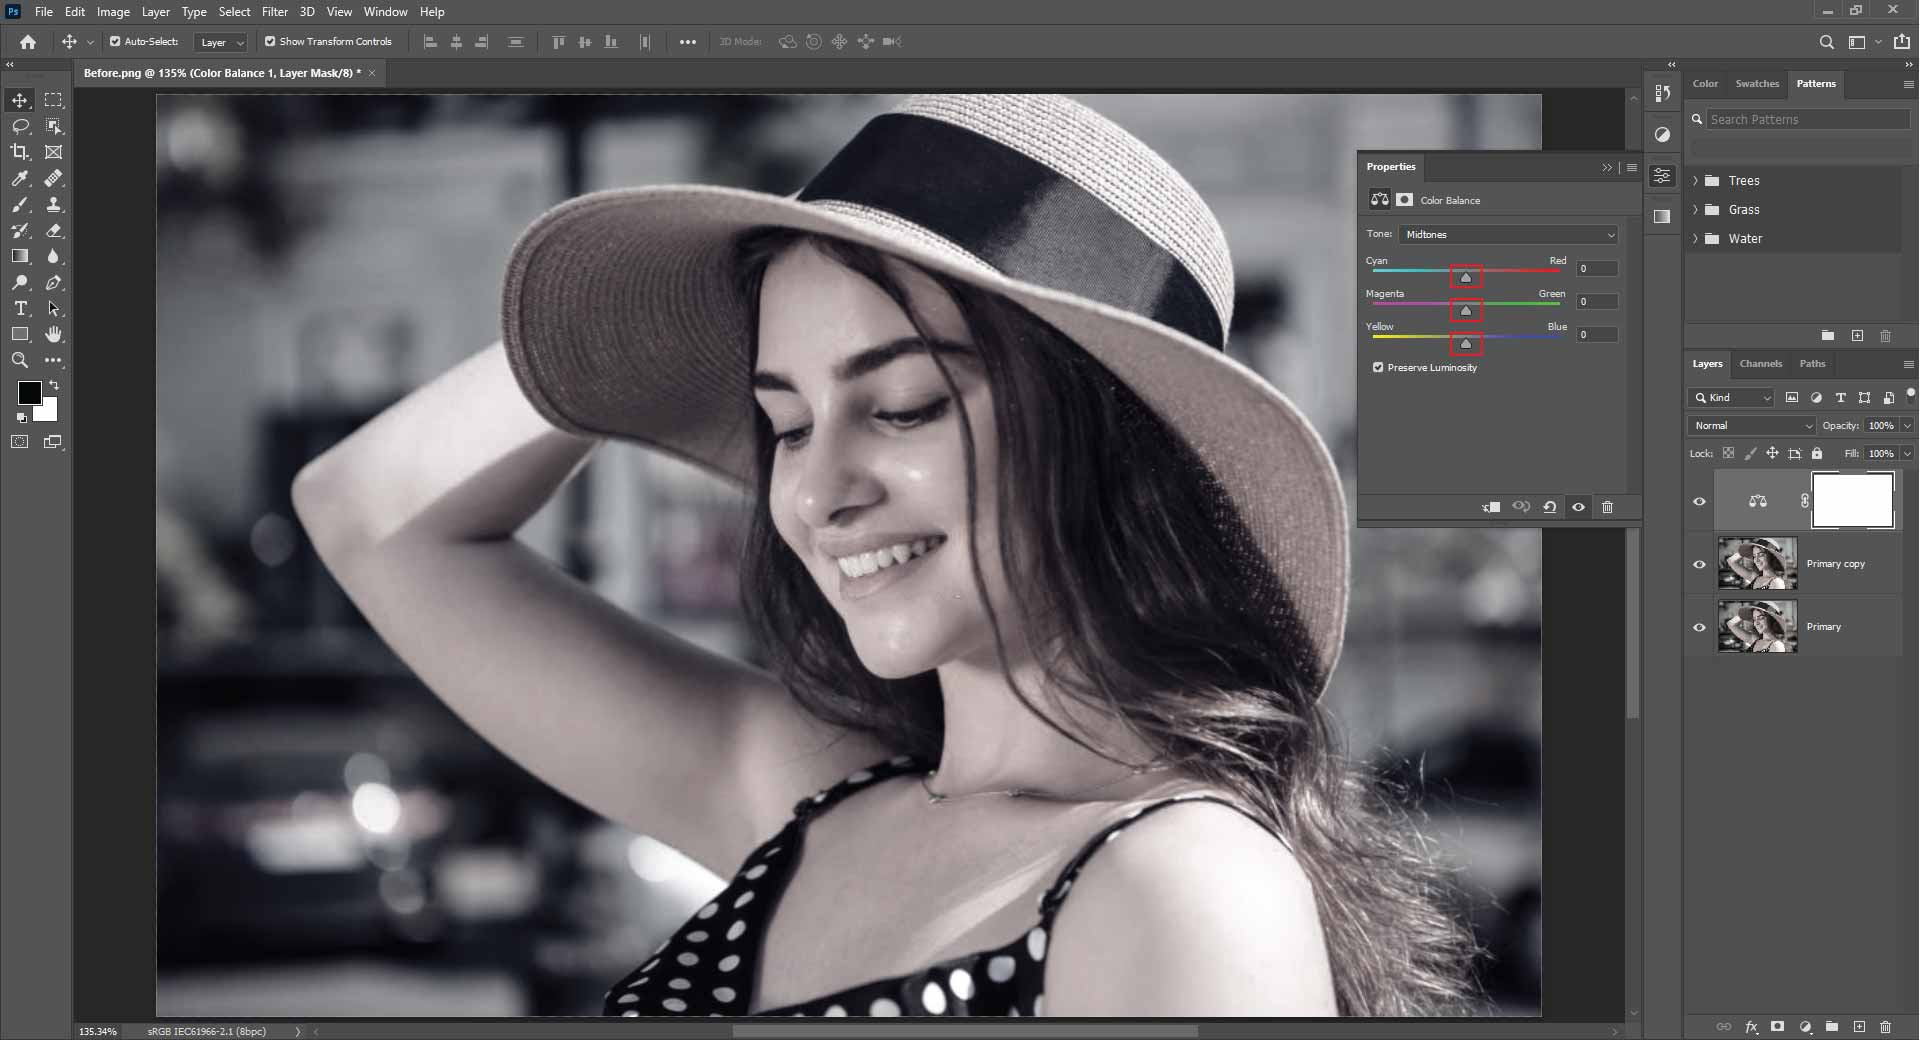
It’s obvious that it’s cast in magenta. As a result, adjust the slider to make the green color brighter. When you’re through, come to a halt.
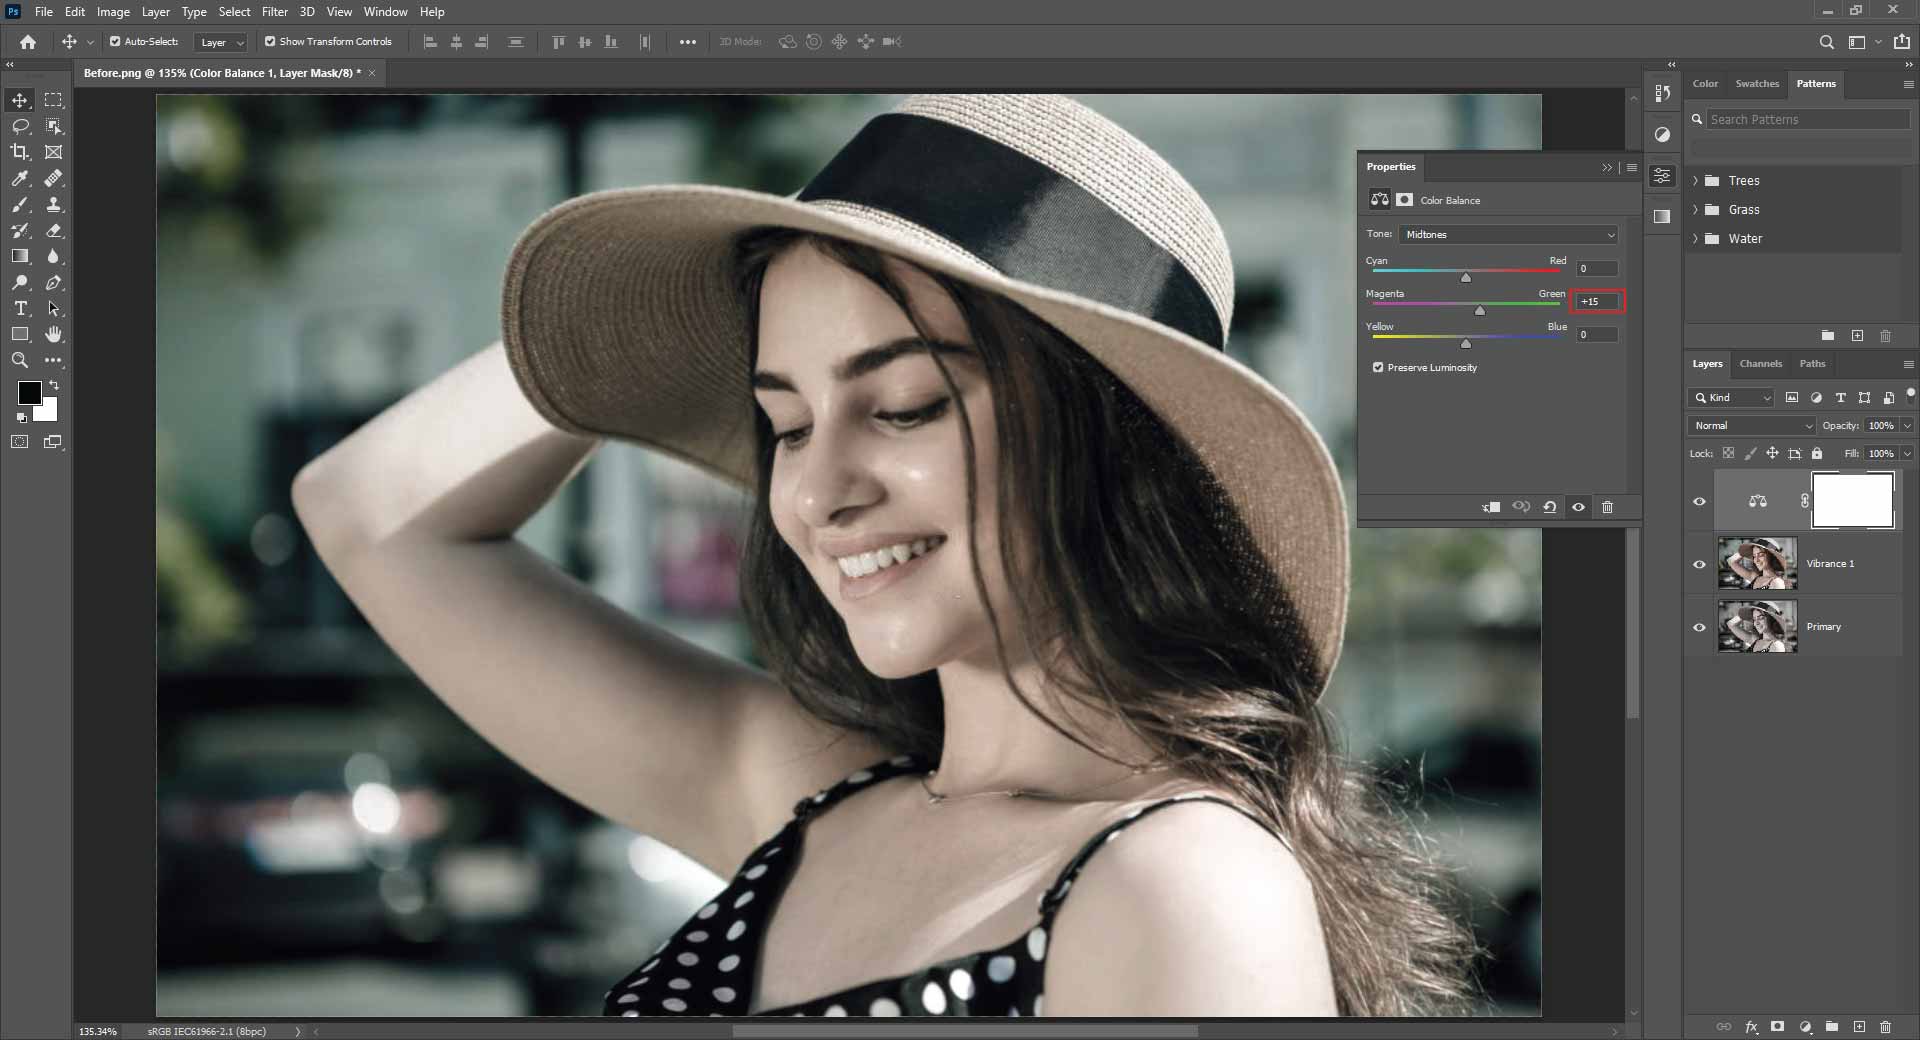
Now, there appears to be a yellow tint. As a result, we’ll also enhance the blue color.

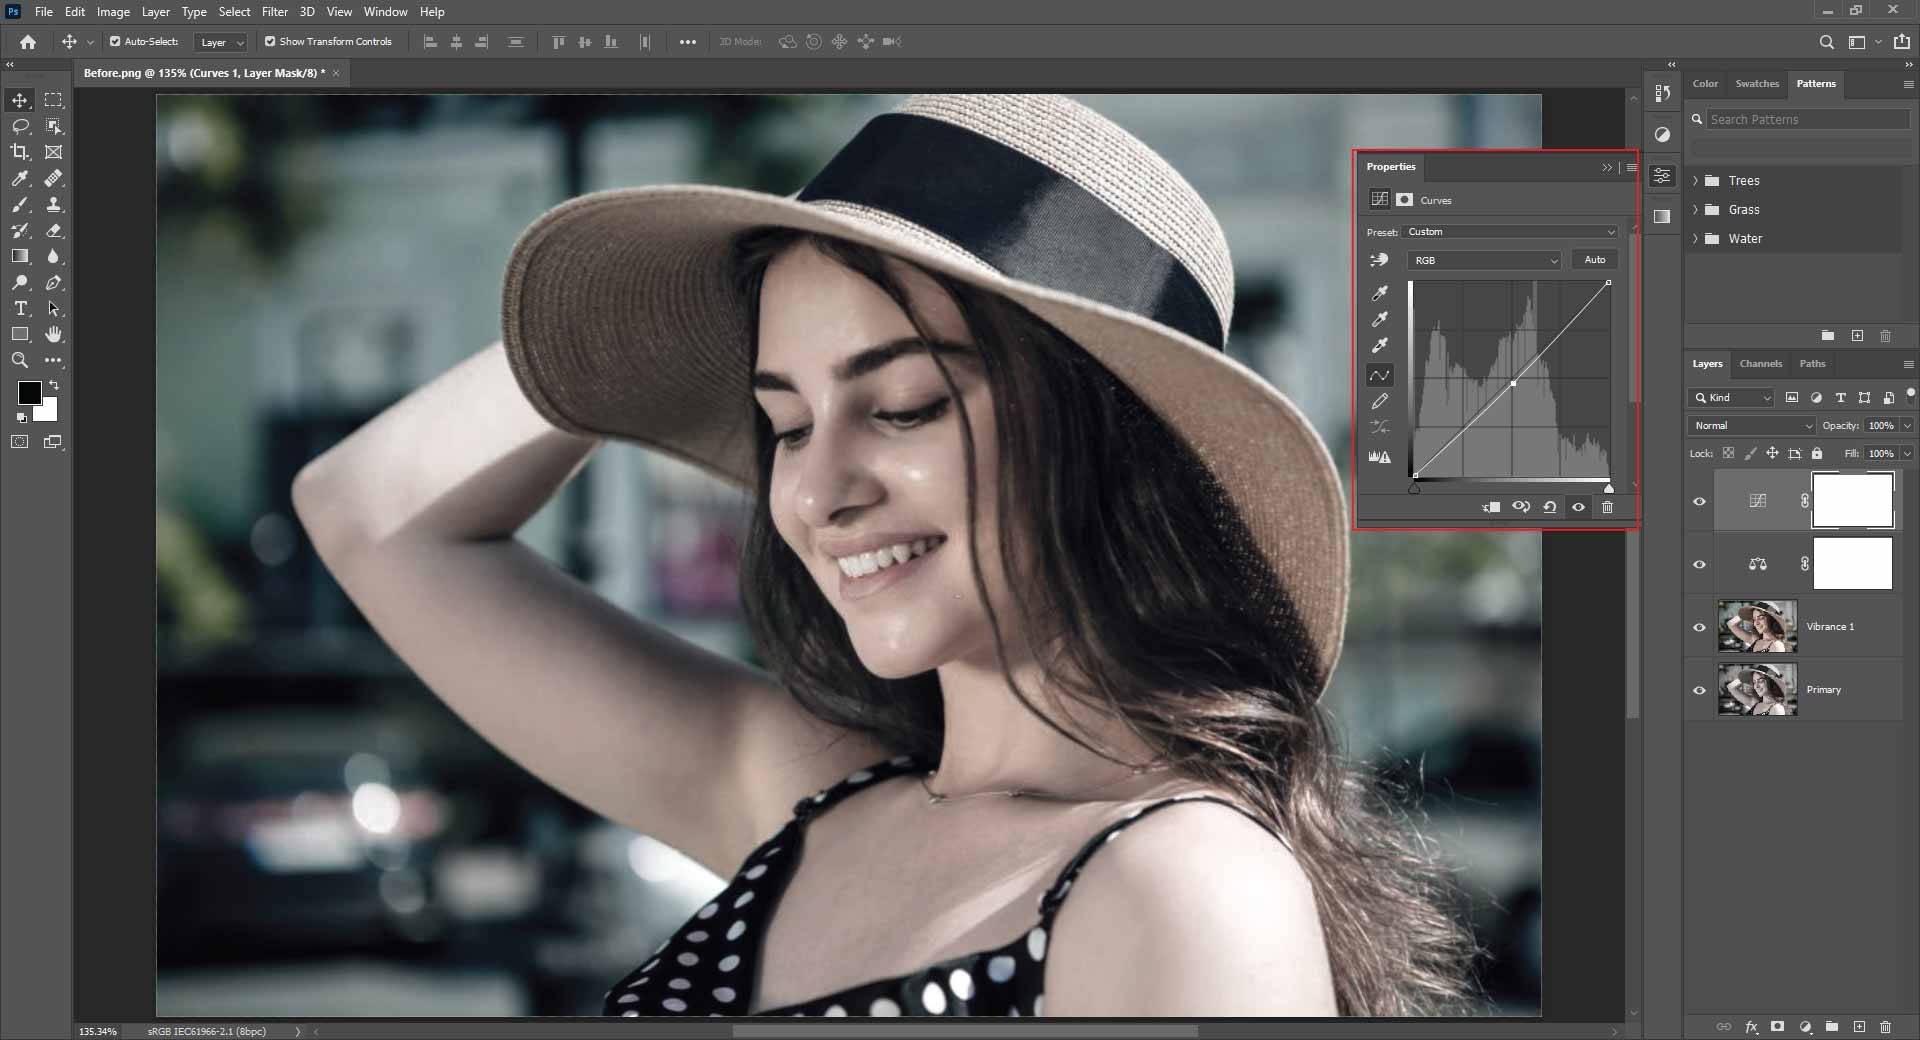
Step-5: Modify The Image’s Light.
You can use Curves to change the image’s illumination.
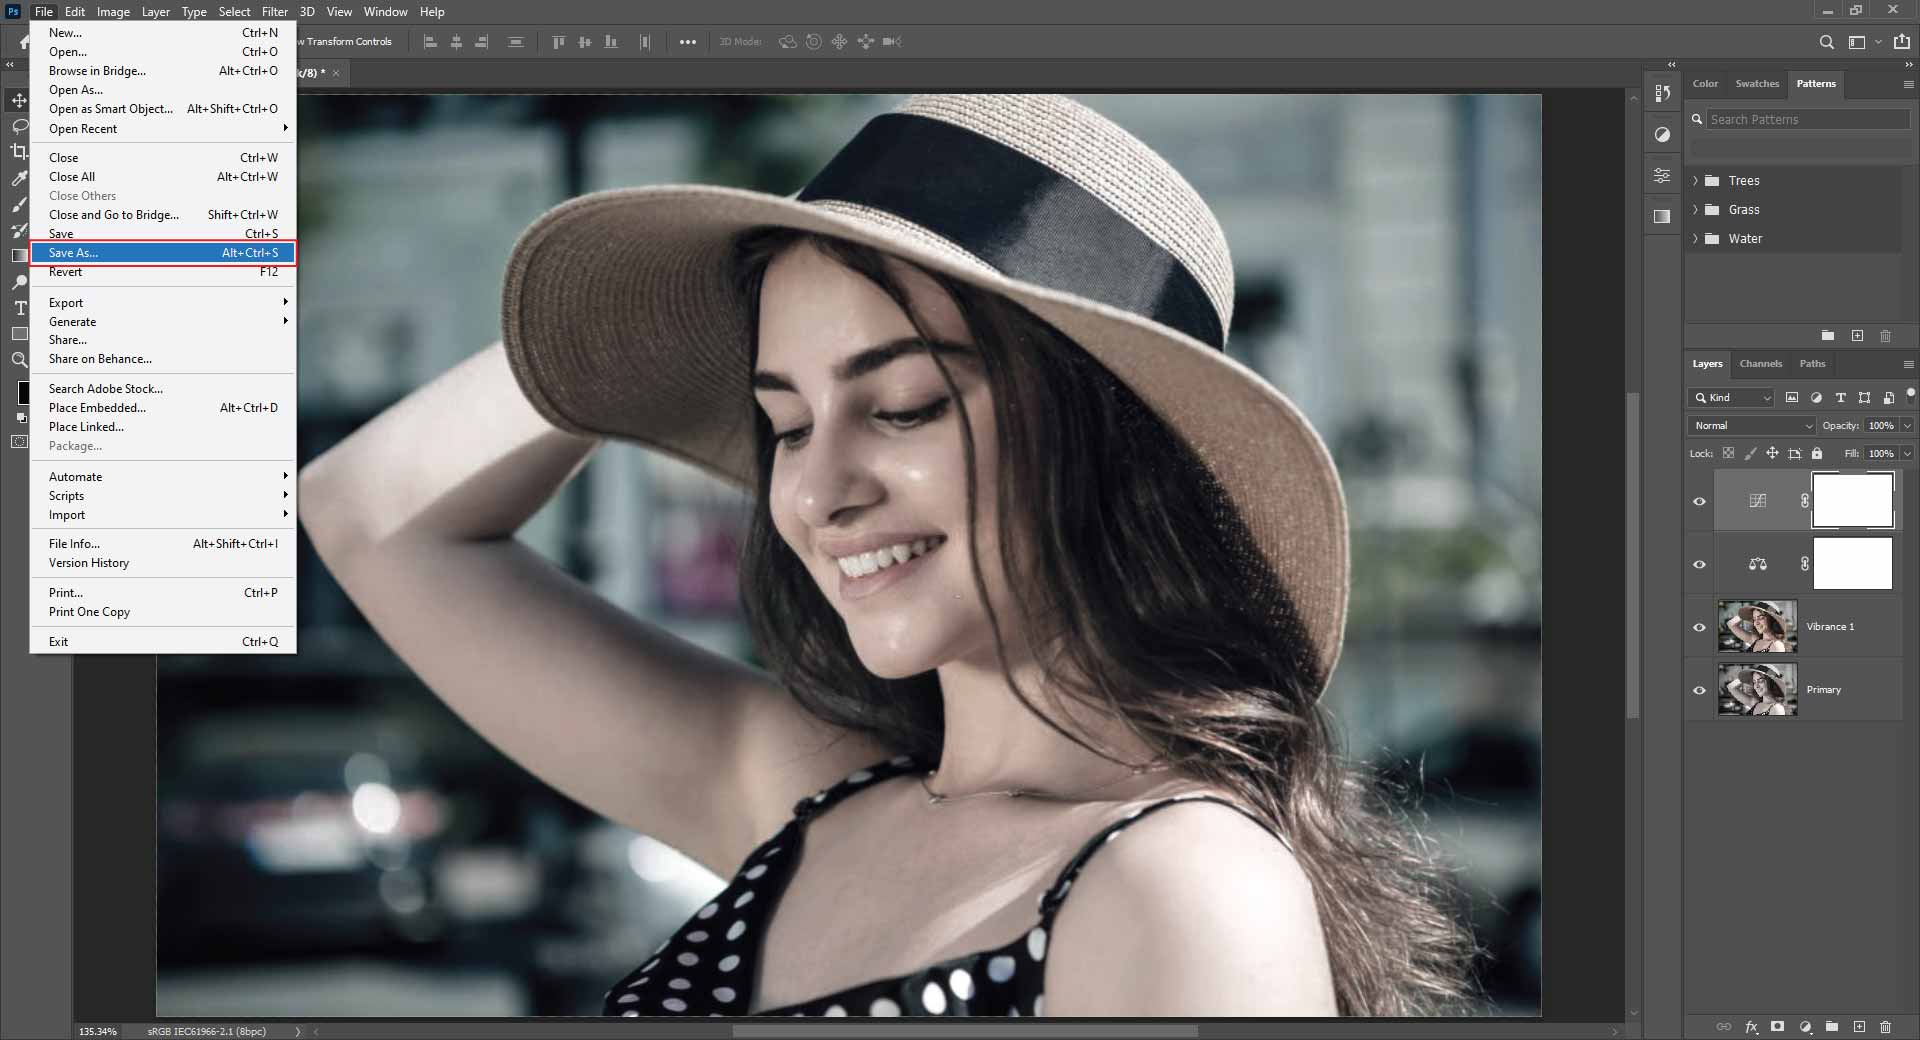
Step-6: Make A Backup.
To save the picture, go to File and Save As.
Final Thoughts: [Color Correction In Photoshop]
For any product photograph, photoshop image color correction is always necessary. Because the photograph does not depict the true color of the goods, it may puzzle clients after receiving it, resulting in a loss of confidence. So, to give your photograph the proper color tone, be as precise as possible.
Let us know whether you try our easiest two proven methods. If you are truly interested in knowing more about photoshop color-correcting tricks, knock us as soon as possible at any time.
Till Then, Happy Color Correction In Photoshop!! Be Cool!


