
When we are working with photo editing and looking for creative ways to showcase our vision, one of the ways to do this is to use Double Exposure in Photoshop. Photoshop’s vast library of tools makes this photo editing technique easy. When you view images using the double exposure effect, it may seem too daunting, and you might get too overwhelmed thinking as to how to go about creating such an artistic portrayal.
However, this blog will take you through the steps you can follow to create Photoshop double exposure in no time and start producing your artistic visions. It is more manageable than it may appear to be. So, sit back and relax and read through this blog to master this photo editing technique. Let us first start with understanding what double exposure is, and then we will move on to how to create one.
- Receive professional Portrait Retouching Services for about $0.50 per photo.
What is Double Exposure in Photoshop?
Double exposure, in simple terms, means overlapping two images, often giving this surrealistic effect that you can use in many different ways to showcase your vision. To capture this otherworldly feel for your images, you can do so while taking your photos with a camera and film. For a camera with film, capture your photo; without advancing the film, capture another photo. It effectively overlays two images giving the double exposure effect.
However, to have greater creative control over creating your double-exposed image, Photoshop can be a much more pleasant journey to get to the outcome you seek from your images. This process becomes relatively easy with the various image manipulation techniques and tools at your disposal. So, we will focus on how Photoshop can help us achieve surrealism in our images.
Step 1: Choose the Photos for Double Exposure in Photoshop
As beginners in this technique, we will start by finding two images we want to combine from stock royalty-free websites such as Unsplash or Pexels. It is always necessary to visualize what you want to double expose and choose the images accordingly.
However, it is advisable to always use portrait images with a neutral background without any distractions from other objects. The subject should have defined edges in a contrasting background to make it easier to select it for overlaying our second image.
Guide to Master Photoshop Color Replacement with these 3 Easy-to-Follow Techniques
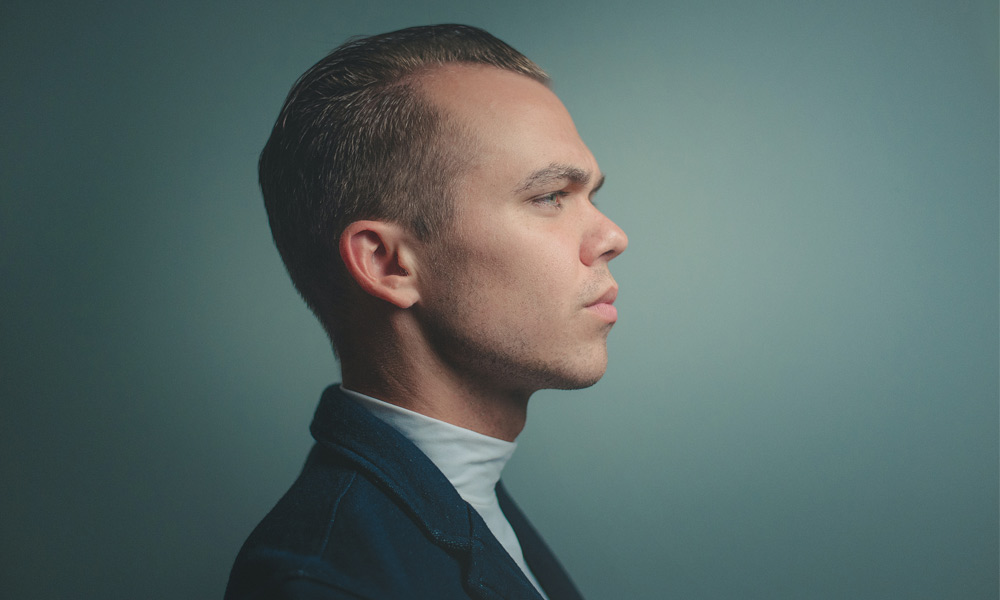
© Photo by Nick Kwan from Pexels
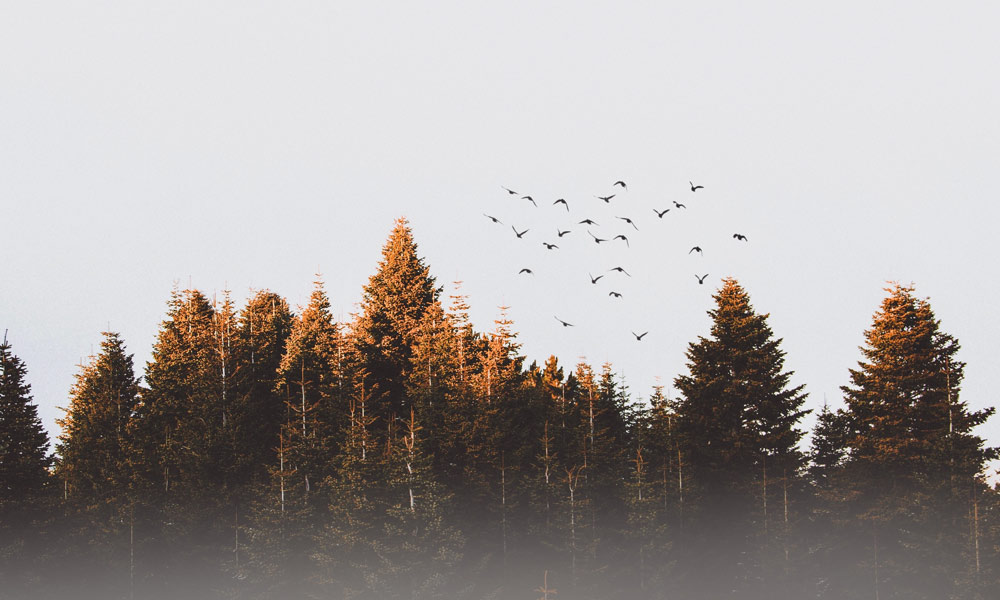
Next, for the second image, you will overlay on the portrait image; you can use images with buildings, trees, forests, clouds, or mountains—that choice is entirely up to the vision you want to showcase with your double-exposed image. For this double-exposure tutorial, we will use a pine forest image.
- Find out more about How to Deselect in Photoshop – The Ultimate Guide
Step 2: Isolating the Subject for Double Exposure in Photoshop
Now, after you have selected your images, the next step, albeit an easy one, is necessary for achieving our Photoshop double exposure effect. You will have to isolate the subject from its background and use layer masking to overlay the second image within the bounds of the double-exposure portrait. So, how are we going to come about achieving this step?
Open your image in the Photoshop workspace. It is an important step to realize that you choose an image with a contrasting background so you can use one of the Photoshop Selection Tools to isolate your subject. To learn more about using the various selection tools, you can read our blog, “How to Cut Out an Image in Photoshop.”
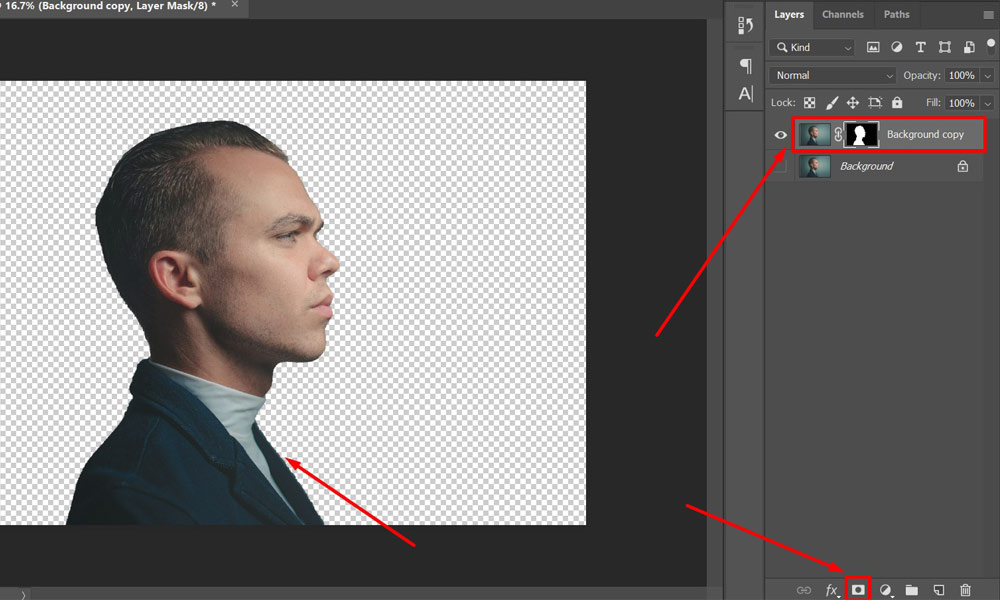
We will use the subject selection option for isolating our portrait for this double-exposure tutorial. When you click on any selection tool on the left toolbar, you will see the “Select Subject” button.
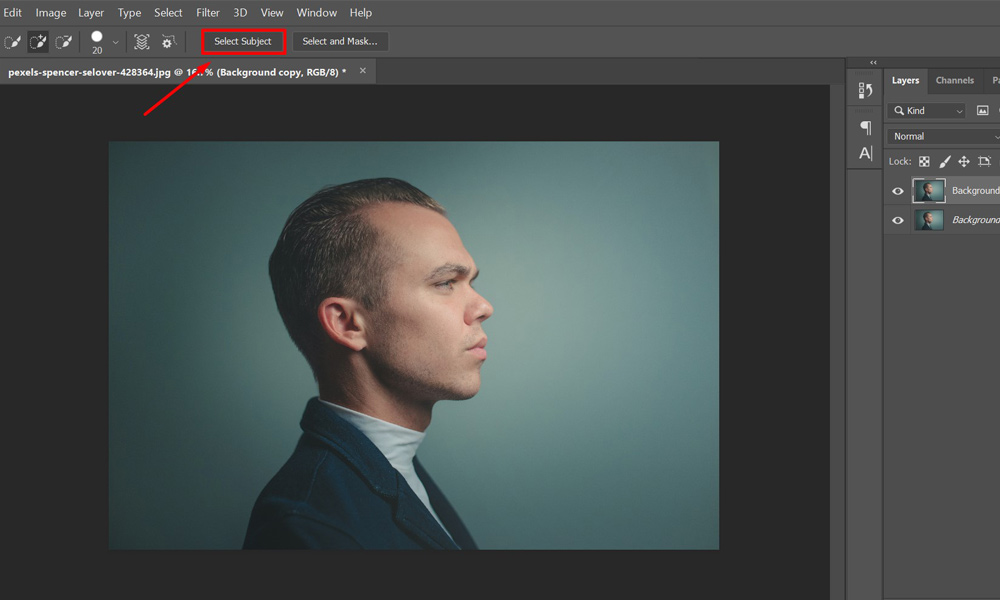
Press that button and Photoshop will automatically identify the edges of the subject from its background and create a selection for you. You will have to mask this selection to overlay your second image.
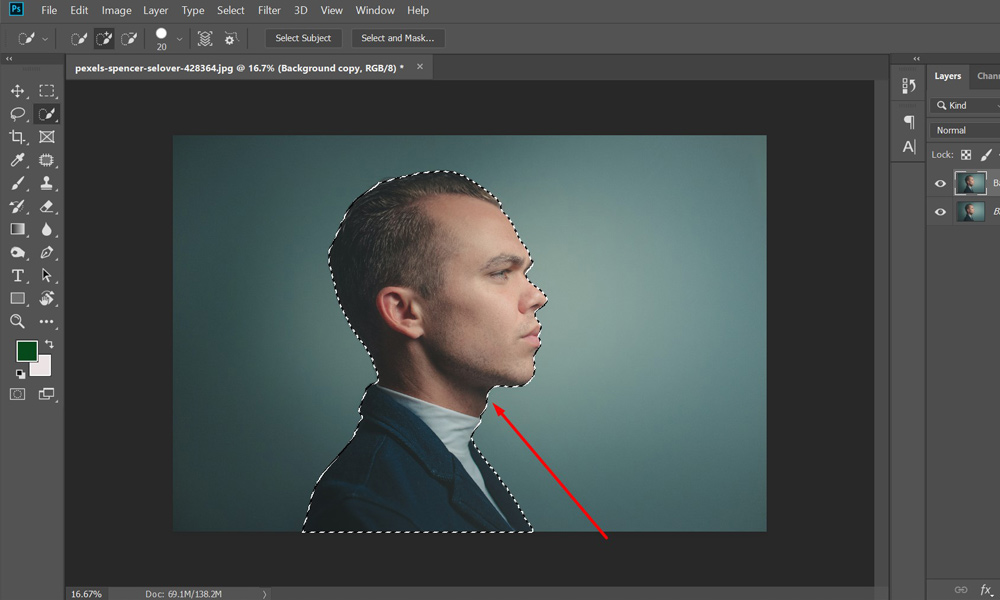
Once you have selected your subject, simply go to the “Add a layer mask” button at the bottom of the Layer Panel and create a layer mask. You can identify this as there will be a black-and-white thumbnail on the image layer. The white area of the mask shows the visible area of the image, while the black area represents the hidden part.
- Check out How to Photoshop Someone out of a Picture | The Easy Method
Step 3: Place the Second Image for Double Exposure in Photoshop
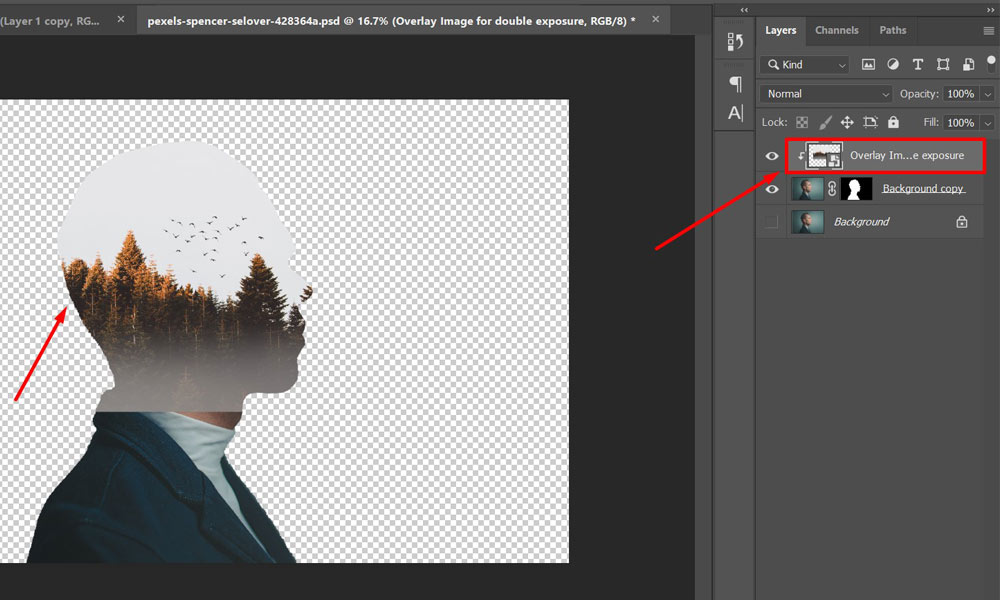
Now, it is time to bring the second image you will use to get the Photoshop double exposure effect. One way to do this is to drag the file and drop the second image onto your subject. Or you can use the File > Place Embedded option and select the image you want to place from the folder you stored the image in.
- View more A Complete Tutorial for How to Resize an Image in Photoshop

Once you have successfully brought in the second image, you have to use a clipping mask to confine the image within the bounds of the subject. You can do this by holding down the “Alt” key on Windows or the “Option” key on macOS and hovering your cursor over the line separating the two image layers in the Layers Panel. An icon with a square and arrow down will appear. You can click your left mouse button to clip the second image effectively.
- Learn more about How Easily You Can Make A Background Transparent in Photoshop
Now that your image is clipped, you can use “Ctrl + T” on Windows or “Cmd + T” on macOS to resize and adjust the image according to how you envision your double exposure portrait. You can even move your picture around within the confines of the subject as your image is clipped.
Step 4: Bring Surrealism to the Double Exposure Portrait
We have effectively done the basics of creating double exposure in Photoshop. However, to bring the dreamy, otherwordly look to our double-exposed image, we will have to take some additional steps to give it a look that is pleasing to the eyes while being surreal.
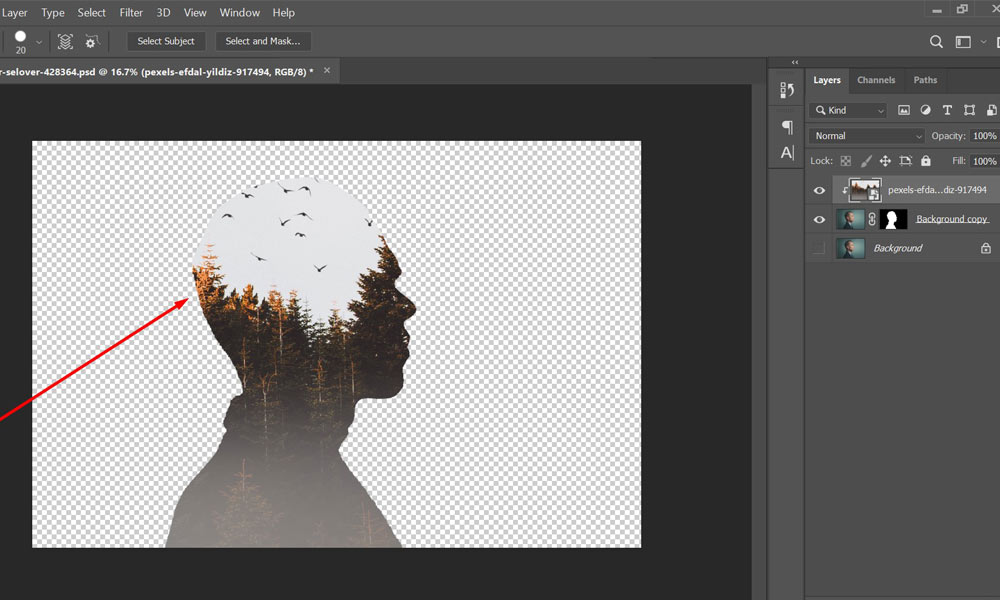
For our double exposure photo, you can see that there are birds flying away into the horizon. We have adjusted the second image in such a way that it is placed near the head of our portraits, as though they are coming out of it. However, it is not complete there. To complete the look that the birds are flying off into the distance, the background of the portrait must match that of the sky in the second image.
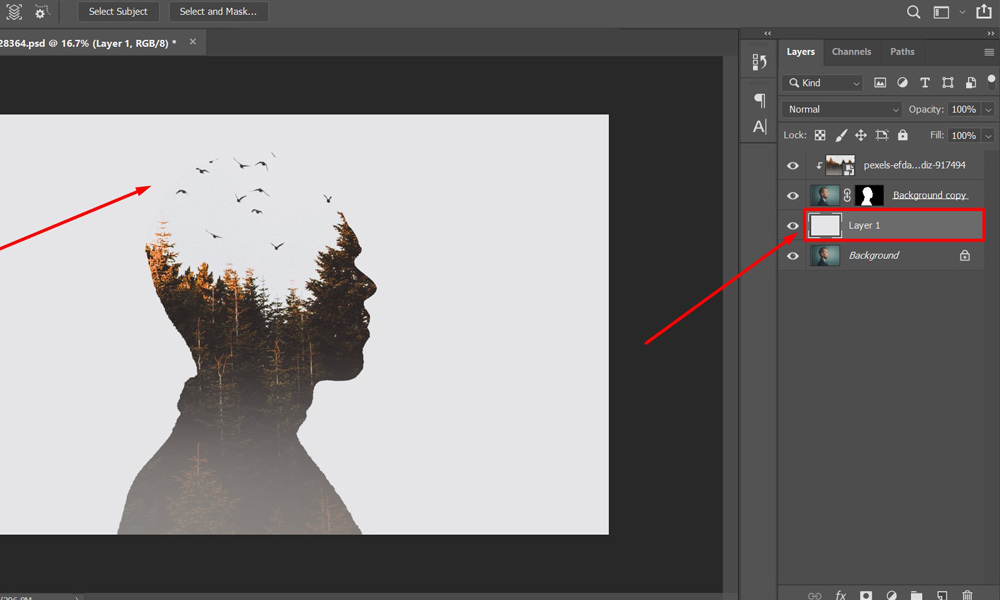
To achieve this, place an empty layer below our portrait image layer and you an idea dropped tool to pick the color of the sky from the second image. You must have this color in the foreground, and then you can use “Shift + Backspace” for both Windows and macOS to bring up the Fill toolbox. From the drop-down menu in the toolbox, you will have to select “Foreground Color”. It will immediately change the look of your double-exposure portrait and give it the surreal look that you are aiming for.
- Read more about How To Do Color Correction In Photoshop. [Best 2 Proven Methods]
Step 5: Blending for Enhancing Surrealism for Double Exposure in Photoshop
Even at this stage of our process, it seems like the double exposure portrait is still incomplete. What can we do now then? We can use the layer blending option to see how they react with our subject, background, and every element involved in our double exposure effect.
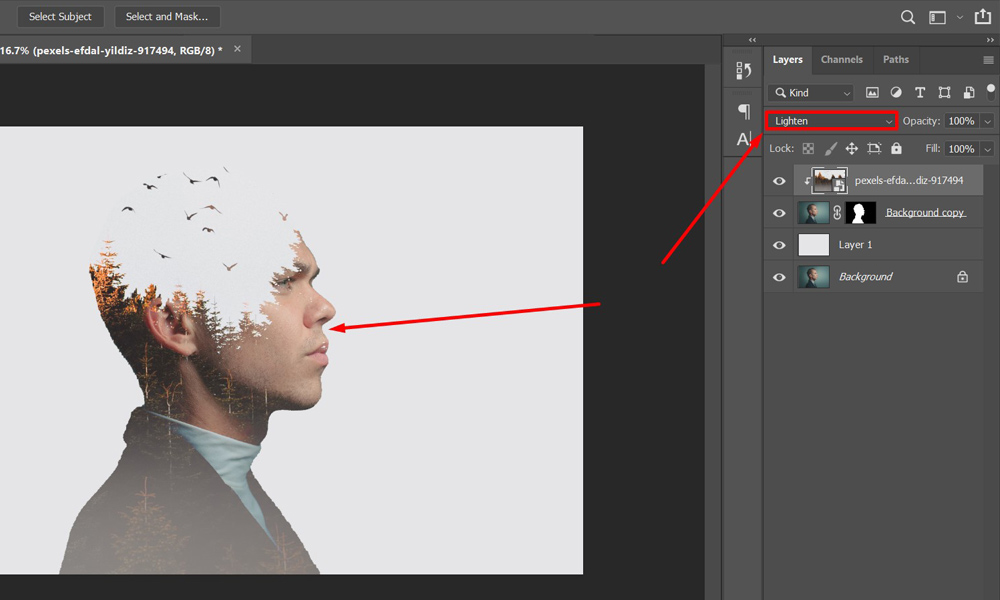
For most Photoshop double exposure having the face slightly visible conveys more surrealism to the image. Thus, we will use the “Lighten” blending mode from the Layers Panel on the second image to achieve this. Once you have used this blending mode, you can see the subject’s face is exposed.
Now, you might be wondering why using the “Lighten” blending mode made it so that the face is exposed. This blending mode works by comparing the base and blend colors and displays the lightest of the colors involved.
- Check out How To Edit Waterfall Photos.
Step 6: Fine Tuning the Double Exposure Portrait
You can essentially end this double exposure tutorial at step 5. You will still have successfully created a double exposure in Photoshop. However, we want to fine-tune it further to give it that extra touch to make it stand out.
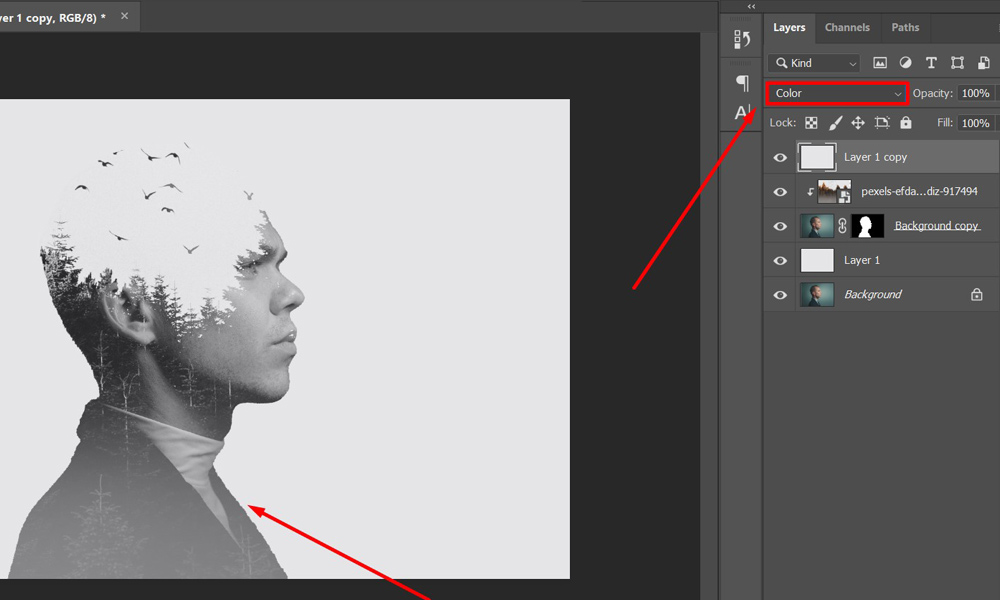
To do this fine-tuning, we first copied the layer with the fill color and placed it as the top layer. It was initially done to see if the double-exposure image would look better in black and white. The “Color” blending mode is used for this purpose. It would be blending the color of this layer with the layers below it, effectively giving in that grayscale look.
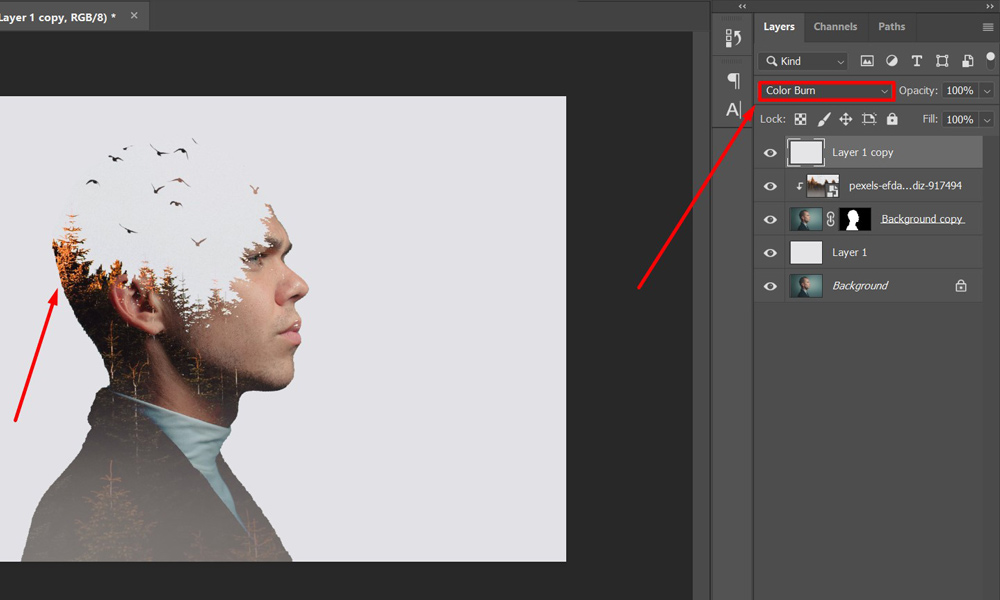
However, we opted against this option and blended the copied fill layer with the “Color Burn” blending mode. It boosted the contrast of the trees in the double-exposed image. It helped with defining surrealism further in the picture.
- Find out more How to Remove Watermark from Photo: A beginner’s friendly Guideline
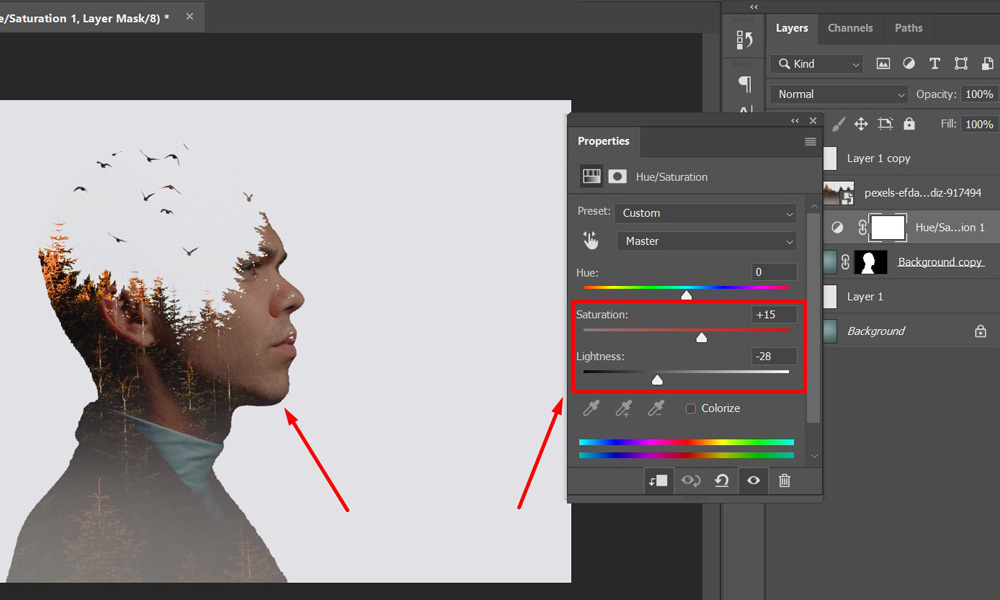
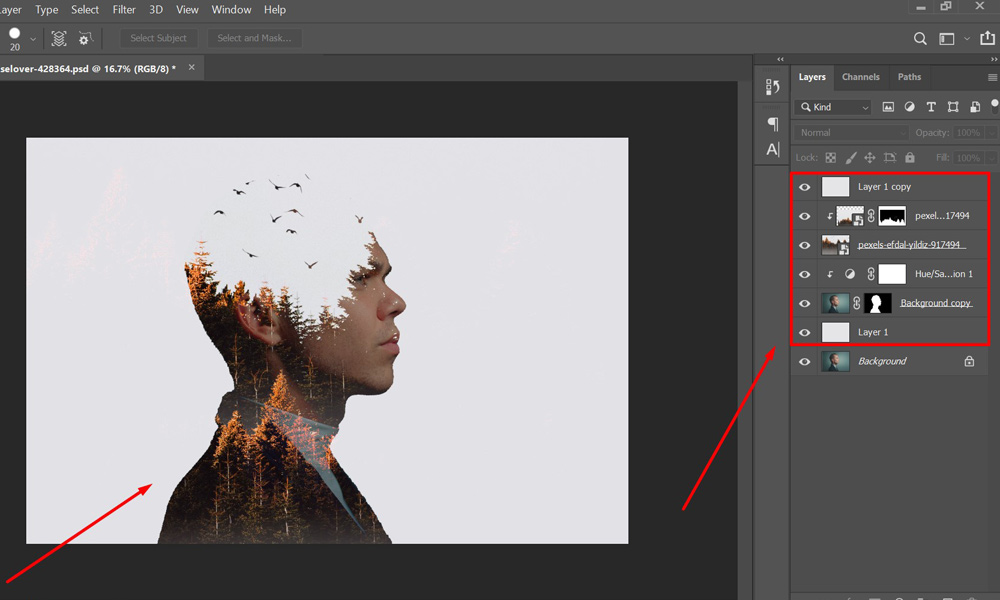
Furthermore, we did not stop at this point and tried other techniques to enhance the image further. We used Hue/Saturation on the first image layer as the face appeared too dull for our liking. So, we moved the slider around in the Hue/Saturation toolbox until we found something we liked for our image.
Lastly, we weren’t satisfied with how the trees appeared at the bottom of the image, so we got the second image again, removed the sky using the Magic Wand Tool, and clipped and adjusted the image to cover the area we weren’t satisfied with. However, the trees seemed a little out of place. As such, after trying a few things, we decided to remove the clipping of the original second image layer. The image stayed within the subject’s bound because of using the “Lighten” blending mode. Thus, giving us the image we were looking for.
Receive professional Image Background Removal Service for about $0.50 per photo.
Conclusion
So, here we are after successfully creating a double-exposure portrait. With our photo, you can see that person is looking into the distance observing while being deep in thought. This point of view is brought into surrealism by showing the bird flying away into the horizon representing the observation of something deep. Or the feeling of longing for something. One of the many effects of double exposure is that everyone can have their own interpretation of the image.
Now, let us wrap up this blog here. If you have come this far, you truly want to master this fantastic method of double exposure in Photoshop. The steps to follow in this double exposure tutorial are straightforward. Thus, with some practice, you can excel in making double-exposure photos in no time. So, start practicing and create some beautiful works of art!
Read Our Latest Articles-
- Maternity Photoshoot | Pregnancy Photoshoot Poses Ideas to Capture Love
- How To Make Photos Pop In Lightroom? [A Step-By-Step Tutorial]
- A Complete Guide on Photoshop Liquify Tool You Must Know
- Digital Image Manipulation: Everything You Need To Know For Growing Your E-Store


