
My love for all the filters, brushes, and panels in Adobe Lightroom is equal to my love for my family members. The main focal point is to make stunning images that will reflect a positive impression on your website. Hence, it’ll be best to learn how to make photos pop in Lightroom swiftly to get the optimum outputs.
This blog tutorial will show you how I started my post-production procedure for almost all of my captured images. With only a few exceptions to make photos pop, I usually do 95% of my post-processing tasks in Adobe Lightroom.
Relevant Content: Unique 19 Product Photography Props For 2025
How To Make Photos Pop In Lightroom
Before starting, I must admit that I am not a master of post-production. Plus, do I know Lightroom inside and outside, nor do I know Adobe Photoshop’s ins and outs? But as I’ve already discovered I’m pretty sure that you don’t need to be a master to generate your unprocessed photos alive.
Therefore, an exclusive eCommerce Image Editing Service plays a vital role in generating more clients along with boosting your company’s brand reputation swiftly.
However, anyone can effortlessly produce pop photos just by following a few easy steps. Now, let’s get started!! Happy Reading!!
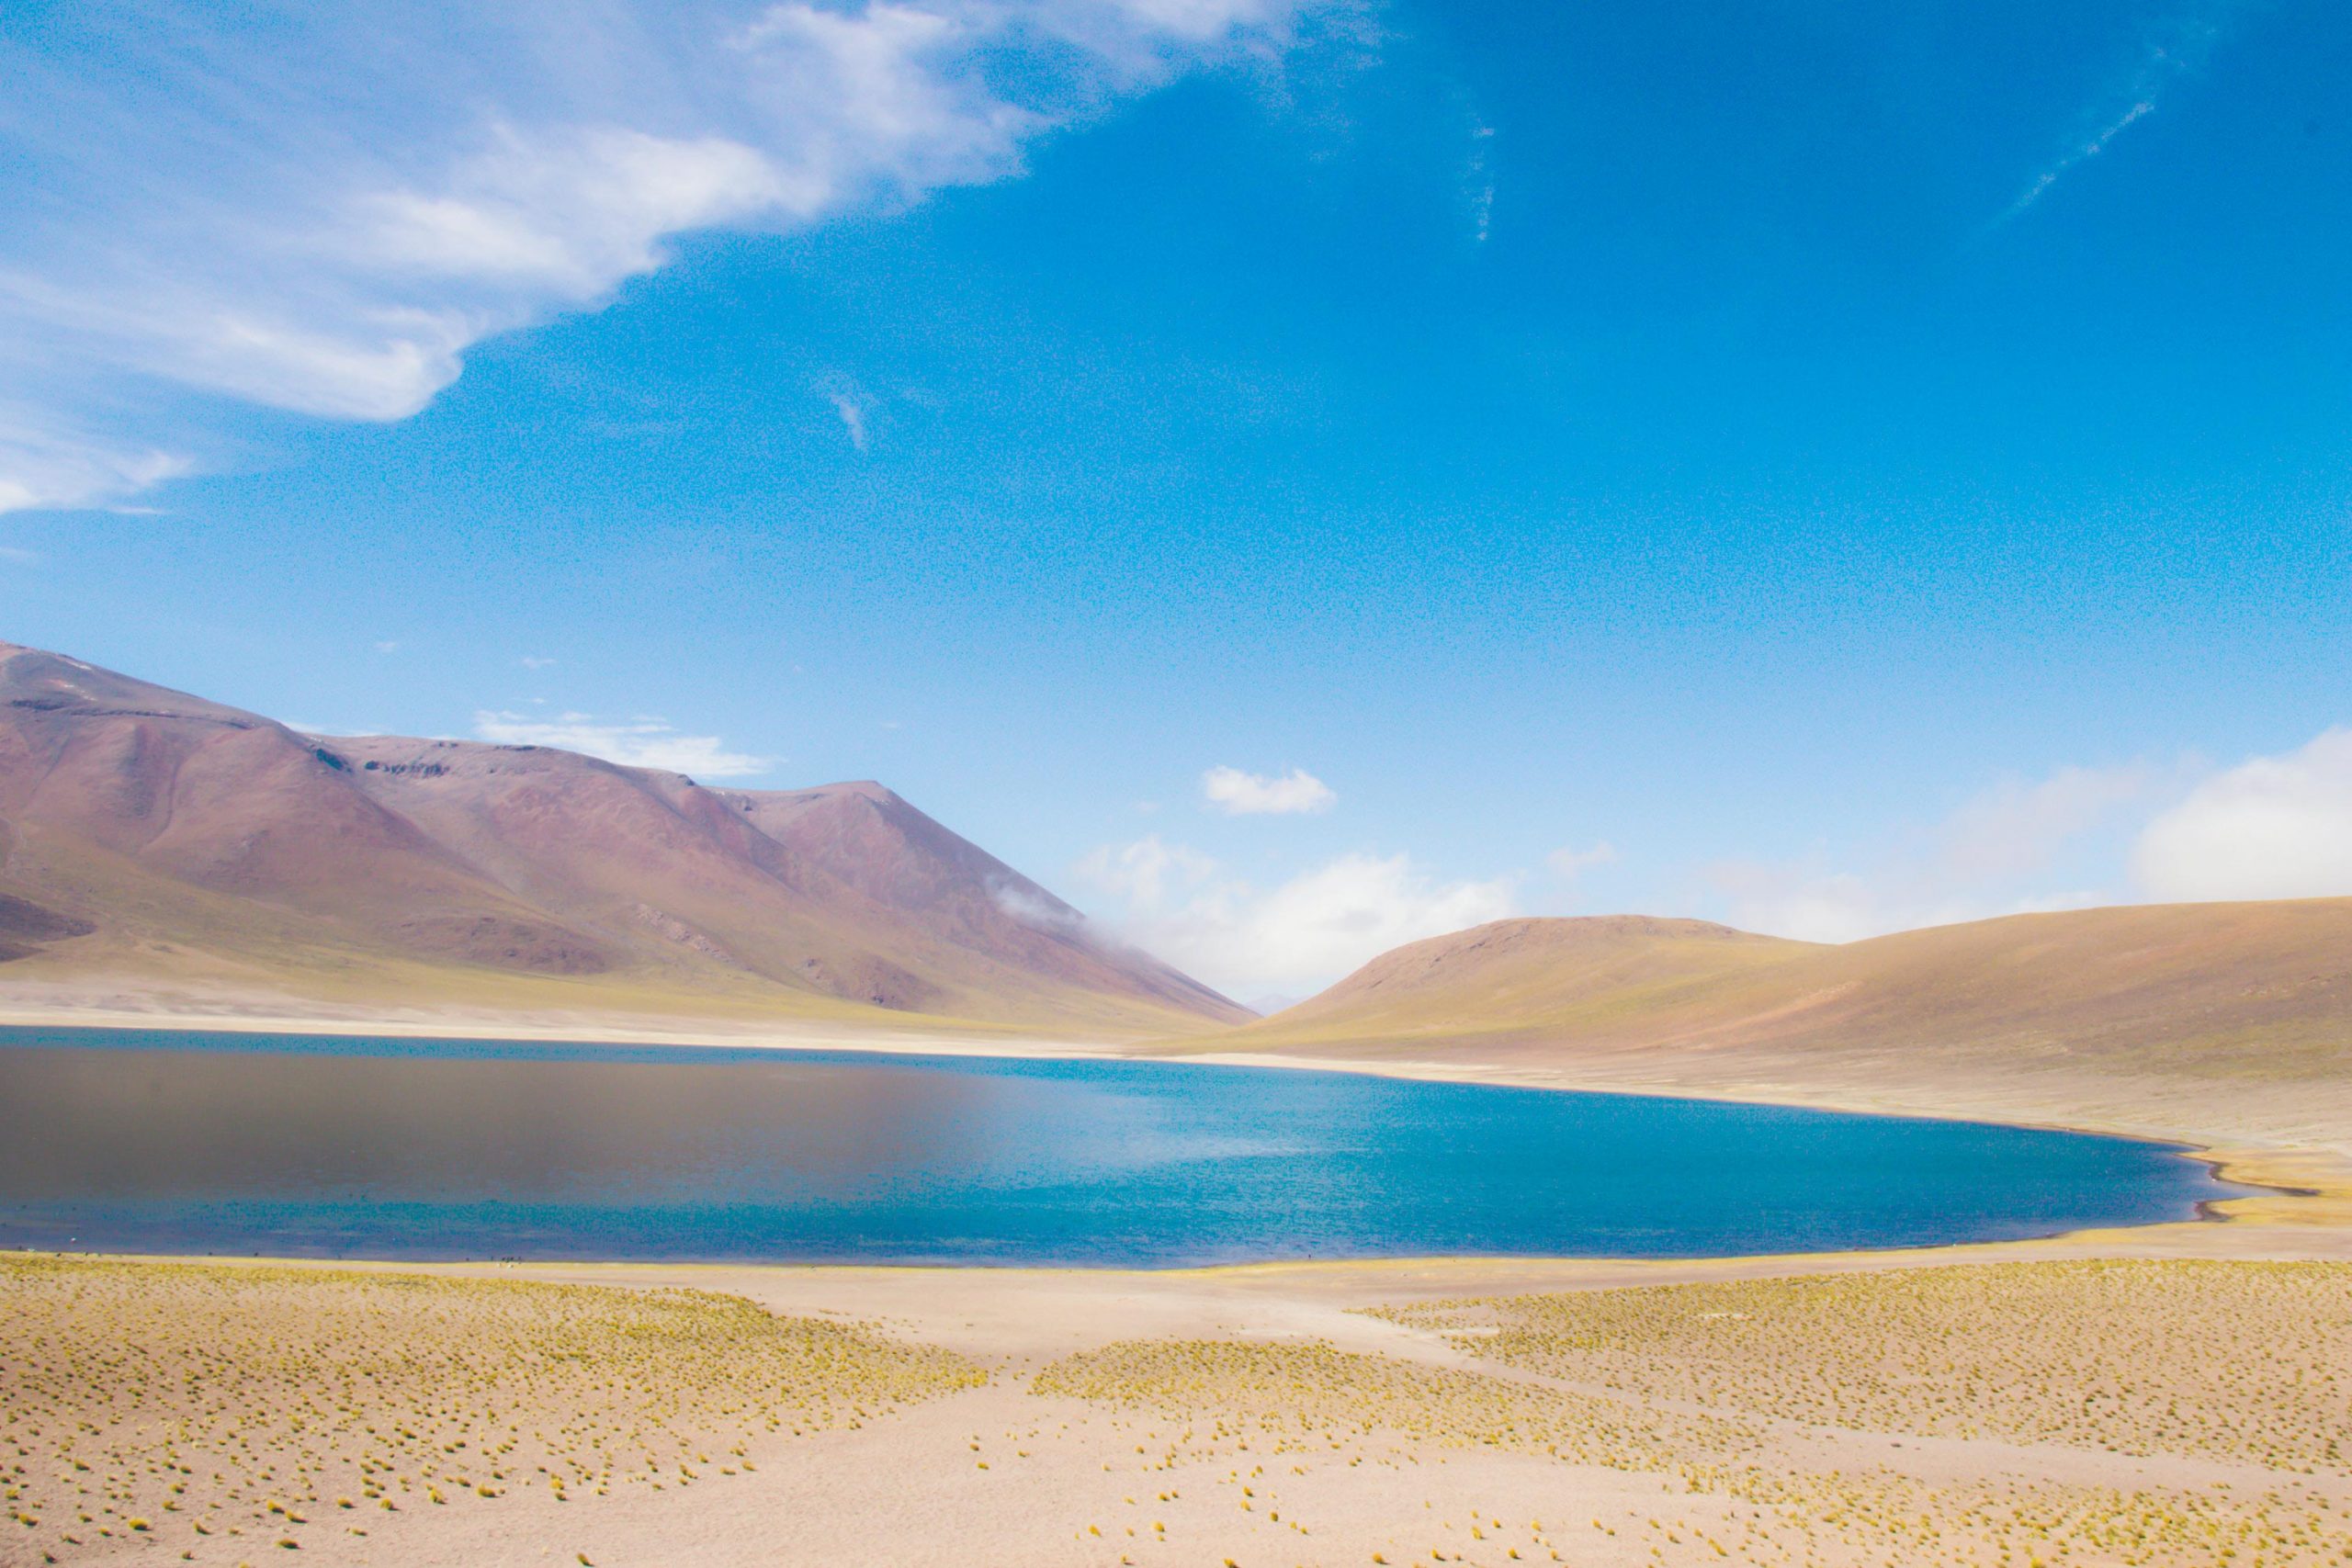
The Raw Image
How To Make Photos Pop In Lightroom? [The Easiest Steps]
There are the simplest 4 steps regarding how to make your photos pop without any delay. Those are given below:
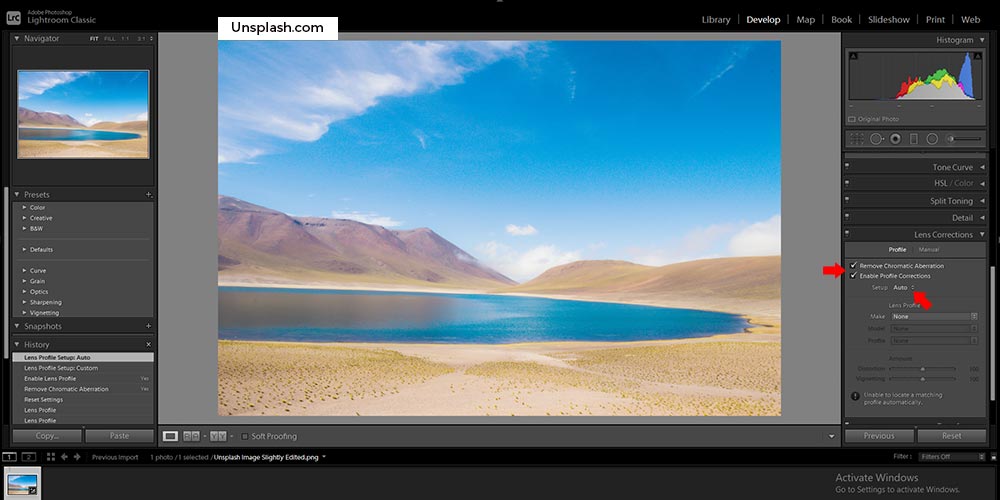
Step#1: Lens Adjustments:
I started by applying lens adjustments. This photo was captured using a wide-angle camera. If you’re interested in landscape shooting, you can use a wide-angle lens 90 percent of the time. Therefore, correcting the distortions is crucial.
Now, select “Enable Profile Corrections” from the “Lens Adjustments Menu.” However, Adobe Lightroom includes profiles for various lenses, which likely exist for the one you’re using. If not, you have to ensure the upgraded version of Adobe Lightroom.
In certain circumstances, I choose not to adjust the lens and leave the photograph as is. It’s simply a matter of deciding what looks or feels corrected for each photograph.
On the other hand, you can also adjust perspectives in your snapshot using the Lens Adjustments window, so I always choose Auto and see how it improves the photo. I always keep it if it’s good. If it’s off, I prefer to undo it. However, I physically realign it or use the crop tool to turn it quickly if required.
See: How to Remove Watermark from Photo: A beginner’s friendly Guideline
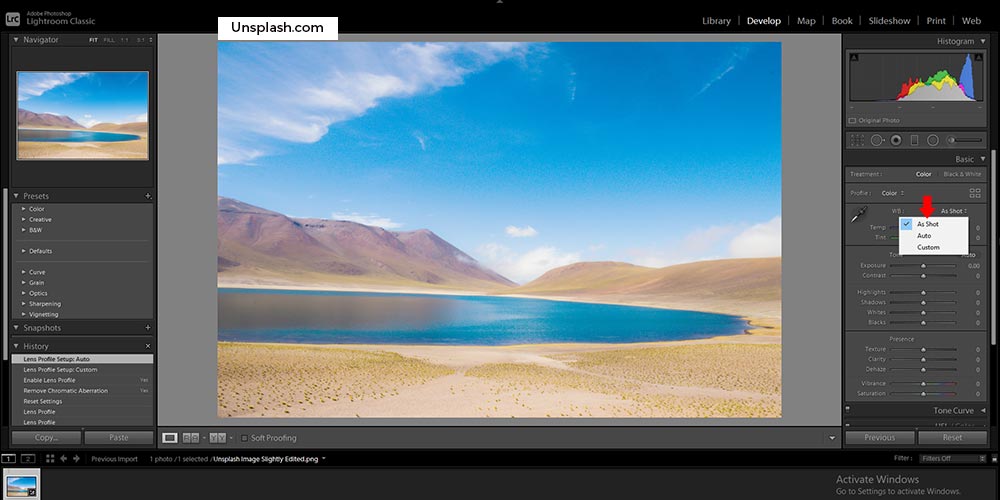
Step#2: White Balancing:
The second step is to correct the white balancing appropriately. Since I always capture raw images, I don’t fiddle with “White Balancing” when I’m photographing. Plus, it’s just a matter of experimenting with Adobe Lightroom’s choices to discover what fits so attractive and gets the image as near to how it appeared while I was capturing it as possible.
Moreover, I use the “Auto” or “As Shot” alternatives about 90 percent of the time, and I maintained it at “As Shot” for this snapshot.
Check out Basic Things to Know About Photo Editing for eBay
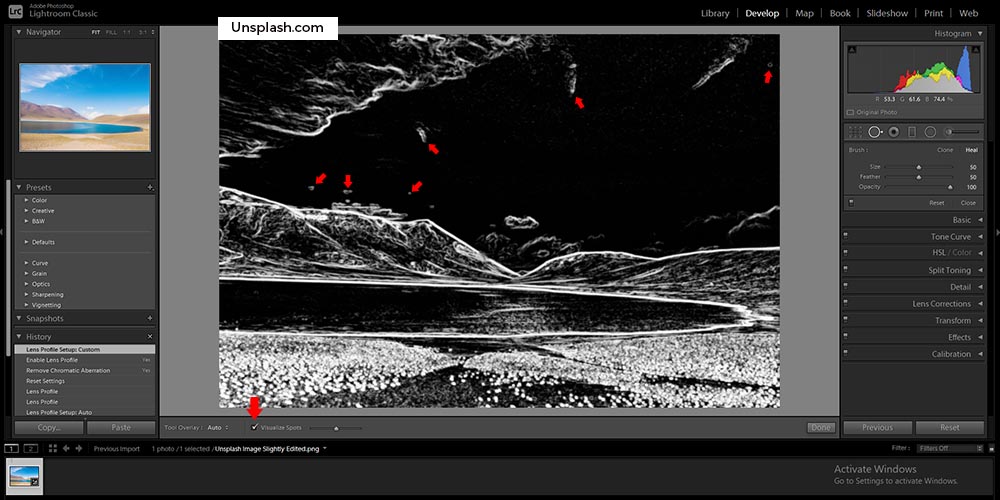
Step#3: Spots Withdrawal:
It’s a must-do. It’s a poor habit not to remove stains from your images. Difficult to prevent these spots because the lens or sensor can collect dust and debris over time, and having them cleaned regularly isn’t something that most photographers do. I’m sure I don’t.
Learn more about Professional Headshot Background Ideas, Tips, and Must-Serve Purposes
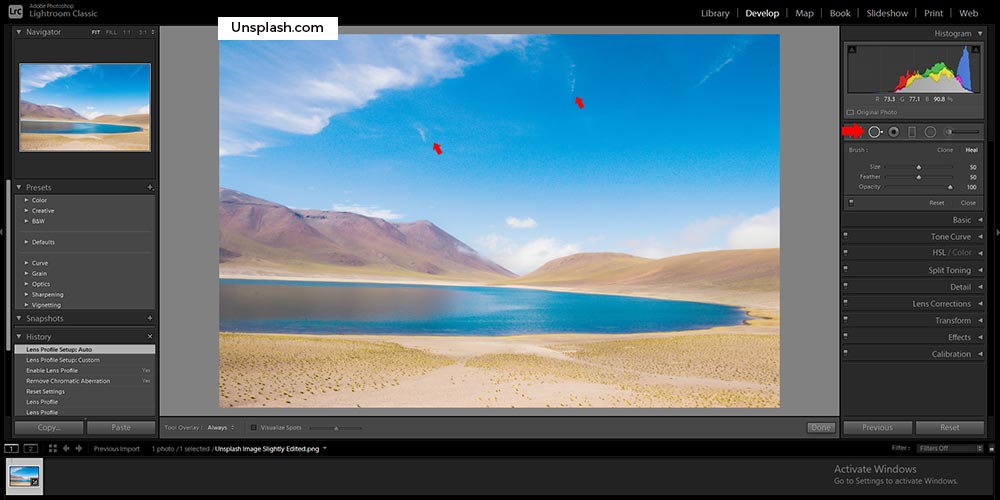
In my opinion, the spots may destroy any photo. I despise them, but I enjoy getting rid of them, and Adobe Lightroom makes it so simple. As you may observe in the above screenshot, I marked two fairly apparent areas with pointers, but see what happens when you use the “Visualize Spots Tool.”
I know I shouldn’t be so thrilled since my lenses or sensors are almost unclear. But special thanks to this fantastic tool in Adobe Lightroom. Here, I can see and remove almost all of the spots. Additionally, you can use the “Healing or Cloning” in spot removal tools. I usually use “Heal” since it performs a better job at eliminating spots and determining the ideal places to replicate from.
Photos Pop!!
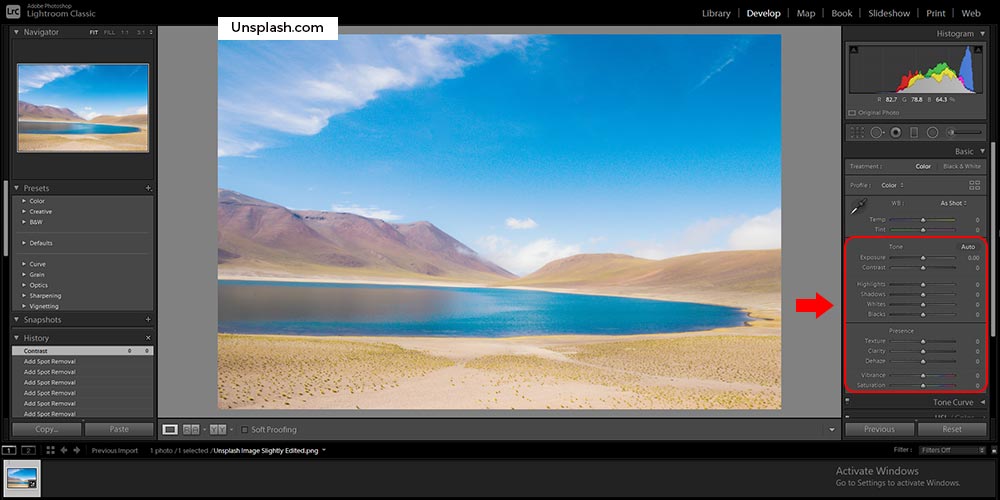
Step#4: The Primary Panel:
It has a powerful effect on any image, where most enchantment occurs. It includes nine sliders (apart from the two for White Balancing, which I just addressed in step#2). In addition, one crucial thing to remember is that each photo requires its own set of adjustments because every photo is unique.
The modifications I’m going to do on this image may not work well on another work. So always keep in mind that the basic technique is identical. Here, I’ll use all of these parameters for each photo, but not always in the same places.
Find out more Why Do You Use Photoshop For Shadow Creation
The 5 Alternative Ways: How To Make Photos Pop In Lightroom?
There is a good range of ways to make photos pop In Adobe Lightroom. Here, I’ve just mentioned the best 5 ways that will help you produce pop photos instantly. Just follow the below ways:
#1. Implementing Contrast:
Increasing the contrast level in your photo is one of the easiest ways to make it a little more alive. Because most of the raw images have low intensity, that’s why it’s necessary to boost it up.
The “Contrast Scale” is mainly located below the “exposure slider” within the basic panel. I increased the contrast to +48 in the sample below. Your photo will determine the quantity you decide on.
Read more about 18 Best Clipping Path Service Providers For 2025

#2. Increasing Brightness:
We know that most raw photographs have poor color grading right out of the cameras. So, a quick twist to the “Dynamic Contrast Scale” in Adobe Lightroom will instantly brighten up your photograph POP!
However, the “Brightness Scale” can also be located near the bottom of the basic panel, between “Clarity and Saturation.” Hence, I increased the “Brightness Parameter” to +49 in the screenshot below.
View more Top 07 World-Class Photoshop Image Retouching Provider Company

#3. Black & White Points:
Selecting your black and white points is a Photoshop feature that will give your picture more “POP” rapidly. It takes a couple of more slider movements, but it’s still straightforward. On top of that, the blacks’ and whites’ adjusters are positioned underneath “Highlights and Shadows” in the Basic Panel’s middle section.
Start by clicking and holding the “Alt key” and dragging the “Whites Slider” to the right until you see some colors on your completely black photo. When you press the “Alt key,” your normal image is generated. While trying to hold down the “Alt key,” drag the “Blacks Scale” to the left until you see colors appearing on your white background.
Finally, in the photo below, I pushed the “Whites Parameter” to the right +43 and the “Blacks Parameter” to the left -32. Another thing is, that your photograph will determine the quantity you select!
Receive professional Photoshop shadow service for about $0.25 per photo.

#4. Adaptation of The Tone Curve:
Using the Adobe Lightroom Tone Curve is a quick and easy approach to add additional good punch and contrast to your photographs. Most individuals are frightened of performing “Tone Curve” adjustments. However, with this approach, you won’t have to touch the “Curve” at all.
Apart from that, the words “Point Curve” should appear just below the curve. The word “Linear” is chosen by default. If you hover your mouse above the word “Linear,” further possibilities appear. I like to adjust it to moderate or high contrast to help fast and improve the “POP” in my images.
View more How to Add Fonts to Photoshop – The Detailed Guide
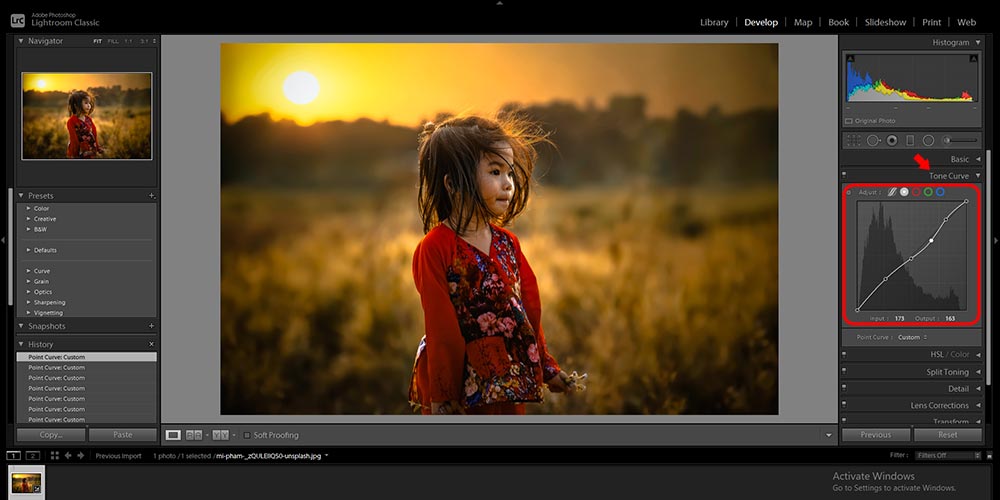
I altered the “Tone Curve” option from “Linear to Clear Contrast” in the photo below.

#5. Filters:
Another option is to use a couple of radials or/and graded effects to give your photographs a little more excitement and pop. What you use depends on your image, but I usually add just little colors and blackness to the photo’s backdrop along with creating a little sharpness to my main object.
Therefore, I’ll utilize two radial filters in this scenario. The “Radial Filter Tool” is positioned above the basic panel. You can use it between the graduated filter & brush tool. After that, I’ll create a circle around my topic using one of my filter/brush presets.
Eventually, just uncheck the “Invert Mask” option at the foot of the “Radial Filter” dropdown menu whenever I want the change to extend just outside the circle. Check out the “Invert Mask” boxes if I want the modification to extend inside the circle.
Read more about How to Photoshop Someone out of a Picture | The Easy Method

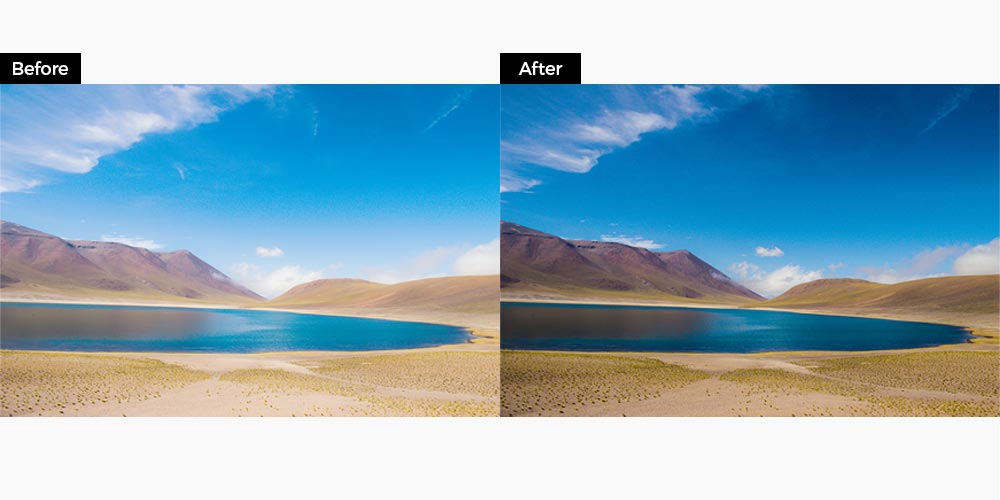
Before And After
In the end, here are the top 5 alternative ways to brighten and beautify your photographs with only just a few keystrokes! I’ve already gone over five different ways. This tool (Adobe Lightroom) can change your photographs, especially making your photos pop swiftly.
 Final Image
Conclusion
In short, I frequently combine a few of these techniques to give my photographs just the appropriate balance of punch/ pop!!
Overall, the more you experiment with these reliable techniques regarding how to make photos pop in Lightroom, the more you’ll discover your preferences and have a better understanding of how they can effectively affect your image. It makes just making a good decision about which strategies will work faster and easier to pop photos!!
Don’t forget to keep the pleasant, humble radial filtering in your suitcase of techniques as you continue your post-processing experiments. To explore more unique strategies for shining any photo in Adobe Lightroom, you can simply read about how to edit waterfall photos and enrich your Photoshop knowledge to the next level.
Be dynamic to make photos pop by using Adobe Lightroom!!
FAQ: [How to make photos pop in lightroom]
1. How do I get my photos to stand out?
Ans: There are mainly top five ways to make photos pop; those are given below:
- Make use of the image styles available in the camera.
- Using photo-editing applications, post-process your photographs to your satisfaction.
- For one-click modification, use applications preset or procedures.
- On your smartphone, use a photo editing app.
- Use the fundamentals of arrangement to create a more deliberate photograph.
2. How can you make photos pop colors stand out?
Ans: To make a photo’s colors pop, you need to apply the following things:
- Intensify the colors in a photograph.
- Enhancing the brightness of subdued colors is a good idea.
- To saturate greens throughout the image.
- Make some of the gold accents stand out even more.
- Create a backup of your project works.
3. Should I start with Adobe Lightroom or Photoshop?
Ans: If you’re a beginner photographer searching for a simple photo editing program to start with, Lightroom is usually the best option. If and when you require complex photo manipulation skills, you can always add Photoshop to the mix afterward.
Read Our Latest Articles-
- Maternity Photoshoot | Pregnancy Photoshoot Poses Ideas to Capture Love
- The Ultimate Guide to Captivating Couple Poses: Unleash the Magic of Love
- Ugly Wedding Rings: Embracing Unconventional Beauty
- Incredible Graduation Photoshoot Ideas and Poses


