
The majority of waterfall photos are simple to edit. Bear in mind that when photographing waterfalls, you should pay extra attention to your camera’s brightness.
Generally, the average landscapes have a lot of contrast. Darkened areas and dark rocks are common because of bright (nearly white) water streams and waterspouts. Therefore, you should know how to edit waterfall photos skillfully to fix those issues.
Additionally, the patches of bright spots from penetration sunlight can easily appear in your image if there are gaps in the tree shade above it. The detail is lost when the blacks and whites are trimmed due to indecent exposure. It’s a smart idea to bracket your exposure here. By contrast, if you want to enhance the color and tone of your waterfall photos, you must hire an experienced Photo Color Correction Service to get your desired outcomes.
This blog post will broadly describe how to edit waterfall photos appropriately. In general, I’ve used a similar editing procedure for most of my woodland waterfall images. Here, start reading from now! Learning is Fun!
- Receive professional photo manipulation services for about $1.50 per photo.
Learn How To Edit Waterfall Photos In A Few Simple Steps:
Anyone can be fascinated by waterfall photos. They can effortlessly appeal to everyone. The roaring instability in the water stream and the booming smash between the water and the rocks have a dramatic quality.
However, the final image will express significantly different emotions depending on whether I capture the movement of the water in my photoshoots or let it flow. For editing your raw waterfall pics, you need to follow the below steps carefully:
Open Adobe Lightroom
In Adobe Lightroom, I first merged the three bracketed pictures. Keep holding Ctrl while clicking the three photos to pick out all three. Then, using the right-click menu, select Photo Merge –> HDR. I marked auto-align and chose none for de-ghosting in the pop-up box.
Then, a new file will be generated when the photo has been combined. Go to the “develop module” and choose that file.
Check out the Top 07 World-Class Photoshop Image Retouching Provider Company
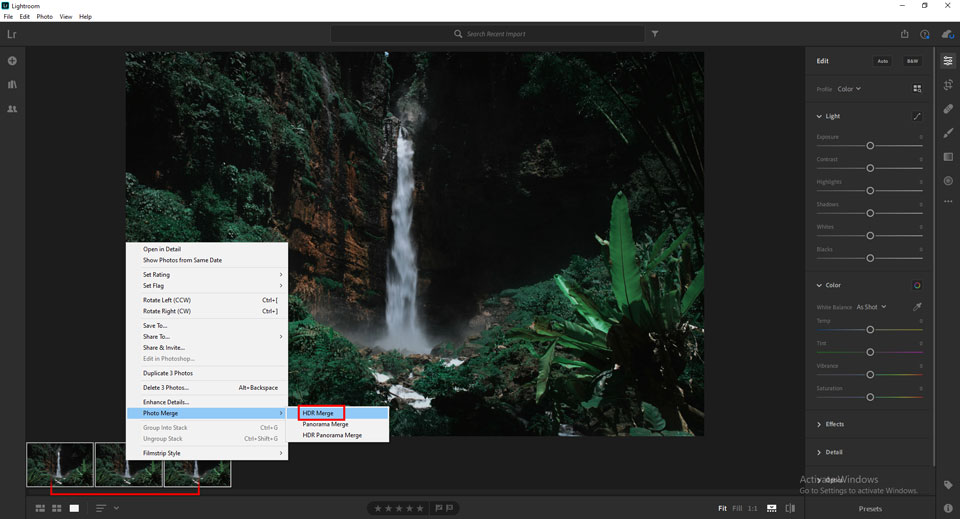
HDR merges 3 images
Remove Chromatic Aberration
Secondly, go to the “lens corrections tab.” After that, check out the “remove chromatic aberration” and allow the “profile correction boxes.”
Trim The Image
Thirdly, trim the image. When I took the photo, I had this in mind. I like the 5:7, 4:5, and 8:11 aspect ratios for the vertical photos. However, I do 2:3 on occasion, but I find it too lengthy most of the time.
Since I know, I’ll trim it, and I shot it from a wider perspective to ensure that I don’t miss any important details while cropping. I normally use a 5:7 aspect ratio.
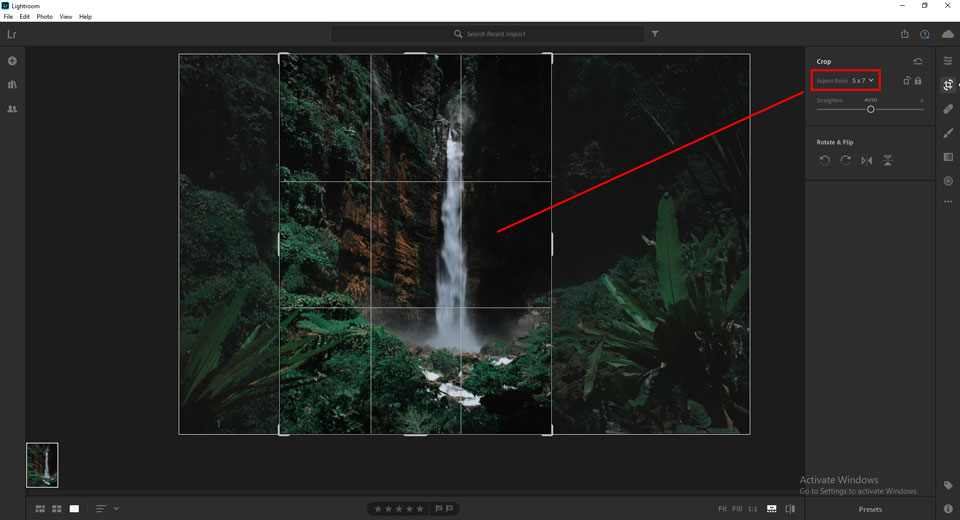
Cropped the photo with a 5×7 aspect ratio
Adjust The Comnination
The next stage is to adjust the combination of whites and blacks. Therefore, I raised the “Whites” to around +17 while lowering the “Blacks” to around -18. As a result of this task, the image becomes more contracting. Hold down the “Alt key” when modifying these or other brightness adjustments (such as highlights, exposure, and shadows).
However, it’ll show any cropping in the blacks or whites in the photo. So, have a quick stare at the 2nd image below. A spot will show whenever a clipping happens.
Check out How to Cut Out an Image in Photoshop
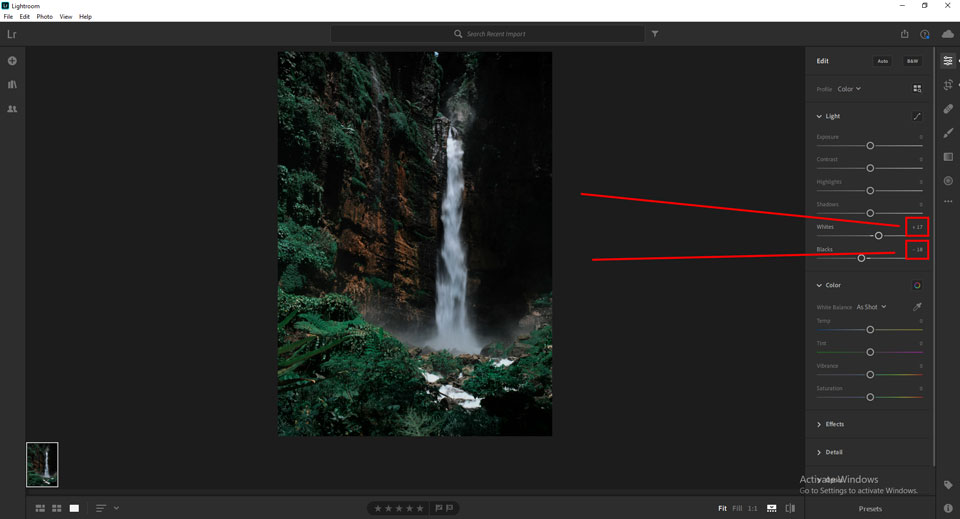
Increased the Whites and decreased the Blacks to create contrast
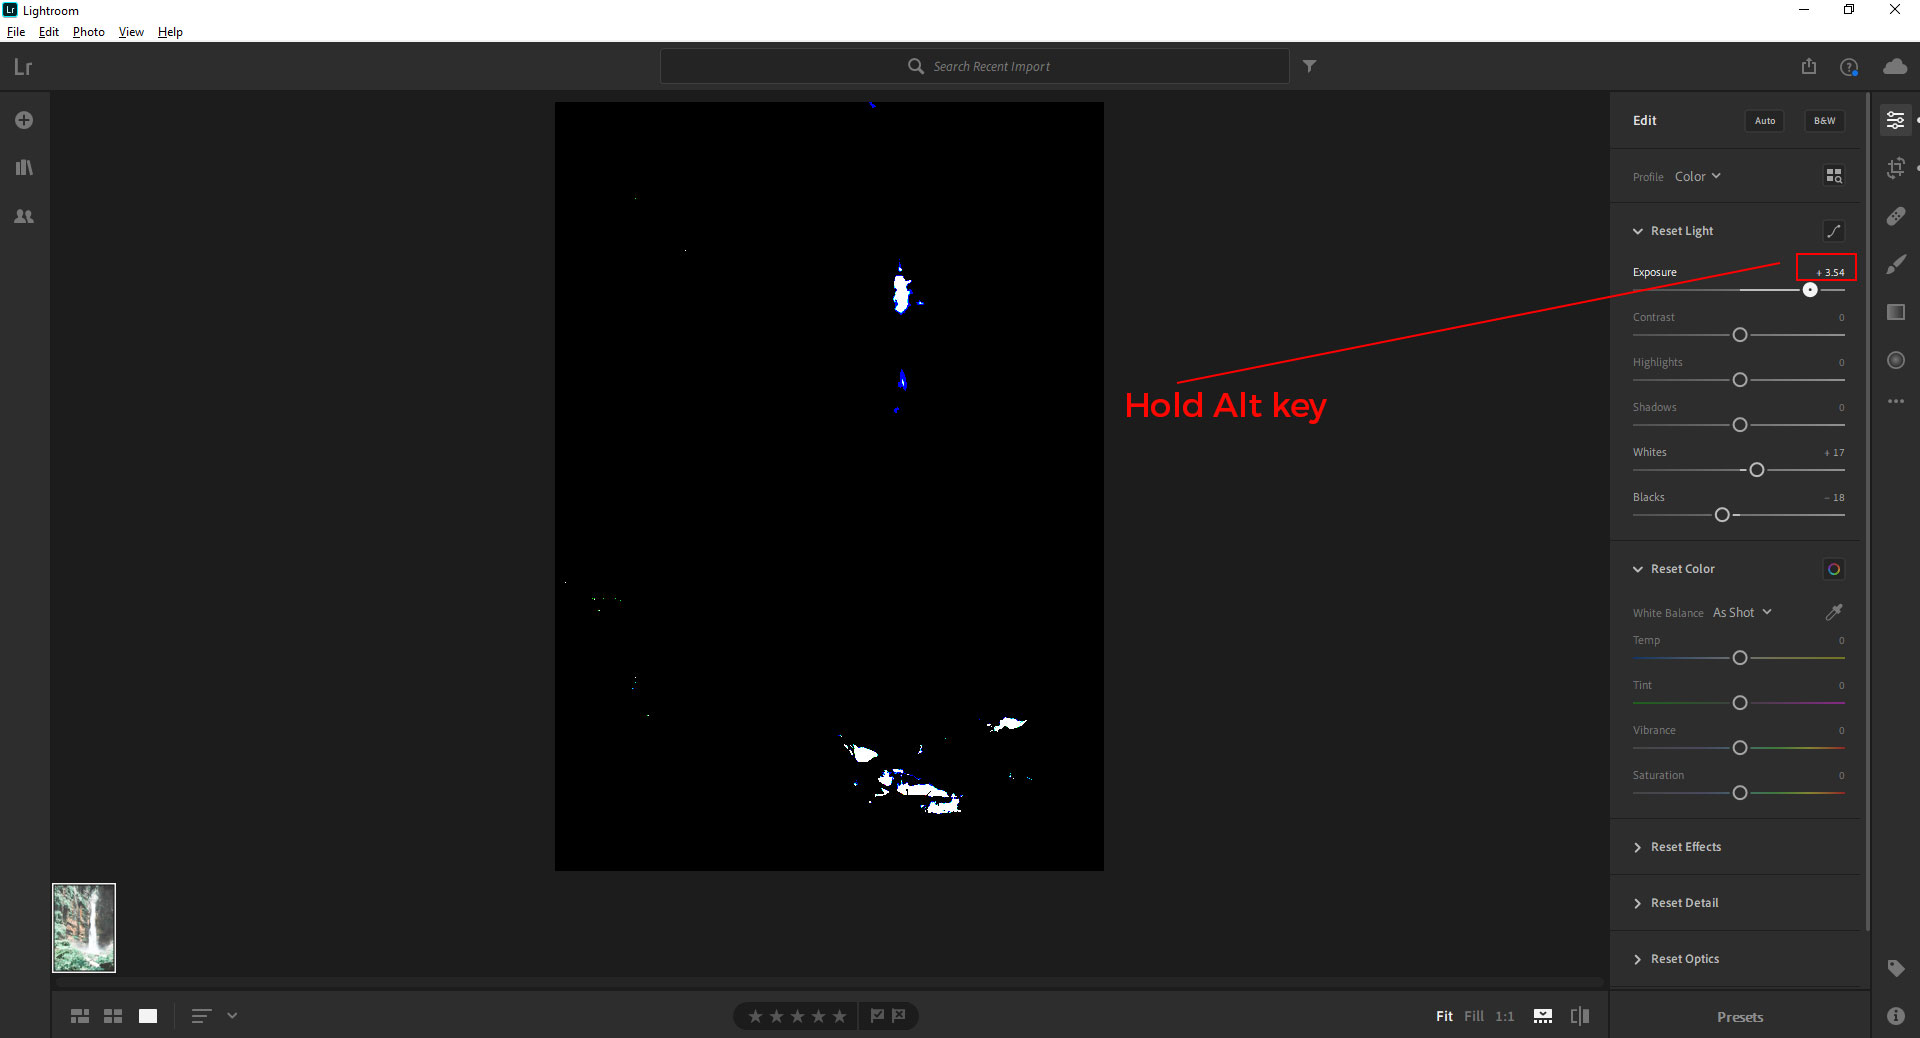
White and black clipping can be seen while adjusting by holding down Alt
Increased Exposure
After that, I increased my “Exposure” to +1.00. In the histogram (The Right Side of this Curved), you can easily see clipping in the whites. In the following step, I’ll pay more attention to this thing.
View more How to for Double Exposure in Photoshop Made Easy
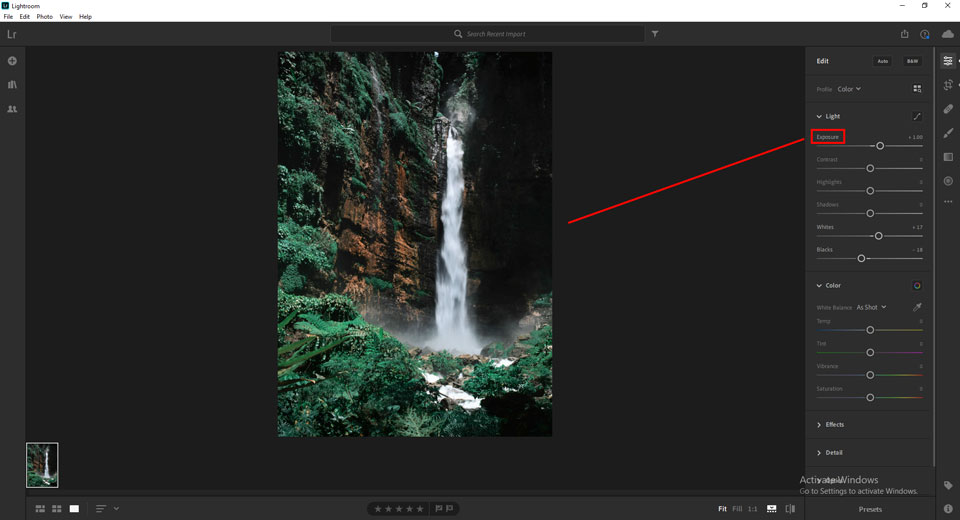
Increased the exposure to brighten the image
Highlights
To emphasize the sensitivities in the water streams, I lowered the “Highlights” to -82. The white clipping was also removed as a result of this. I’d re-adjust the “Whites,” but it’s not necessary in this case. To bring up the ins and outs in the rocks, I boosted the “Shadows” to +35.
Learn more about How to Photoshop Someone out of a Picture | The Easy Method
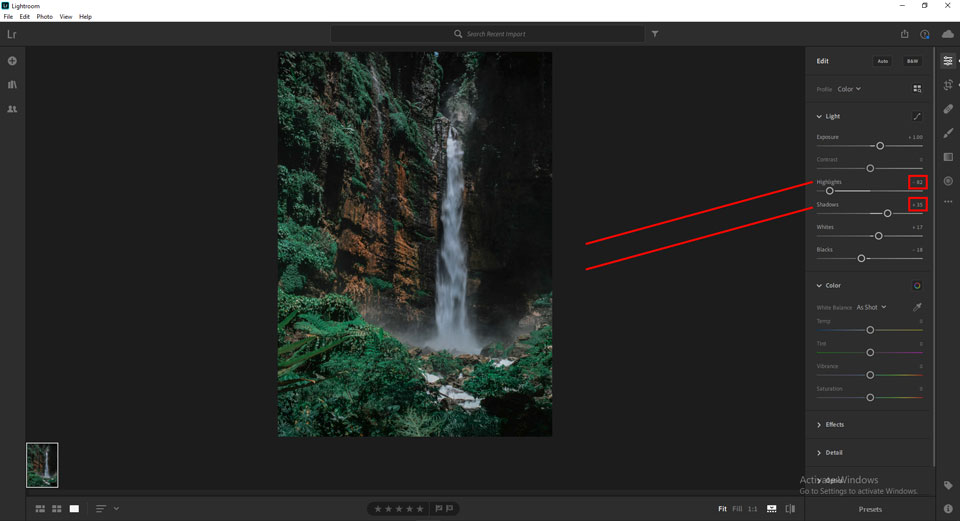
Reduced the Highlights and increased the Shadows to recover detail
Adjust White Balance
After that, I adjusted the “White Balance (WB).” I sometimes modify the WB first, depending on the shot. In this case, I want to lighten it first to make a better decision effortlessly. Moreover, the WB of this photo does not require much adjustment. As I thought the landscape was too green, I only raised the color (Tint) slightly (towards magenta, away from green).
Find out more about How To Do Color Correction In Photoshop
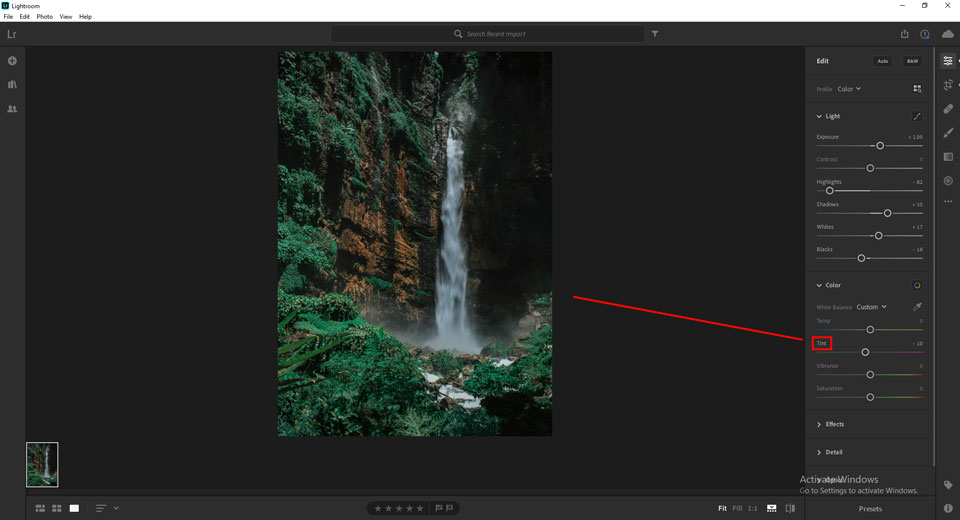
Adjusted the White Balance by just a bit
Contrast And Details
After satisfying the exposure, I worked on both the contrast and details. Then, I wanted to contrast this image slightly, so I raised it to +9. I decreased it to -18 for clarity and to make the photo appear softer. Therefore, the softer-looking leaves blend in well with the water’s gentle flow. The “Dehaze” is also reduced to -12. It gives the image a gentler feel once more.
Read more about Pro Tutorial: How To Photoshop A Picture
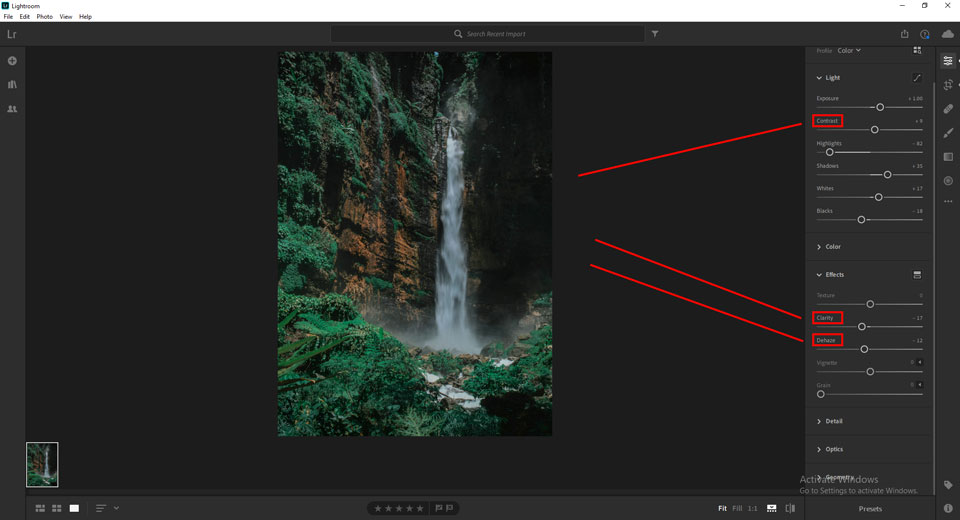
Manipulated the Contrast, Clarity, and Dehaze to soften the image a little
Incrase Vibrant
In this step, I’d like to make slight changes to the tints (Colors). I don’t want to overuse the color because the image is already vibrant. The “Vibrance” was increased to +13. The “Saturation” was decreased to -6.
In the HSL (Hue-Saturation-Lightness) panel, I modified the specific colors. To make the rocks, mountains, and water pop more, I boosted the “Saturation” of Oranges, Aquas, and Blues (+6, +12, +11). To soften the color (tint) of the trees, I lowered the yellows (-7) a little. I just made a smidgeon of a change to the brightness.
On the other hand, I raised the Oranges (+6) and Yellows (+5) while decreasing the Aquas (-3) and Blues (-6). It improved the brightness of the wooded picture while also intensifying the hue of the water.
Guide to Professional Headshot Background Ideas, Tips, and Must-Serve Purposes
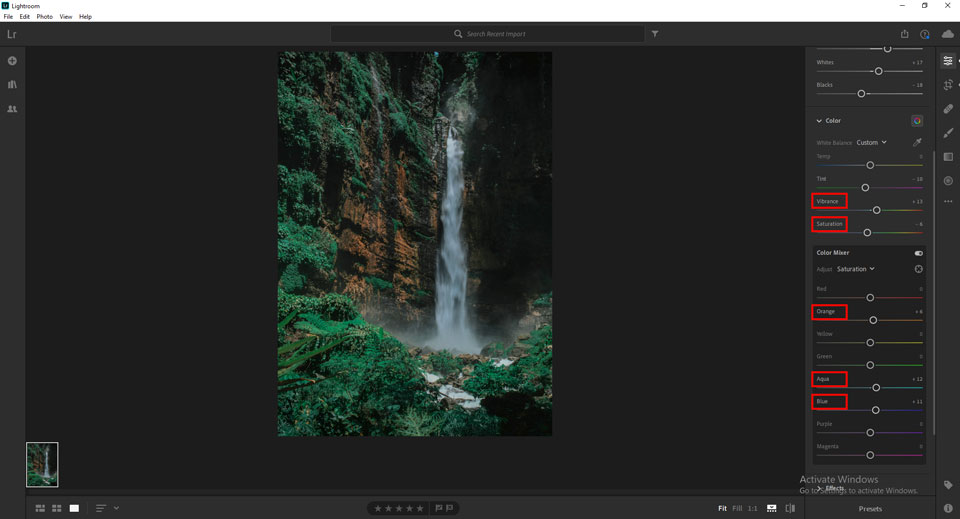
Adjusted the Vibrance and Saturation
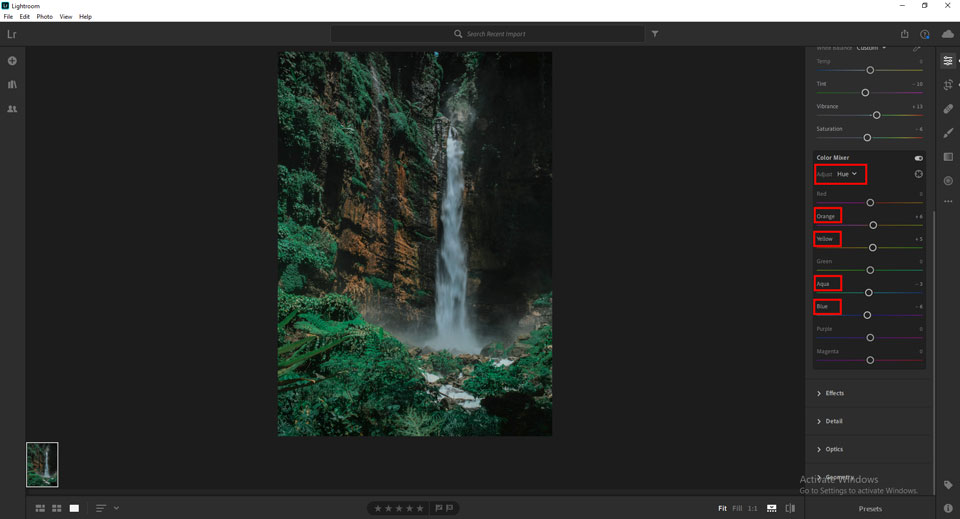
Tweaked the individual color saturation and luminance
Tone Curve
The “Tone Curve” is a really useful tool in your Adobe Lightroom menu. I slightly elevated the “Midtones” and “Highlights.”
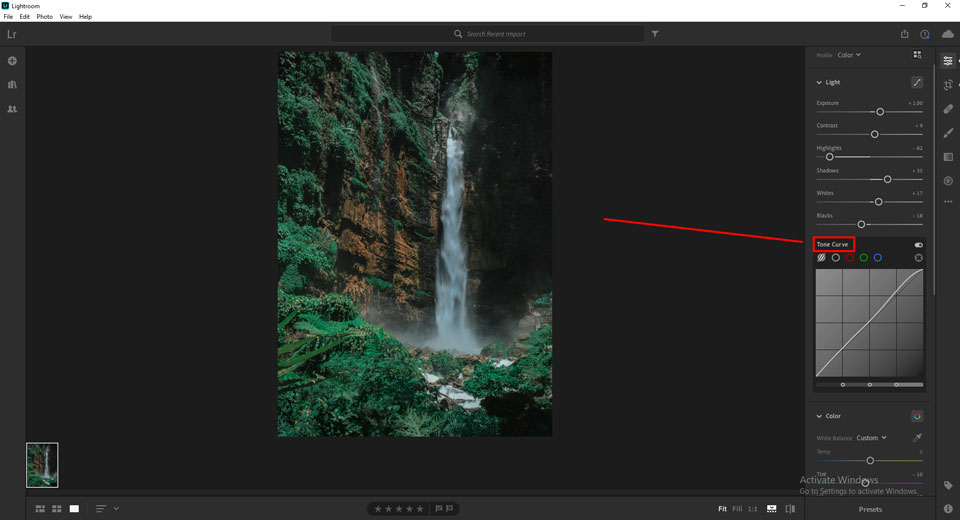
Increased the mid-tones and highlights in the Tone Curve
Change The Hue Profile
Finally, change the hue profile in Adobe Lightroom from “Adobe Color” to “Adobe Landscape.” It added a little more vibrancy to the photo. The profile option is a drop-down menu above the WB (White Balance) sliders. I assume that most people like to do this at the start of their editing procedure. But I only remembered to fix it now. So there you have it.
Read more about How To Edit Newborn Photos in Adobe Lightroom
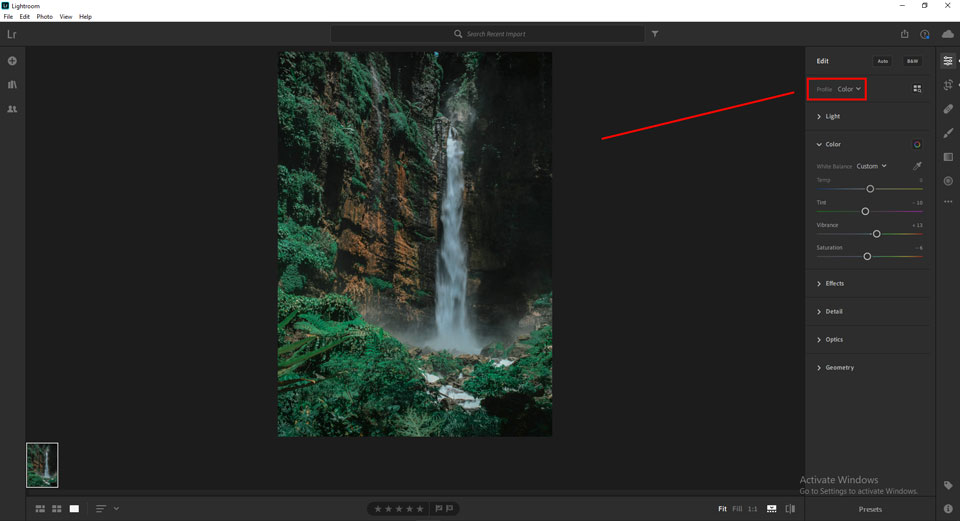
Chose Adobe Landscape Profile
Add a Subtle Effect
I’ve already made many changes to this photo up to now, and it’s ready to go. However, I’d like to add a subtle effect to it. The overall process was taught to me by a few professional snappers that I viewed on YouTube. Hence, the “Orton Effect” is the name of this approach.
Moreover, I unlocked my snapshot in Photoshop by right-clicking it and then choosing “Edit in” —> “Edit in Photoshop.” Construct a copy of the layer in Photoshop by pressing “Ctrl+J.”
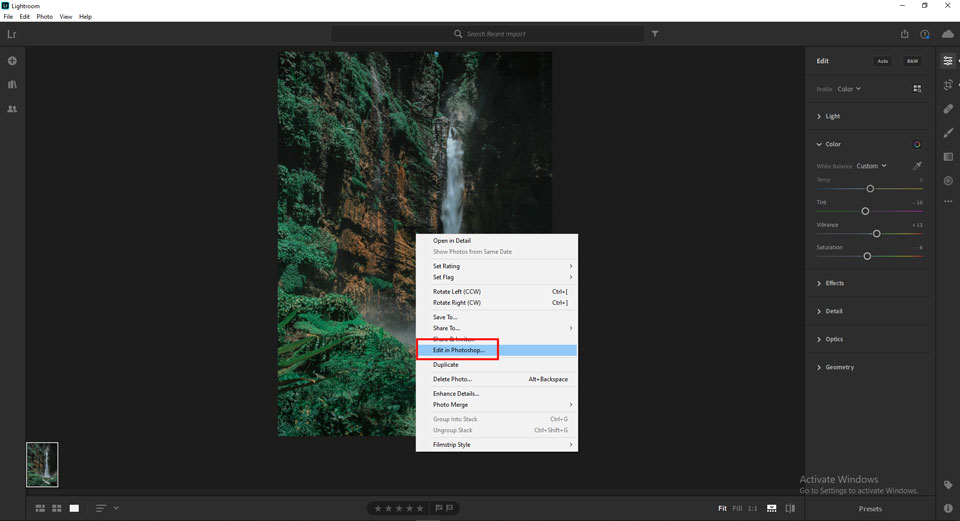
Opened the photo in Photoshop
Add Gaussian Blur
In this step, I need to go “filter” —> “blur” —> “Gaussian blur” on the copied layer, which must be on top of the original. The vision turns hazy almost instantly. Choose a “Radius Size” so that the photo is blurred, but still, you can see the details, as shown in the photo below. I went with a radius of 30 Pixels.

Select the top layer and apply Gaussian Blur
![]()
Chose the radius size of 30 pixels on the Gaussian Blur
Adjustments
In this stage, select photo —> adjustments —> levels on the same layer. Moreover, crunch the blacks and whites together in the pop-up box. I started with the “Black” at 0 and increased it to 18. The “White” was originally 255, but I reduced it to 180. As you can see in the second image below, I ended up with a terrible and highly contrasted photo.
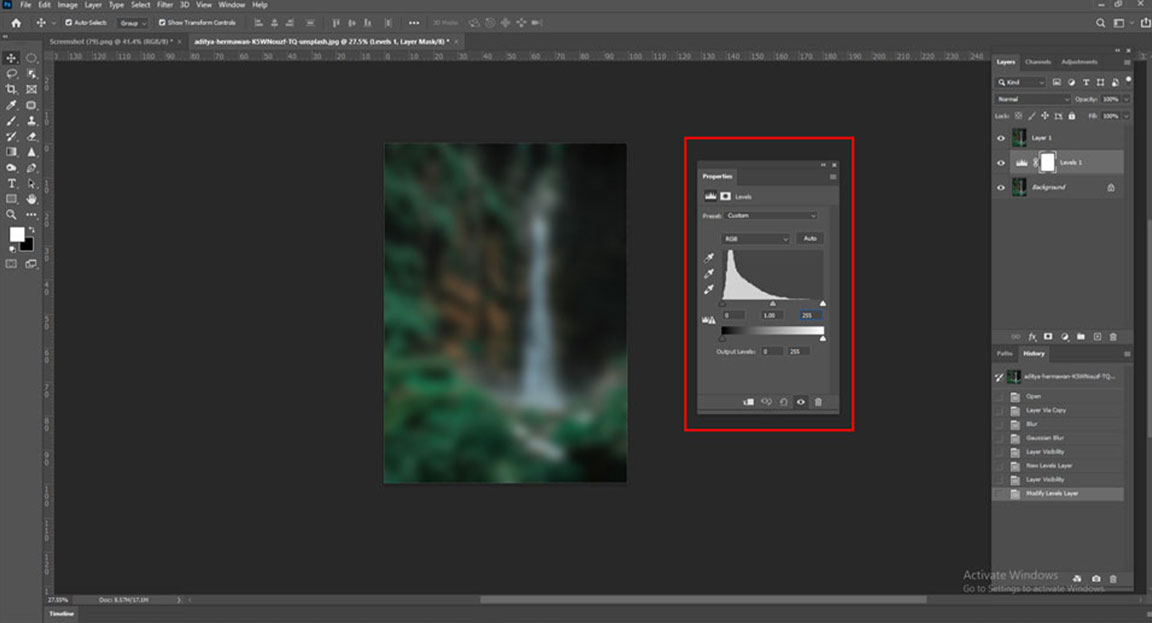
Opened up the Level adjustment

Crunched the Whites down and the Blacks up
Final Stage
In the final stage, decrease the opacity of that awful layer to 0. There is an opacity adjustment on the right-hand side, above the list of layers. Gradually increase the opacity until the image appears softer while still retaining details. However, the top photo is at 100% opacity, as shown below. A terrifying waterfall pics!!
When the opacity is fixed to 0%, the photo in the middle left is the outcome. The image becomes softer when the opacity is boosted up. When the opacity is 40%, the photo on the middle right is the outcome. However, I used a 15 percent opacity on this photo. The final product is represented in the 4th photo below.
In a word, the “Orton Effect” can transform any photo into a dreamy experience. The waterfall engagement photos appear to be softer, sunnier, and ethereal. Anyone can consider a scenario from a fantasy movie that resembles a fairytale!!
Guide to Best Background Removal Service Providers

Adjust the opacity of the top layer

0% from 40% opacity
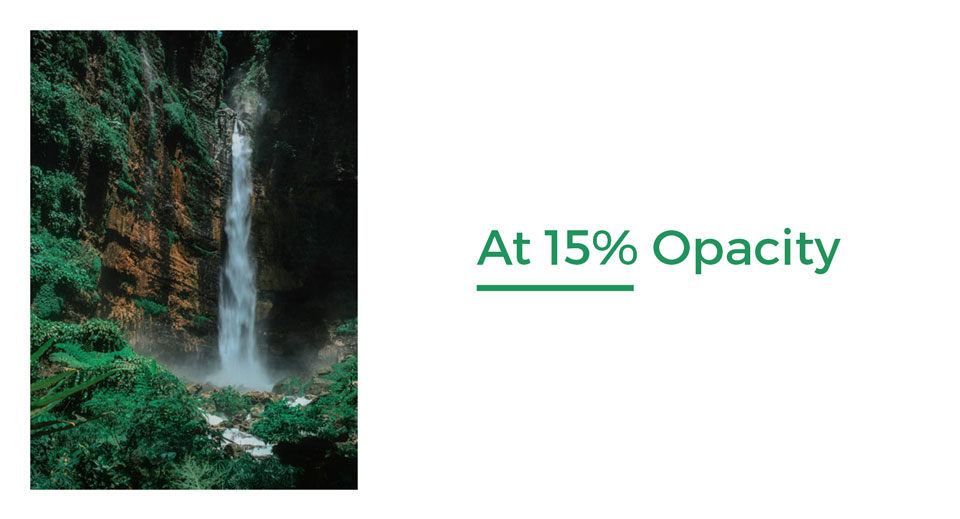
At 15% opacity-The perfect blend
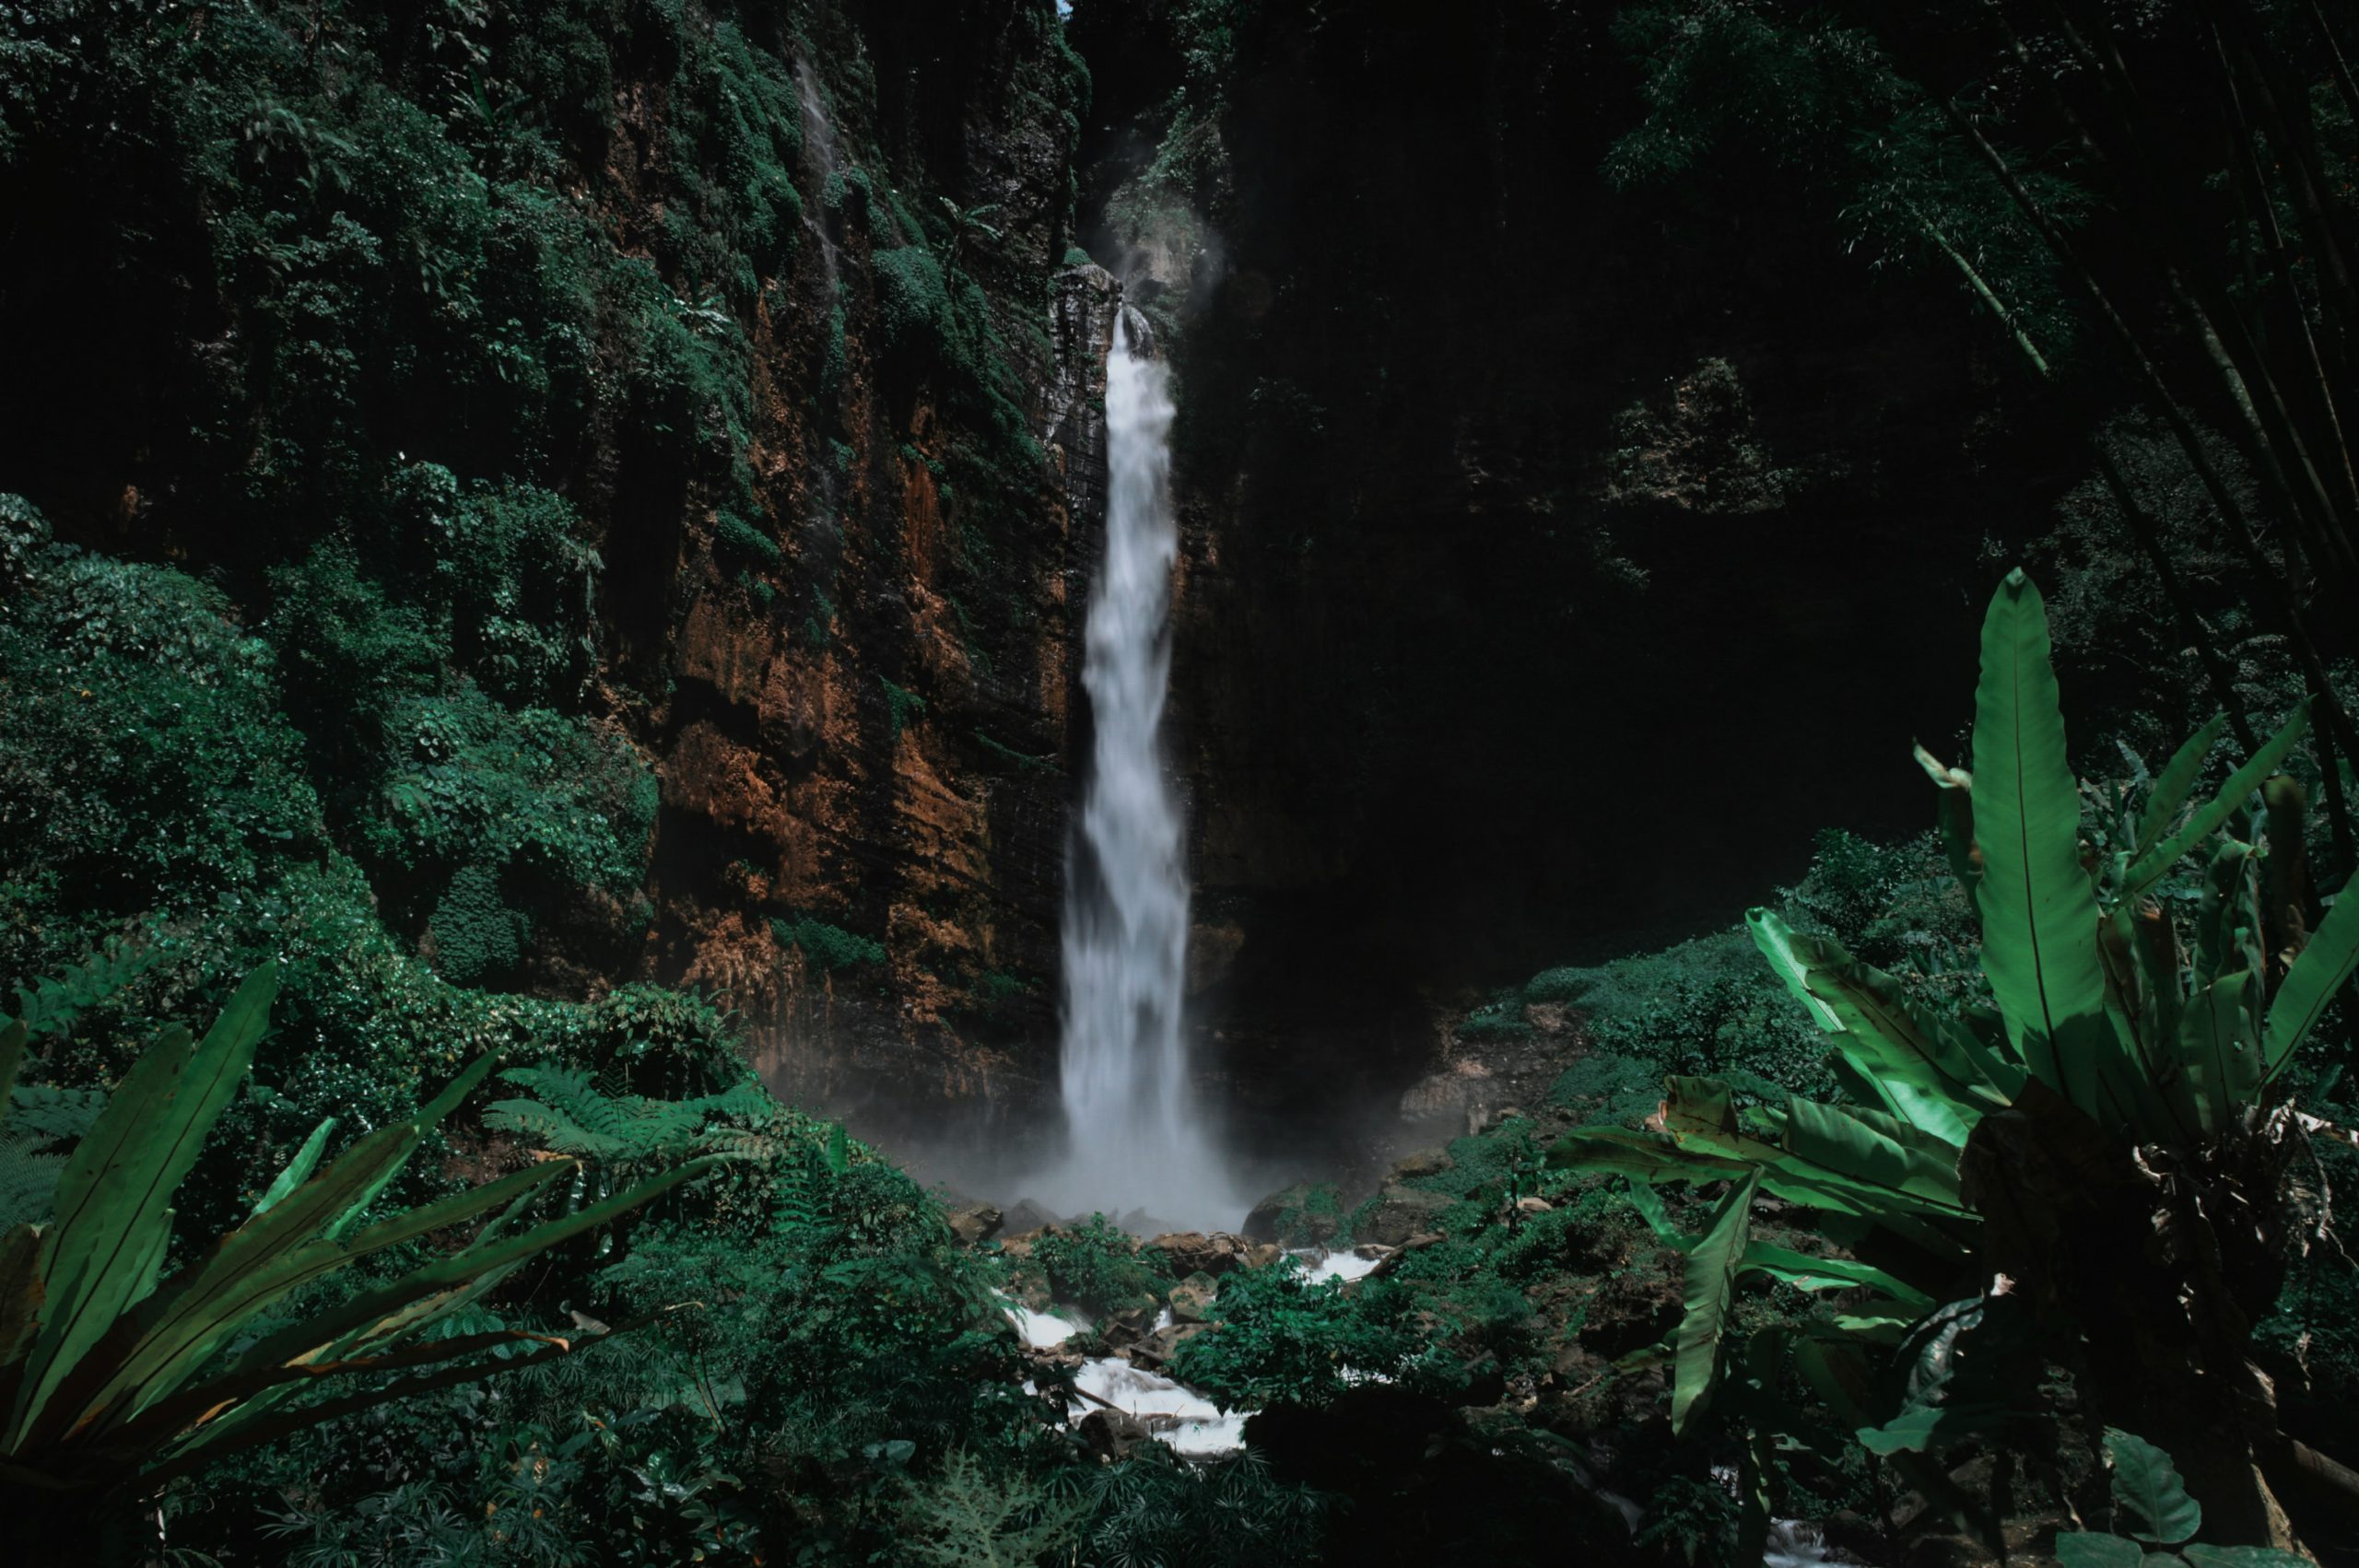
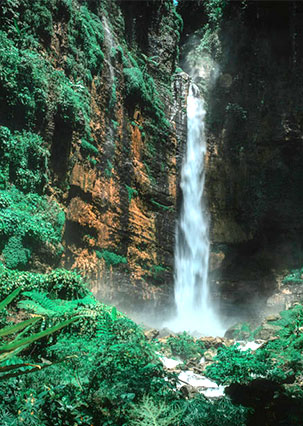
RAW file straight out of the camera
Eventually, you have owned it. That’s how I went about editing my waterfall images. Therefore, the waterfall’s before and after photos are shown below.
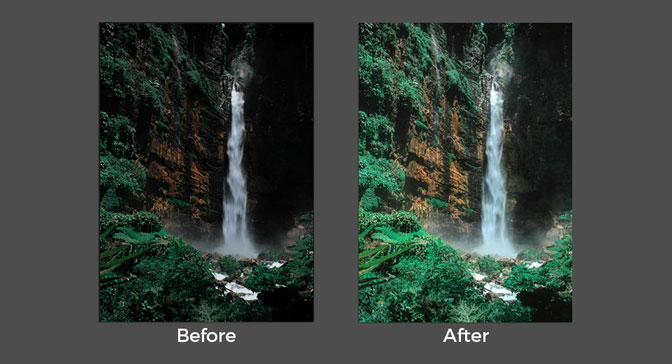
Before And After
The Final Image
In the end, this mini-tutorial was intended to teach you something. If you like it, I’ll possibly do it again soon. Thanks for reading this long post!!
Know the Top 7 categories of waterfalls before watching how to edit waterfall photos:
- Dropping waterfalls
- Astragals falls
- The fan plummets
- Liquefiable falls
- The block falls
- Division waterfalls
- The multi-segment waterfall
Check out the list of Product Image Editing Methods For Amazon
Pro 8 Tips: How to Edit Waterfall Photos Professionally
1#. Pick out your natural waterfall photos to work with.
2#. Create a copy of the selection and paste it into a different layer.
3#. Put on the blur effect.
4#. Put on a layer mask for the photo.
5#. Start cleaning up the waterfall’s outer edge.
6#. Fill out the water stream with blur efficiently.
7#. To make things appear flawless, use warp tools appropriately.
8#. Complete the final polish process on your waterfall image.
Learn More: How to Photoshop Someone out of a Picture
Conclusion
In a nutshell, I only want to emphasize that everything here is arbitrary. It can be perfect for you if you enjoy waterfall photographs with little to no details about the water’s movement.
Additionally, you can obtain the best of both offline and online worlds by employing all the approaches that I’ve already explained in this long article and by deciding which combinations of options can perform better for your photos in post-production. It’s wiser to have more than you require than regret not capturing a wide range of waterfall photographs.
Here, I can recommend experimenting with different shutter speeds to find out the style that suits you best. I believe this info will support you in enhancing your entire waterfall photos. Plus, if you have any queries regarding how to edit waterfall photos quickly and efficiently, feel free to leave your comment below.
Happy waterfall photography cheat sheet for all!!
Read Our Latest Articles-
- Maternity Photoshoot | Pregnancy Photoshoot Poses Ideas to Capture Love
- The Ultimate Guide to Captivating Couple Poses: Unleash the Magic of Love
- Ugly Wedding Rings: Embracing Unconventional Beauty
- How to Remove Watermark from Photo: A beginner’s friendly Guideline


